Continuous offline dictation in Mavericks
The dictation feature introduced last year in OS X Mountain Lion left a lot to be desired. Just like Siri on iOS, it required you to speak in short bursts, then wait while the data was sent to Apple’s servers and the results were returned. As well as requiring a constant internet connection, it was almost unusable for dictating anything more than a couple of sentences.
Fortunately, with OS X Mavericks, there is now an option to enable “Enhanced Dictation”, which solves a lot of these problems. To do this, open up System Preferences and go to the Dictation and Speech section. Here you will find a checkbox, Use Enhanced Dictation, which “allows offline use and continuous dictation with live feedback”.
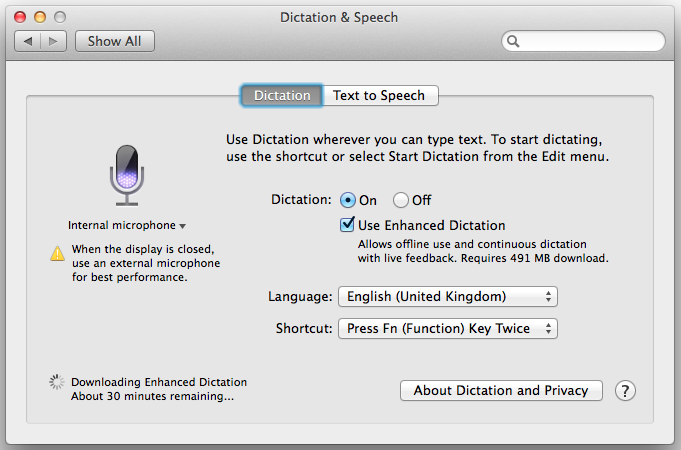
As you will probably notice, enabling this feature requires a fairly large download. For me this was 491 MB, but others have reported between 700 and 800 MB, so I suspect it depends on your chosen language.
Once the download has completed, you can dictate text just as before, using the shortcut specified in the Dictation and Speech preferences. Only now you will find the transcription happens locally on your Mac instead of on Apple’s servers. This allows the words to appear “live”, as you speak, resulting in a much more enjoyable and useful dictation process.
There are a number of dictation commands to help with formatting and punctuation. As far as I can tell, these are just the same as in Mountain Lion, however they become much more useful with this new enhanced dictation feature. Apple provides a full list, which contains things like “all caps”, “smiley face”, “new paragraph” and “next line”.
While this is a massive improvement over Mountain Lion’s dictation features, there are still a few further additions needed before the free built in OS X dictation will be a serious competitor to commercial alternatives such as Dragon Dictate. For example, there needs to be a quick and easy way to edit existing text and correct transcription errors, preferably without needing to use the keyboard or mouse. It would also be great if the system automatically learnt from your corrections over time, or allowed manual training through the addition of tricky words such as names and places to the dictionary. Maybe next year...
Customize System Preferences
It’s always been possible to install and remove your own custom preference panes in System Preferences, but until Lion, the default Apple-provided preference panes were there to stay, whether you used them or not.
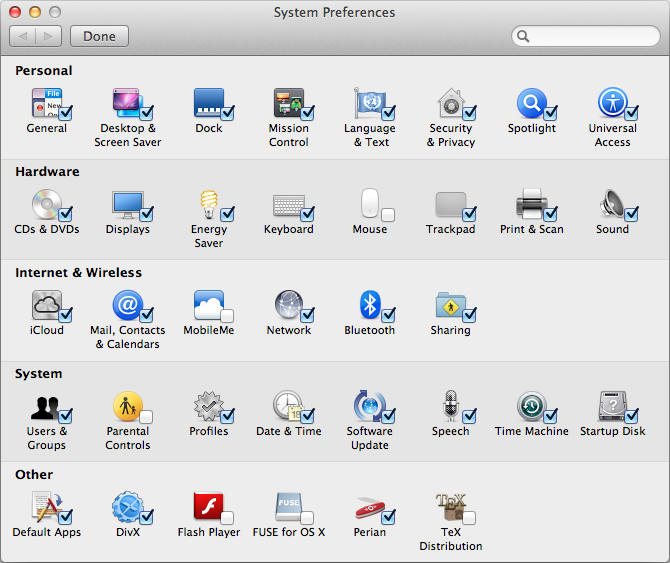
Now, in Lion, it’s possible to hide any icon in System Preferences, including the Apple ones. To do this, just go to the View menu and choose Customize. A checkbox will appear next to each of your System Preferences icons, allowing you to turn off the ones you don’t regularly use.
As well as giving you the ability to remove the default preference panes, this also has the benefit of allowing you to hide your own custom preference panes without completely uninstalling them. If you do occasionally need to access one of the hidden preference panes, they are still all accessible from the View menu or by right-clicking on the System Preferences icon in the Dock.
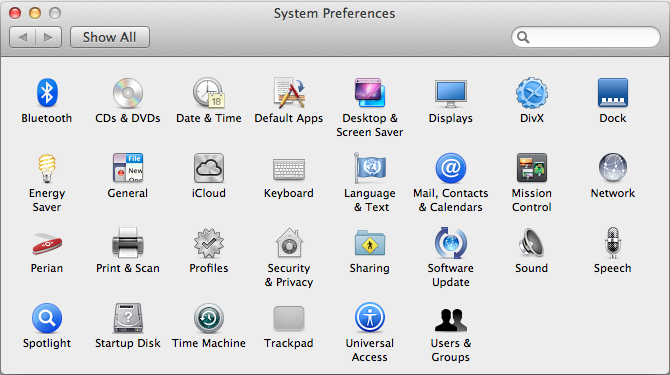
Another new customisation available in Lion is the ability to sort the icons alphabetically, instead of by category. Without the category names taking up space, this gives a nice, slightly more compact System Preferences window. Just choose Organise Alphabetically from the View menu.
Bonus tip: It is possible to quickly switch between preference panes by clicking and holding on the Show All button. This causes a drop-down menu to appear with a list of all your preference panes (including hidden ones). This is pretty much the same as what is in the View menu, but might save you a few milliseconds by being a little bit closer to your mouse cursor.
Customize the login screen in Lion
A lot of people have complained that the login screen is too bland and boring in Lion - it now sports Apple’s new favourite grey linen texture. Fortunately, it’s not to tricky to make some customisations. It is possible to change the background, add a custom welcome message and display system stats. Find out how below.
Changing the background
In Lion, the background used for the login screen is located at
/System/Library/Frameworks/AppKit.framework/Versions/C/Resources/
The easiest way to get to this folder is to choose Go to Folder in the Go menu while in the Finder. Then just copy and paste in the above line and click Go. The image that is used for the background is NSTexturedFullScreenBackgroundColor.png. You can replace this with any other image, and as long as you give it exactly the same name, it will be used for the login screen background. Before you make any changes, make sure you make a copy of the original file somewhere safe so you can go back to it if you want.
You’ll notice that the image is only a small 256x256 pixel square — this is because it is automatically tiled across the screen. If you want to use a similar type of texture, any size image is fine. However, if you would like to use a full size image without tiling, you need to make sure the image dimensions exactly match your screen and the resolution is 72 dpi. Either way, it must also be in PNG format like the original. It’s pretty simple to use Preview to adjust any image to the correct size and format.
Display a short message
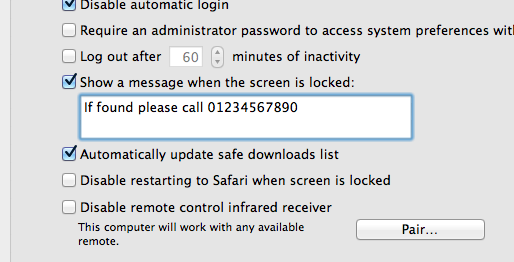
Before Lion, displaying a message on the login screen was a complicated process that involved entering commands into the Terminal. Luckily, Apple have now added an easy way to set a message using System Preferences. To do this, go to the Security & Privacy preference pane, and under the General tab, tick the checkbox Show a message when the screen is locked then add your message. Only about the first 200 characters you enter will be displayed, so make your message short and sweet.
Display system stats
In older versions of Mac OS X, simply clicking on your computer name in the login window would cycle through displaying lots of useful system information. Unfortunately this feature has been removed in Lion, but you can bring it back to a certain extent. Open up Terminal (located in Applications/Utilities), paste in the following line and press Return:
sudo defaults write /Library/Preferences/com.apple.loginwindow AdminHostInfo HostName
Now when on the login screen, clicking on the time in the top right will cause the computer name to appear, followed by the OS version and build number, followed by the IP address.
Display a login banner
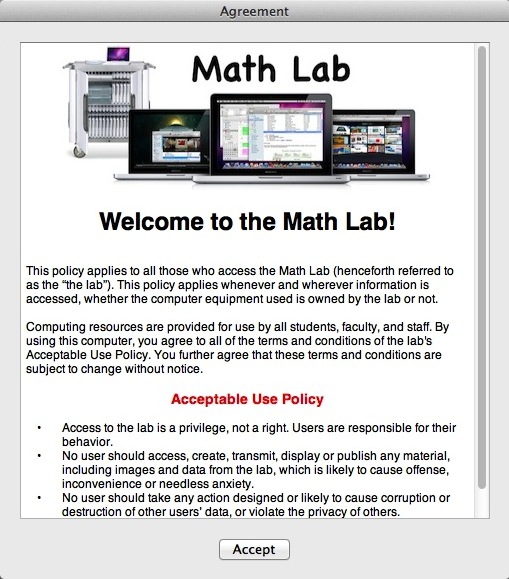
Apple has a great article over on their support site on how to display an agreement window where users must read and click Accept before logging into the computer. This is really useful for people who manage lots of Macs in a school or company with an “Acceptable Use Policy” that all users must agree to.
To do this, just create a file in TextEdit that contains whatever text you want to display. You can embed images and use whatever text styling you want. Once you are done, save the file with the name PolicyBanner in the Security folder in the Library in Macintosh HD.
Disable restored windows when re-opening specific apps
There’s a great tip over on the Macs in Chemistry blog on how to stop Lion from restoring your previous windows when re-opening specific apps. In System Preferences there’s a checkbox for turning this on and off globally, but using a handy little AppleScript you can disable it on a per-app basis.
One of the new features in Lion is the ability of applications to resume activity at the point an application was quit. This means that when you reopen an application it will open and display all the documents you were editing in the state when you quit the application. This is obviously very useful but there are times when you may not want confidential documents automatically opened and displayed when you open an application.
Here’s an example of the script for Safari:
set statePath to POSIX path of (path to home folder) & "Library/Saved Application State/com.apple.Safari.savedState"

set quotedPath to quoted form of statePath
try
   do shell script "test -w " & quotedPath
    set current to "enabled"
on error
   set current to "disabled"
end try

if current is "enabled" then
   tell application "Finder" to delete every item of ((POSIX file statePath) as alias)
    do shell script "chmod u-w " & quotedPath
    display dialog "Disabled window restore for Safari" buttons "OK" default button 1
else
   do shell script "chmod u+w " & quotedPath
    display dialog "Enabled window restore for Safari" buttons "OK" default button 1
end if
Head over to macinchem.org for a quick explanation of how to add it to your scripts menu to give you an easy place to access it.
Add any text to iTunes as a spoken track
There’s a great feature in Mac OS X that allows you to take any block of text and transfer it into iTunes as a spoken track, which you can then easily sync to an iPhone or iPod. This is done using a ‘Service’ that comes built into your Mac, but is disabled by default in Snow Leopard. This article explains how to enable it, and, for those who are interested, I’ve also included a short tutorial on how to add some improvements to make it more like the new version that will be included with Lion.
First, to enable the Service, go to the Keyboard section of System Preferences. This may sound like a bit of a weird place to have the Services settings, but it makes more sense when you consider pretty much the only setting for Services apart from turning them on and off is assigning keyboard shortcuts.

Click the “Keyboard Shortcuts” tab, and then choose “Services” from the list on the left. There are loads of great little features hidden away in here that are worth checking out, but for now just find “Add to iTunes as a Spoken Track” in the list on the right and make sure the checkbox next to it is checked. You might also want to add a keyboard shortcut if you think you might be using this often.
Now, whenever you have a block of text selected, just right-click on it and choose “Add to iTunes as a Spoken Track.” iTunes should open up, and a new track called “Text to Speech” should have appeared in your music library.
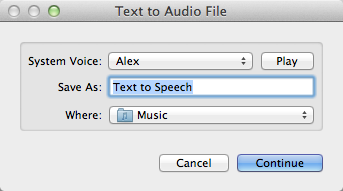
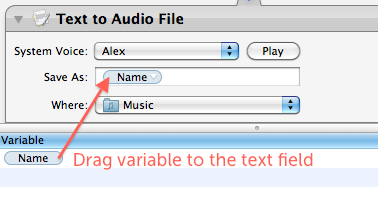
In Mac OS X Lion (coming out next month), this Service is enabled by default, and has been upgraded to give you the option to choose the voice used and the name and location of the track in iTunes. The screenshot below gives a little sneak preview of what to expect.
In the meantime until Lion is available, we can do a bit of tinkering to make our current Snow Leopard version almost as good as the upcoming Lion version. Like many Services, it is actually just an Automator workflow that you can easily modify yourself using ready-made building blocks. To see how this works, open up Automator (located in the Applications folder) and click “Open an Existing Workflow.” Navigate to
Macintosh HD/System/Library/Services/
and choose “Add to iTunes as a Spoken Track.”
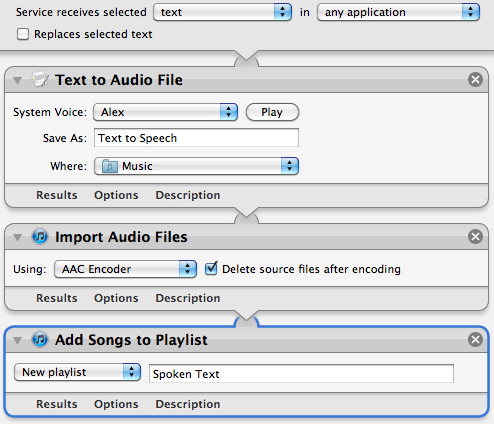
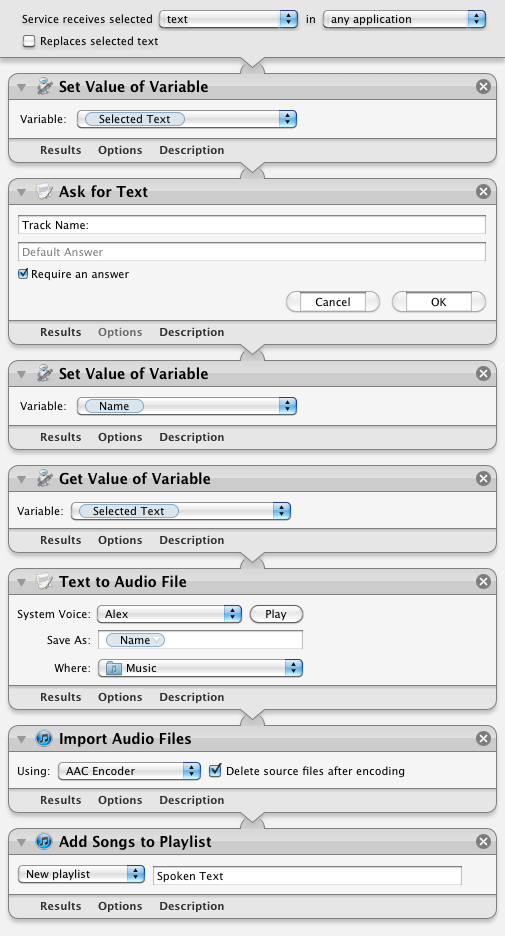
First lets familiarise ourselves with how this workflow operates. The selected text input comes in from the top into the “Text to Audio File” action. This creates an audio file with the specified voice and file name, and saves it in your Music folder. This file is then used as the input to the “Import Audio Files” action. This takes the file, adds it to iTunes, then deletes the original file. Finally, the “Add songs to Playlist” action takes this song and puts it in the specified playlist.
It’s quite clear that we can change the playlist, file name and voice from here, but with a bit of work we can make the Service work like the Lion version, where you are prompted to choose these values each time you run it.
First, if the Library isn’t visible, click the “Show Library” button in the top left of the window. This shows all the available actions we can add to the workflow. To start off, our main aims are to:
- Display a popup window that asks us what we want to call our track.
- Put that value in the “Save As” text field in the “Text to Audio File” action.
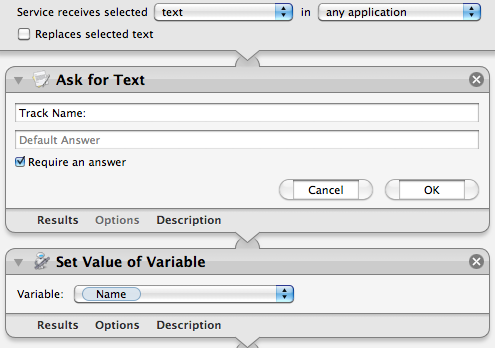
To do this, we need to add two actions to the start of the workflow. Drag across the “Ask for Text” action and the “Set Value of Variable” action, and place them above all the existing actions in the workflow. In the “Ask for Text” action, set the question to “Track Name:” and tick the checkbox “Require an answer.” In the “Set Value of Variable” action choose “New Variable...” from the drop-down menu, and call it “Name.”
So what exactly is this thing called a “variable” that we’ve just created? Basically it just gives us a way to store a value (in this case the chosen file name) and then use it later in a different place. Once you have created the “Name” variable, you should see it in a new list that has appeared at the bottom of the workflow area. Using this variable in other places is simply a case of just dragging it there. So select “Name” in the list at the bottom, and drag it onto the “Save As” text field in the “Text to Audio File” action.
Great, it looks like we’re all done! But wait — there’s actually a small problem with our workflow. Look carefully at the order of the actions in the workflow, and think about how the output of each action acts as the input to the next action. The selected text comes in from the top, but the first action (“Ask for Text”) just ignores this, and outputs the chosen file name. This is passed on through the subsequent actions, meaning that the text that is spoken is actually just the file name instead of the selected text!
So the two new actions that we have added have got in the way, and don’t allow us to pass the selected text through to the “Text to Audio File” action. What we need is some way of storing the selected text somewhere safe, then retrieving it later to use in another place ... luckily that’s exactly what variables are for!
It just takes another two actions to save and then retrieve a variable. First, add a “Set Value of Variable” action right at the start of the workflow, before all the existing actions. Once again, choose “New variable...” from the drop-down menu, but this time call it “Selected Text.” Now the selected text is stored away safely in a variable while we do other things. To retrieve the value later on when we need it, add a “Get Value of Variable” action just before the “Text to Audio File” action. Finally, make sure “Selected Text” is chosen in the drop-down menu, and also right-click on the “Get Value of Variable” title and choose “Ignore input.” The final result should look something like the following screenshot:
Note: You will find that Automator won’t let you save over the built-in Service, so you will have to choose “Save As” and give this Service a new name. Further extending the workflow to allow the user to also choose the name of the playlist is really easy and can be done in exactly the same way, but choosing the voice is a bit more complicated, and can probably only be achieved using a bit of AppleScript.
The Input menu and Character Viewer
The input menu is a handy little menu extra that appears on the right hand side of the menu bar. While its main use is for switching between the keyboard layouts of different countries, it’s also really useful for quickly typing special characters.

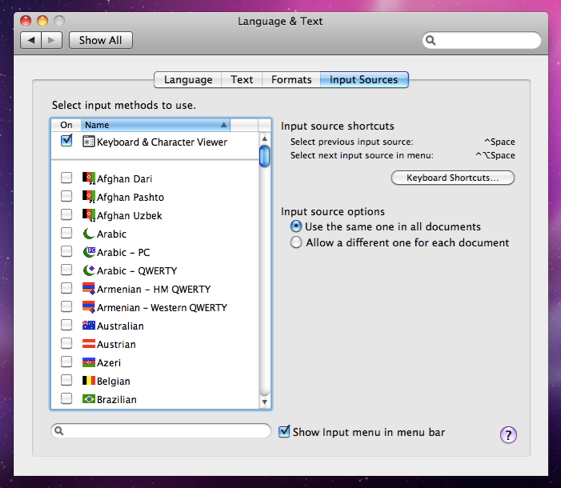
To enable the menu, open up System Preferences and go to the Language and Text section. Under the “Input Sources” tab, check the “Show Input menu in menu bar” option at the bottom.
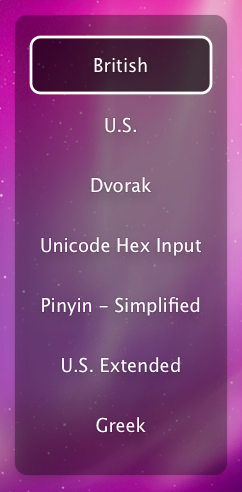
By default your input menu will be pretty empty. Most likely there will be one input method that matches your own country or language. To add items just choose them from the list in the Language and Text Preferences. Each of these input sources is essentially a different keyboard layout, with some extra complexities for non-latin alphabets. The best way to understand how they work is to enable a few, then switch between them using the input menu. Then go to an application like TextEdit and do some typing.
There is a handy keyboard shortcut that allows you to quickly switch between your input sources, but on some Macs it seems to clash with Spotlight. You can resolve this clash in the Keyboard section of System Preferences, for example by setting Spotlight to Command-Space and the input switcher to Control-Space. The input switcher works just like the Command-Tab application switcher. If you keep the control key held down, a menu will appear that allows you to tap the space bar to cycle through the different input sources.
If you only ever type in one language, being able to switch between input sources isn’t of much use for you. However the input menu is also great for quick access to special characters. To do this, enable the Keyboard & Character Viewer, which is at the top of the input sources list.
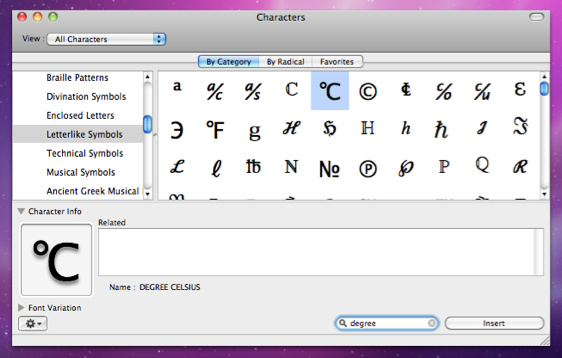
Now whenever you find yourself wanting a special character, you can just quickly go to the input menu and choose “Show Character Viewer.” Every single character that your Mac is able to produce is available in this window, including punctuation, mathematical symbols and other alphabets. The quickest way to find the character you are looking for is to start typing its name into the search box at the bottom. Once you have found your chosen character, you can either drag it into where you are typing, or click the “Insert” button.
You may notice that if you have only one input source and the Keyboard and Character Viewer enabled, the input menu icon changes to the Keyboard & Character Viewer icon instead of the flag of your chosen input source. If you want the flag back, you will have to add at least one other input source to the menu (even if you never switch to it).
There are a couple of input sources that may still be useful, even if you only use one language. American users may find the US Extended layout is better for typing diacritics using the Option key. Scientists and mathematicians may find that using the Control-Space keyboard shortcut to switch to the Greek input source is quicker than opening up the Character Viewer when adding Greek letters to equations. The Unicode Hex Input source is also a great way for quickly typing special characters. To use it you just hold the Option key and type four hex digits (numbers 1-9, letters a-f), but of course this requires that you remember the 4-digit hex code for the symbols you want to type.
If the Character Viewer is the only thing in the menu you find interesting, you may want to disable the input menu and use another method for opening the Character Viewer. In many applications it is accessible from the bottom of the Edit menu, under “Special Characters,” often with the keyboard shortcut Command-Option-T. Alternatively, the application itself is located in /System/Library/Input Methods/CharacterPallette. You can easily drag this to the Dock or Finder sidebar.
To create a keyboard shortcut for it, open up Automator (in the Applications folder) and create a new Service. Add the “Run Applescript” action, and paste the following lines in:
tell application "CharacterPalette"
   activate
end tell
Change the “text” drop-down menu to “no input,” then save the Service. You can then add the keyboard shortcut from the Keyboard section of System Preferences.
Quickly enable Private Browsing
Normally when you are browsing the internet, Safari keeps a record of things like the pages you have visited, the files you have downloaded and the searches you have made. In most circumstances this is great as it can save time and help you retrace your steps. However, in some cases you may prefer to leave no record of your browsing, for example when you are using a public computer.
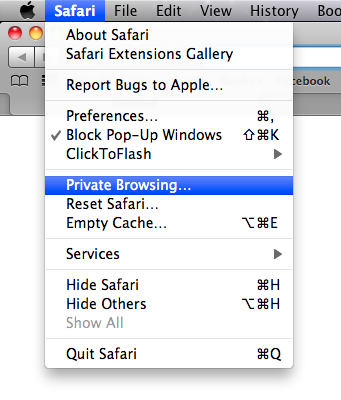
Safari’s Private Browsing mode is great for this. Just go to the Safari menu and choose “Private Browsing.” Click OK in the dialog box that appears and then you are browsing privately. Safari won’t store the sites you visit in the History menu, and your Google searches won’t be added to the Recent Searches menu.
Enabling and disabling Private Browsing through the Safari menu can be a bit annoying, especially if you find yourself doing it often. Luckily there are a couple of ways to speed this up.
In all menus in Mac OS X, an item followed by an ellipsis (…) means that action will be followed by a dialog box. If you hold down the Option key while the Safari menu is open, you will notice that the ellipsis after Private Browsing disappears. Now when you click it, you will skip the dialog box. This is a great trick for skipping the “Are you sure?” type dialog boxes in any Mac OS X application.
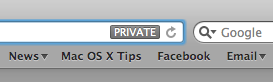
When Private Browsing is enabled, a “Private” button will appear the in address. Just click this button to quickly exit Private Browsing mode and return to normal browsing. This also has an “Are you sure?” dialog box, but Option-clicking it will skip it in a similar way.
You can also create a keyboard shortcut that does the same thing. Open up System Preferences and go to the Keyboard section. Under the Keyboard Shortcuts tab, click the “Application Shortcuts” item at the bottom of the list on the left.
Now click the plus (+) button to add a new shortcut. Choose Safari from the Application drop-down menu, and type “Private Browsing” into the Menu Title field. Make sure you don’t add the ellipsis (…) unless you still want the dialog box to pop up. Finally, choose your keyboard shortcut. I use Command-Shift-P.
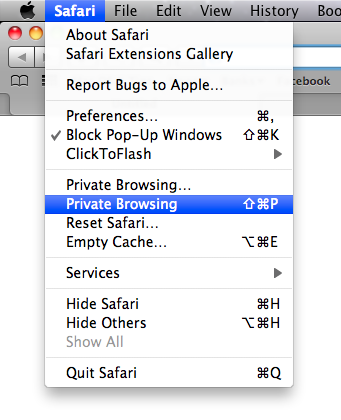
Now when you return to Safari, there should be a new Private Browsing item in the Safari menu, without the ellipsis and with your chosen keyboard shortcut next to it. Pressing these keys should quickly toggle Private Browsing on and off without you dealing with dialog boxes or having to go to menus.
Automatically set time zone by location
Snow Leopard has the ability to automatically set your time zone based on your location. To enable this, go to System Preferences and click on the “Date and Time” section. Under the Time Zone tab, check the “Set time zone automatically by location” option. The map should become greyed out, and your Mac should determine your current location using CoreLocation.

Generally your Mac won’t have GPS, so instead this works by checking the visible Wi-Fi networks against a database of their locations. As a result this only works when your AirPort is turned on, but it isn’t necessary for you to be connected to the internet through it. Of course this also works much more accurately in urban areas where there are lots of Wi-Fi networks around.
If you have connected a GPS device to your Mac and it is recognised by Mac OS X, CoreLocation should switch over to using that. This means that having nearby Wi-Fi networks is not an issue, but you do need to make sure you have GPS signal.
Now when you travel with your Mac, the time zone should automatically update to your new location.
Other applications can also use CoreLocation. For example, Google Latitude asks for access to your location so it can share it with your friends. While an application must always ask your permission for access to your location information, some people still see this as a bit of a privacy and security risk. To disable CoreLocation completely, go to the Security section of System Preferences and check the “Disable Location Services” checkbox under the General tab.
![]()
Run a screen saver over the login window
As of Snow Leopard, it is now possible to set a screen saver to run over the login window. Unfortunately Apple haven’t built the settings into System Preferences so the process is a little complicated, but it isn’t too tricky.
Start by going to Macintosh HD/System/Library/Screen Savers/. You can navigate to it in the Finder, or just open up a new Finder window, press Command-Shift-G and then paste in the following line:
/System/Library/Screen Savers/
This folder contains all the possible screen savers you can use. If you have 3rd party screen savers installed, you may have noticed that this folder only contains Apple screen savers, and none of the ones you have installed yourself. Unfortunately, only Apple screen savers are allowed to be displayed over the login window, and even if you try copying another screen saver to this folder, it won’t work.
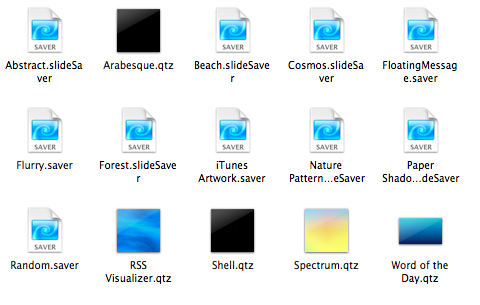
The next step is to choose the screen saver you want, and make a note of the file’s name, making sure you get the file extension and the uppercase and lowercase letters correct. For example, the Flurry screensaver is called “Flurry.saver,” whereas the Paper Shadow one is called “Paper Shadow.slideSaver.”
Next open TextEdit (located in the Applications folder) and press Command-Shift-T to change to a plain text document. Then paste in the following:
<?xml version="1.0" encoding="UTF-8"?>
<!DOCTYPE plist PUBLIC "-//Apple//DTD PLIST 1.0//EN" "http://www.apple.com/DTDs/PropertyList-1.0.dtd">
<plist version="1.0">
<dict>
    <key>loginWindowIdleTime</key>
    <integer>60</integer>
    <key>loginWindowModulePath</key>
    <string>/System/Library/Screen Savers/Flurry.saver</string>
</dict>
</plist>
The number on the 7th line is the time in seconds before the screen saver starts. The file path on the 9th line is to specify the screen saver to use. You can change this to any of the screen savers in the /System/Library/Screen Savers/ folder.
Once you have set these values to what you want, choose Save As... from the File menu. You want to save the file in Macintosh HD/Library/Preferences/. As before, you can navigate to this, or just press Command-Shift-G and paste in
/Library/Preferences/
Save the file as com.apple.screensaver.plist, making sure not to add the .txt extension. Now when you go to the login window, your chosen screen saver should start after the amount of time you specified.
If you ever want to change the screen saver, you can just located this file and modify it to point towards another screen saver. If you want to disable the screen saver, just delete the file.
Getting started with text substitutions
Text substitutions are a relatively new feature that were introduced with Snow Leopard. They allow you to set up certain phrases to get automatically replaced with something else as you type. If you go to the Language & Text section of System Preferences and click on the text tab, you will see a list of substitutions already set up, for example (c) to © and 1/2 to ½.
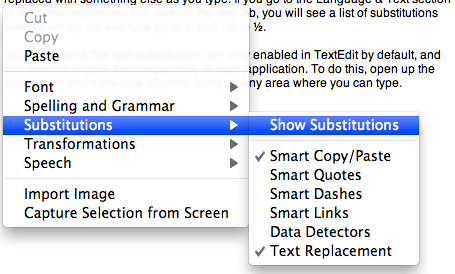
Oddly, it seems that the only application that text substitutions are enabled in by default is TextEdit, and you need to enable them separately in every other application. To do this, open up the application in question and right-click (Control-click) on any area where you can type. In the menu that appears, go to Substitutions and choose “Show Substitutions.” This will bring up a dialog box where you enable Text Replacement and various other substitution features. If the application doesn’t support text substitutions, you won’t see this menu.
Doing this separately for every application is a bit annoying, especially if you want to enable text substitutions everywhere. Fortunately it is possible to enable text substitutions globally using a Terminal command. Just open up Terminal (located in Applications/Utilities), copy and paste in the following line, then press return.
defaults write -g WebAutomaticTextReplacementEnabled -bool true
This will turn on text substitutions in every application that supports them, but you can still go into individual applications and turn them off on a per application basis if you want.
Now you have text substitutions enabled, you can add new ones in the Language & Text section of System Preferences by clicking the plus (+) button at the bottom of the list. Here are some ideas for substitutions to set up.
- Expand internet and messaging slang abbreviations. For example you could set
brbto “be right back” andtyto “thank you” - Use something like
lipsumto insert a few paragraphs of Lorem Ipsum placeholder text so you don’t have to Google for it each time. - Use something like
msigto automatically insert your signature at the end of mail messages or forum posts. - Automatically enter commonly used commands and code snippets that are too long to remember or too tedious to type. For example you could set
rrubyto enter the first line of a ruby script#!/usr/bin/env ruby. - Abbreviate email addresses that you find yourself regularly typing, for example set
matt@to give matt@macosxtips.co.uk - Create email templates to automatically write out “canned responses.” For example I have
ssorryexpand to a detailed email reply saying that I can’t help with a computer problem and explaining some places to go to find out.
When you come to enter some of the longer substitutions such as email signatures or whole email messages, you will run into the problem of how to enter a line break, as just pressing Return doesn’t work. There are a couple of ways to get around this. Firstly, you can simply use Option-Return instead. Option-Tab is also useful for inserting a Tab character. This is the quickest and easiest way, especially for short replacements like email signatures that only have a couple of lines. If you are creating a replacement that is more than a few lines, you may find it easier to write it in something like TextEdit and then copy and paste it into the list in System Preferences. All the line breaks will be preserved.
One final use for text substitutions is to exclude words from spelling auto-correction. Sometimes you will have a word that you don’t want to auto-correct, but you don’t want to permanently add it to the dictionary using “Learn word” because it isn’t an actual word. To get around this, just add it as a text substitution and make the text replacement the same as the original word. Now the spelling auto-correction will never happen.
Option-click menu extras to reveal hidden settings
Menu extras are the little icon menus that live over on the right-hand side of your menu bar. Most people will probably have the Volume and Airport menus, but there are loads more that you can enable.
You can find 26 built in ones located in /System/Library/CoreServices/Menu Extras that you can just double-click to start. On top of this there are many more that come with applications (like Evernote, QuickSilver and Tweetie) and some that are small applications themselves (like Caffeine, F.lux and iStat menus).
If you have a lot of menu extras, you can rearrange them by holding the command key and dragging them around. To remove one, just hold command and drag it off the menu bar.
One not so well known trick is holding down the Option key when clicking on the menus. For some of them this will reveal hidden settings and information that aren't normally shown in the menu. Here's what you'll see in the Option-click menu for some of the most common ones.
AirPort
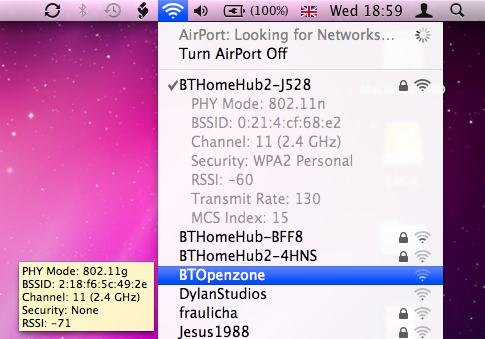
In Snow Leopard the Airport menu has already got a lot more informative with the new way the icon displays the current status. In the Option-click menu you'll see a lot of extra information about your current wireless network, including the protocol (e.g. 802.11n), the signal strength (RSSI), security mode (e.g. WPA2 Personal), the channel (e.g. 11) and some other things like the hardware address and the transmit rate. If you want to get some of this information about another wireless network in the list that you aren't using, just hold your mouse over it and a yellow tooltip will appear.
Volume
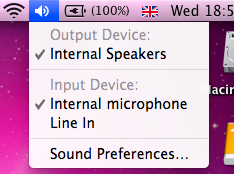
This menu normally just shows a slider for you to adjust the volume, but option-clicking shows some settings that you can normally change in the Sound section of System Preferences. It allows you to select different input and output devices, such as an external microphone or external speakers.
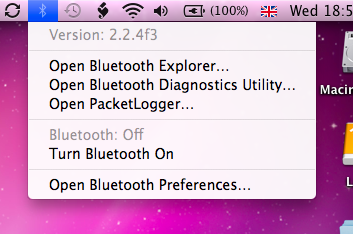
Bluetooth
If you have Bluetooth on your Mac, option-clicking the menu will show you the bluetooth version number. If you have the developer tools installed, it will also give you options to open Bluetooth Explorer and Packetlogger.
Battery
This one is just for laptop users. Option-clicking will add an item at the top of the menu that displays the condition of your battery. Clicking on this will open up a help page explaining what your condition means. You can find out more information about your battery here.

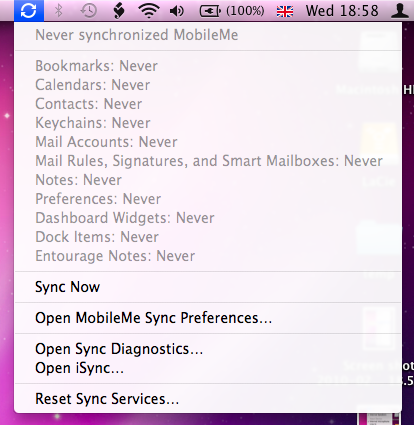
iSync/MobileMe
A normal click on this menu gives the time of the last sync, but option-clicking gives a huge list of the last time each individual data type was synced (i.e. Bookmarks, Calendars, Contacts etc.). It also adds in an option to open Sync Diagnostics and iSync, as well as giving the option to reset sync services.
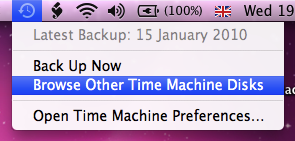
Time Machine
In this one, Option-clicking changes "Enter Time Machine" to "Browse Other Time Machine Disks". This brings up a dialog listing all the connected drives that contain Time Machine backups. Select one and click Use Selected Disk to browse the Time Machine backup.
10 Security and Privacy Tips

1. Disable "Open safe files after downloading"
If you do one thing this article suggests, this should be it. Unticking just one checkbox will protect you from most of the few dangerous Mac exploits around on the internet.
In Safari, choose Preferences from the Safari menu and then click on the General tab. Near the bottom, un-check the checkbox that says "Open safe files after downloading". There. Done.
2. Disable automatic login
Even if you only have one user on your Mac, requiring a username and password when starting up is great for security, especially if you have a laptop that can more be easily lost or stolen. You can do this from the Security section of System Preferences, by checking the checkbox "Disable automatic login".
While this isn't going to stop someone intent on stealing your personal data, regular thieves are more likely to just wipe the hard drive rather than going through all your personal stuff first.
3. Lock screen when away
There are a couple of ways to make your Mac require a password when you leave it. The easiest way is to set "Require password after sleep or screen saver begins" in the Security section of System Preferences. Here, you can also set a time limit so a password isn't required right away, but only after 15 minutes for example.
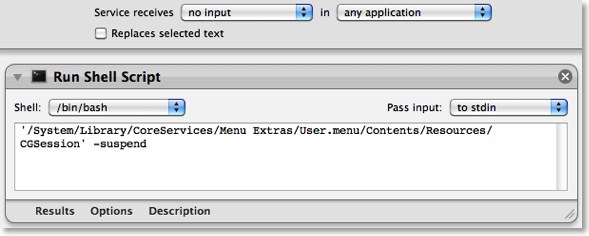
If you would prefer a keyboard shortcut to lock the screen, you can create this yourself. Open up Automator (in the Applications folder) and choose a Service template. From the library choose "Run Shell Script" and drag it across to the workflow area. In the text box paste the following command:
’/System/Library/CoreServices/Menu Extras/User.menu/Contents/Resources/CGSession' -suspend
Finally, change the "text" drop-down menu above the workflow to "no input" and then save you workflow as "Lock Screen". To add the keyboard shortcut, go to the Keyboard section of System Preferences and click the Keyboard shortcuts tab. Select Services from the list on the left, then scroll down to the bottom of the list on the right to find "Lock Screen". Double-click on the area to the right "Lock Screen", then press the keyboard shortcut you want. I used Command-Control-L.
4. Use 1Password to create and store internet passwords
One of the problems with having lots of accounts on the internet is that for them to really be secure, they should all have a different password. For example, if you use the same password for your bank account, your email account and some shady disreputable website, you are asking for trouble.
My solution to this is to use an application called 1Password to create and remember all my passwords for me. The only three passwords that I remember myself are my email password, my bank password and a master password for 1Password. All the others - for Facebook, reddit, Amazon, etc - are randomly generated 20 character strings that are created and remembered for me by 1Password. When I go to one of those web sites, 1Password simply prompts me for my master password, then fills in the rest for me.
Some of this functionality can be replicated for free using Keychain Access, but the real benefit of 1Password is its automation, and the fact that it works in Safari, Firefox and on your iPhone so you don't have to save your passwords separately for each.
5. Turn on the firewall
Mac OS X comes with a built in firewall, but it is actually turned off by default. You can turn it on in the Security section of System Preferences. The Mac OS X firewall is really simple to set up - just click start to turn it on. Some applications will have trouble working through the firewall, instant messengers for example. If you find you start having connection problems with an application, just add it to the allowed list in the firewall preferences.
6. Little Snitch
While a Firewall protects your computer from unwanted connections from the outside, Little Snitch does the opposite and blocks your private data from being sent out. If you start an application and it tries to send some data out to a server on the Internet, Little Snitch will inform you and ask if you want to allow it. Read more over at the Little Snitch site.
7. Encrypt and hide your private files
It isn't entirely obvious how to password protect files or folders in Mac OS X but there are a couple of ways.
If you just want to protect a single iWork or PDF document, you can do this from within the specific iWork application or from within Preview. In Pages, Keynote and Numbers '09 you can choose "Require password to open" from the Document section of the Inspector window. In Preview, when choosing "Save As.." on a PDF there is a checkbox to encrypt.
If you want to password anything else, you have to password protect an entire folder. The way this is done is using encrypted disk images. Once created these appear as a single file on your hard drive with a dmg extension. When you double-click on one, it will ask you for the password. If you enter the password correctly, it will mount a disk image on your desktop. So while unlocked, the disk image is just like a temporary folder on your desktop. You can copy files to it and delete files from it, and as soon as you eject it, the contents will be password protected again. Here’s a detailed article about how to set up a disk image.
8. Use FileVault
Personally, I don't use this option, but for those who want to be ultra-secure it is an amazing feature. It is similar to creating an encrypted disk image for some files, but instead it does this for your entire user folder. It is much more straightforward and transparent than setting up an encrypted disk image too. Just turn it on the Security section of System Preferences, and all your files will be unencrypted and encrypted on the fly when you log in and out of your computer.
I would say this is probably overkill for most users. If you have an encrypted disk image for your most sensitive files, then it is a bit redundant to then encrypt your entire user folder. It also causes some problems concerning Time Machine backups, and also huge problems if you happen to forget the password…
9. Secure Empty Trash
More and more people now realise that when you delete something off your hard drive, it doesn't actually get physically removed from the disk. All references to it are gone, but it stays there until something else is written over it. For private documents this is a bad situation because someone with some special software can recover you supposedly deleted files.
To prevent this, you can use the "Secure Empty Trash…" option which is in the Finder menu. This takes longer than the normal trash emptying, because your computer is actually writing nonsense data over the top of your deleted files.
10. Securely erase an entire hard disk
If you have an old Mac you are thinking of selling or throwing away, it might be a good idea to securely erase all the data from it. To do this you need to start up from the installer CD that came with your Mac by inserting it and holding the C key while the computer starts up. In the installer, choose Disk Utility from the menu bar.
If the hard drive you want to erase is not your main hard drive, you can skip starting up from the install disk and just open Disk Utility from the Utilities folder inside the Applications folder.
In Disk Utility, choose the hard disk from the list on the left, click on the Erase tab, and then click on the Security Options button. Now you have four levels of security to choose from. Each higher level of security takes longer to erase, so the 35-pass erase will take upwards of 24 hours and is only for the truly paranoid.
Of course, if you are throwing away the Mac or even just the hard drive, nothing works better and is quite as satisfying than the physical destruction option. Just take the hard drive out of the Mac and completely destroy it with a hammer.
A place to share your GeekTool setups
I've mentioned GeekTool a couple of times before, and it has recently been updated to version 3. The best thing about the update is how much simpler the interface is. Before the interface was a bit intimidating, but now it is much easier to use.
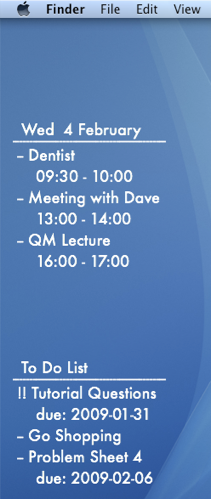
For those who don’t know, GeekTool is a preference pane that allows you to display different kinds of information on your desktop. These bits of information are called Geeklets, and they can be text, images, files, and the output of shell commands. Some of the most common things to use it for are displaying to do lists, today’s iCal events, the date, the current iTunes song and unread mail.
The latest version now allows you to save your Geeklets and share them with each other, so I’ve created a site just for that. It allows you to submit your Geeklets and vote on others to see which are most popular. If you are new to this, it also has a page for getting started with GeekTool.
Here are a few tips for using GeekTool.
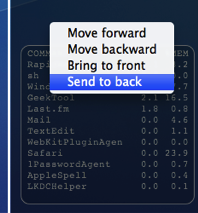
1. Set stacking order
If you have overlapping Geeklets, you might find that the wrong one is on top. Just right-click on the Geeklet and change the order by choosing “Send to back” or one of the other options.
2. Don’t set refresh to zero
By default, GeekTool sets the refresh time to 0, which means it continuously refreshes as quick as it can. It is best to avoid this as it can take a considerable toll on your system, hogging resources and slowing things down. For things that really have to be updated very regularly, consider a refresh time of 5 or 10 seconds instead.
3. Group your Geeklets
By putting your Geeklets into separate groups, you can quickly and easily enable and disable them based on their grouping. Note that Geeklets can be in multiple groups - as long as one of the is enabled, the Geeklet will be shown.
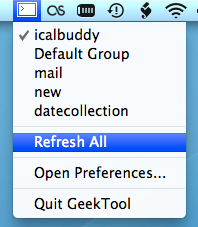
4. Use the menubar item
GeekTool now has a menubar item that you can enable from the preference pane. From here you can enable and disable groups, force a refresh on all Geeklets, disable GeekTool, and access the preference pane.
5. Check out other people’s Geeklets
Check out the Geeklets other people have posted to get some inspiration for your desktop. Vote up your favourites, and share your creations too.
Delete large files from a Time Machine Backup
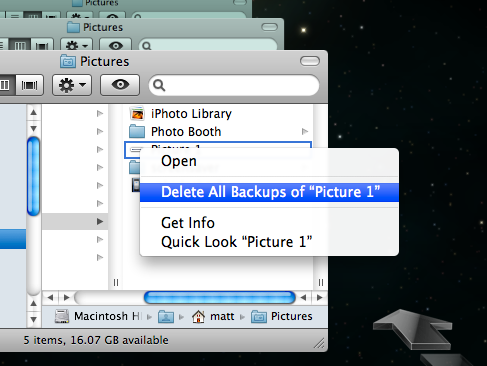
If you are looking to reduce the size of your Time Machine backup, it's quite easy to go through you backups and remove files.
Just enter Time Machine, locate the file you want to delete, right-click on it and choose "Delete All Backups..." But which files do you delete?
You want to get rid of large files, but not those that are important. The best way to do this is to use an application called GrandPerspective. Pierce Wetter has created a modified version of this application specifically for Time Machine backups.
It searches through your backups, and finds large files that have only been backed up once. These will be the files that either constantly change by small amounts or were only on your Mac for a very short time.
It then produces a nice "map" of your backup, so you can easily see which files are taking up the most space. Hold you mouse over one of large boxes, and make a note of the backup date and location, shown at the bottom. Then just enter Time Machine, go to the date, and remove the backup as usual.
If you find that a lot of the files you are removing are in the same location, you might want to exclude that folder from the Time Machine backup. To do this, just go to the Time Machine section of System Preferences, click the Options button and then drag the folder into the list.
How to use Network Utility
Everything you can do in Network Utility you can actually do in a Terminal window using unix tools. But why go to all that effort when Apple have created a nice application that lets you do things much more easily.
When you first open up Network Utility you will see nine tabs along the top [Update: eight in Snow Leopard]. Here's a run through of what you can do in each tab.
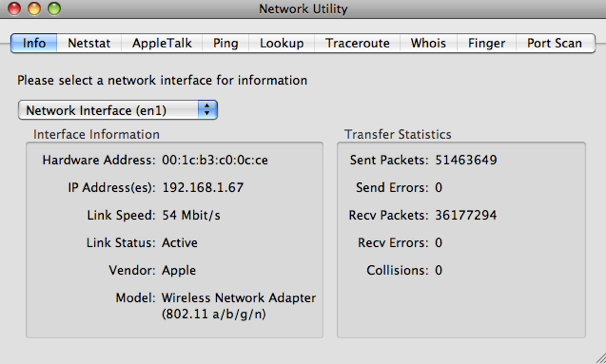
1. Info
The first tab, Info, unsurprisingly gives you general information about your network. The Network Interface drop-down menu shows all the different ways your Mac can connect to the Network. Typically these are ethernet, wireless and Firewire.
The useful bits of information are the Hardware Address and IP Address. You will only have an IP address if that network interface is connected, otherwise it will say unknown. The Hardware Address, otherwise known as a MAC address, can be used to uniquely identify your computer (even though it is possible to change it).
One useful way to use the MAC address is when setting up your wireless router. You can set most routers to only allow specific MAC addresses to join, meaning other people can't log onto your wireless and connect to the internet.
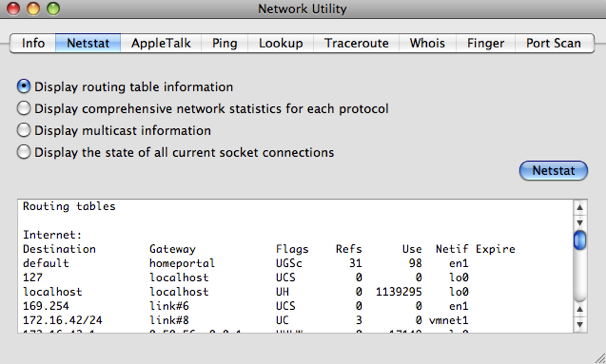
2. Netstat
Netstat is a tool that is really useful to network administrators for troubleshooting, but pretty useless to the average user. If you choose "Display routing table information" and click Netstat, you will get a list that contains all the computers on the network. For example, I get Matts-Macbook, Matts-iPhone and ChrisG5.
If you choose "Display the state of all current socket connections" and click Netstat you'll see a list of your computer's network connections. For example, the first items on the list will correspond to any web pages you have open. If you type the numbers under "Foreign Address" into Safari, the web page will sometimes appear.
3. AppleTalk
The AppleTalk tab is very similar to the Netstat tab, but specifically for Apple's proprietary protocol called AppleTalk. It was very popular in the early days of the Mac, but now has been pretty much abandoned and is unsupported in Snow Leopard. You can read more about AppleTalk on its Wikipedia page. [Update: The AppleTalk tab is completely gone in Snow Leopard]
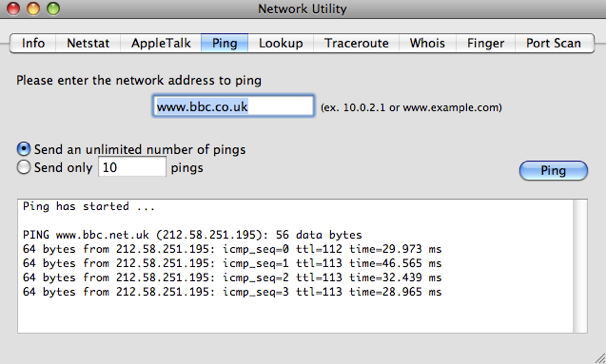
4. Ping
Ping is a tool to check if an internet address is working. When you "ping" an address, you send a small bit of data which it sends back.
You can use this to check if a website is down if it isn't loading in Safari. Alternatively, if you think your internet connection is down, you can try pinging sites that almost never go down like google.com and bbc.co.uk to see if you have a problem on your end.
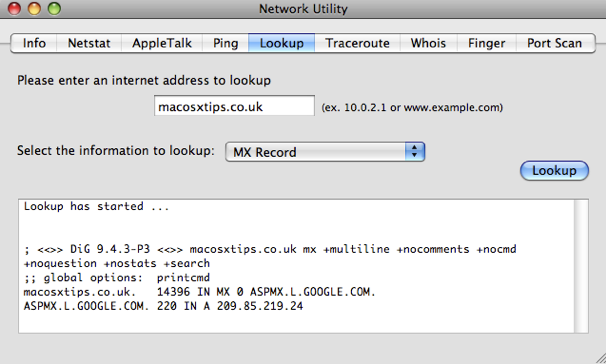
5. Lookup
Lookup allows you to get information about a web site or IP address. The drop-down menu allows you to choose from a number of different types of information. For example, performing a Name Server lookup on macosxtips.co.uk will tell you that this site is hosted by Dreamhost, and a MX record lookup will tell you that our email is handled by Google.
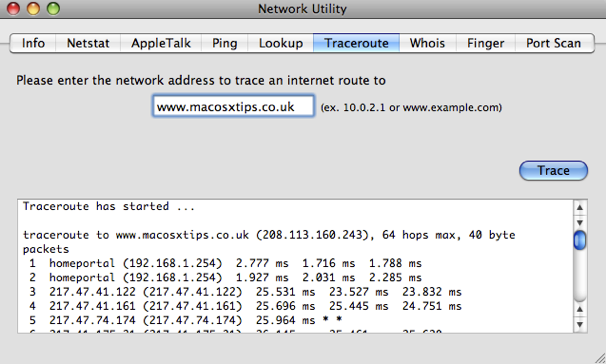
6. Traceroute
When you enter an address and click Trace, traceroute will show you the route taken by data sent between you and the server. It allows you to see all the servers that your data goes through along the way.
You can use this to troubleshoot connection problems by finding out the point where your data is being blocked.
You can also use it when you are downloading a file and have multiple download mirrors in different locations to choose from. Just type the addresses of the mirrors into traceroute and you can get a good idea of which mirror is fastest.
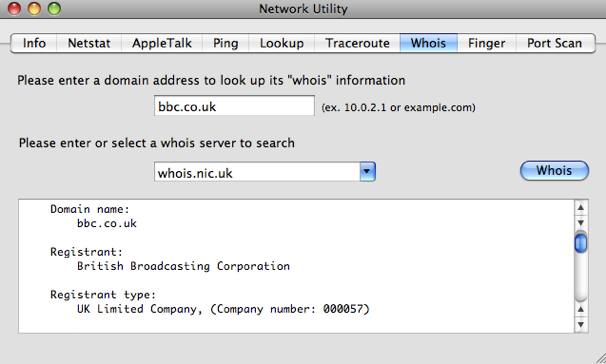
7. Whois
The Whois database gives you information about internet addresses and who has registered them. The default whois server whois.internic.net works quite well for most addresses, but you might have to type "domain apple.com" for example to get it to work. For .co.uk addresses use "whois.nic.uk" as the whois server. You will get information like the registrant, their address, who they registered with, when their registration was started and and when it expires.
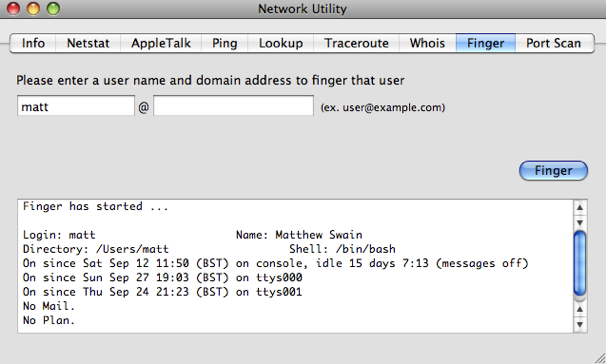
8. Finger
Finger, created in 1971, is one of the earliest forms of status updates that are now done using Facebook and Twitter. It's hardly used anymore, but you can use finger to check if your friends are online, and you can post .plan files to your profile similar to blog posts.
One of the best ways to use finger is to type in your username or the username of another user on your Mac. It will tell you if they/you are currently logged in and how long since they/you last logged in.
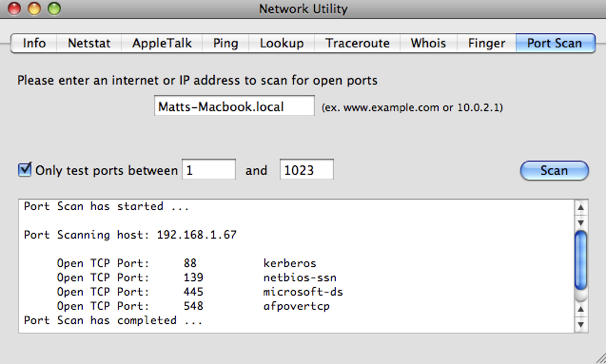
9. Port Scan
The final tab in Network Utility, Port Scan, is for scanning which ports are open at a certain address. These Network ports are a sort of virtual version of the ports on the side of your computer, and each port is for a certain type of network traffic. For example, port 80 is used for web pages.
You can use Port Scan to test your own computer by typing in the name of your Mac followed by ".local". You can find this name in the Sharing section of System Preferences.
Things like iTunes sharing, instant messaging, BitTorrent, AFP and SMB sharing all use different ports. If you find that one of these isn't working, it might be because your firewall is blocking the port that it uses. Instead of turning off your firewall, you can just set it to open that port.
Just run Port Scan with the application or sharing turned off and then again with it turn on to see which port appears. You can then set your firewall to open this port and allow network traffic through. Note that the built in firewall that comes with Mac OS X works on a per application basis rather than a port basis, to keep things simpler for the average user.
Easily remove preference panes
Here’s a trick that I just learnt. You can quickly remove preference panes from System Preferences by right-clicking (or Control-clicking) on them and choosing remove preference pane. Of course this only works on the preference panes that you have installed yourself, i.e. the ones that appear in the “Other” section.

Even though you can just Trash the preference pane file yourself, this is quite a good timesaver if you can’t remember if you installed the preference pane for all users or just your user. Depending on which you chose, the file could be located in the Library folder in Macintosh HD or the Library folder in your user folder. It’s much quicker just to do it straight from System Preferences. Just like if you were Trashing the file, System Preferences will ask you for your administrator password when removing preference panes for all users.
After a bit of a clean out, I’ve managed to cut down to just the preference panes I actually need. I have
- DivX, Flip4Mac and Perian for video formats (Perian is probably the most useful)
- Growl for notifications
- GeekTool for displaying data on the desktop
- Secrets for tweaking all those hidden settings.
Let us know in the comments if there are any other preference panes that you swear by.
A few more GeekTool tricks
Show Basic System Information
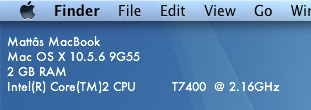
It is possible to use shell commands in GeekTool to display the computer name, operating system version, the amount of RAM and the processor details. This is useful if you have loads of the same model, or if you often remotely control other Macs.
To display this information, just open up System Preferences and click on GeekTool (download it first if you haven't already). Create a new entry, and change the type from File to Shell. Paste the following code into the box:
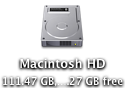
scutil --get ComputerName;sw_vers | awk -F':\t' '{print $2}' | paste -d ' ' - - -;sysctl -n hw.memsize | awk '{print $0/1073741824" GB RAM"}';sysctl -n machdep.cpu.brand_string;You might notice that each line of the code corresponds to a line of the output. In fact the code is actually 4 separate terminal commands. If you want you can delete or modify any of the lines and it won’t affect any of the others. Just make sure each line ends with a semicolon.
These details pretty much never change, so it's worth changing the refresh time to something very high. It is measured in seconds, so something like 100000 (about one day) should be alright. Once you adjust the font, colour and position, the result looks something like the screenshot below.
Show Free Disk Space
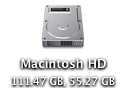
df is a command line utility for getting information on how much disk space you have free. The following command gets the output of the df command and converts it into a more readable format:df -hl | grep 'disk0s2' | awk '{print $4"/"$2" free ("$5" used)"}'Just add this into GeekTool in the same way as usual. "
disk0s2" is the identifier for the hard drive. You can find out what yours is Disk Utility (located in Applications/Utilities). Just click on the hard drive in the list on the left and choose Get Info... from the File menu (Command-I). The Disk Identifier property is near the top of the info window.The second part of the command is awk which rearranges the output. You can change this arround. Just make sure all text is inside double-quotes, and all variables (e.g. $2) are outside. $2 gives the capacity, $3 gives the used, $4 gives the free, and $5 gives the percentage used.
This one would fit quite well with the system info above, but it is likely to change more so you might want to keep it separate and have it refresh more often.
![]()
Display Album Artwork and Song Details of iTunes Currently Playing
I won't go into detail with this, because I don't have it set up on my system. This basically involves using AppleScript to get the details from iTunes. The song details are relatively straightforward to get, but the album artwork is a bit more complicated. Mac OS X Hints shows how to do the song details here, and the album artwork here.
Display a One-line Weather Forecast
Unfortunately this one is for US readers only (or people who want to know the weather in the US). The website Weather Underground gives a single line weather forecast that just compares today or tomorrow to the previous day. As usual, just create a new GeekTool entry, change the type to Shell and paste the following in the box:
curl -s http://www.wunderground.com/cgi-bin/findweather/getForecast?query=12345 | awk '/Today is/ || /Tomorrow is/' | textutil -convert txt -stdin -stdout -format htmlReplace 12345 with your zip code, and you should have a weather forecast for your area. Running this takes a bit of time and system resources, so it's best to change the refresh rate to at least a few hours (about 10000).

Stop GeekTool preventing Sleep
You may have noticed that GeekTool prevents your Mac from going to sleep after the time period set in the Energy Saver section of System Preferences. The display will sleep, but the computer itself will never sleep because it is continuously performing tasks and Mac OS X doesn't think it is idle. This isn't really an issue for me, as I normally close the lid of my MacBook when I'm not using it, but I can see how this would be a problem for others. There is a solution explained over at Mac OS X Hints that uses an application called SleepWatcher to disable GeekTool as soon as the display goes to sleep.
Change or disable the Front Row shortcut
This isn't very well publicised, and the only reason I know about it is that I keep accidentally pressing it when I go to Force Quit an application (Command-Option-Escape). People with American keyboard layouts also report accidentally activating Front Row when going for Command-Tilde (cycle through windows). As Front Row often takes a few seconds to load up and it takes over your entire screen, this can be pretty annoying.
If you are as clumsy as me, you might want to change the keyboard shortcut for Front Row. This is easily done by going to the Keyboard and Mouse section of System Preferences. Under the Keyboard Shortcuts tab you should find a list of all the keyboard shortcuts you can change.
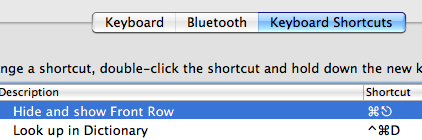
Simply double-click on the shortcut for "Hide and show Front Row" and press the new combination you want. I went for Command-Control-Escape, as it's almost the same but much harder to accidentally press.
Alternatively, if you want to disable the shortcut completely, just un-check the box to the left of "Hide and show Front Row". Even if you do this, Front Row is still accessible via the remote.
Tweets on the desktop with GeekTool
If you are looking for more Geektool scripts then check out the Mac OS X Tips Geeklets site. It has loads of user-contributed Geeklets all in one place for you to download.
As reported in TUAW yesterday, a reader named Ben G saw my recent tip for displaying iCal events and to do items on the desktop and took it one step further. Inspired by iCalBuddy, he has written a similar command line utility called twitterbuddy that instead displays the latest tweets by the people you follow. Getting this onto your desktop is pretty much the same process as with iCalBuddy.
Once you have downloaded twitterbuddy, double-click the install.command file to install it. To test it works, open up a new Terminal window and type in
twitterbuddy -h. This should bring up the following list of options:
As you can see, typing
twitterbuddy -u yourusername -p yourpassword -n 5 -t Tweets will display the last 5 tweets you have received, with the title “Tweets”. After perfecting your settings in Terminal, adding the command to GeekTool is easy. As with iCalBuddy, the only subtlety is that you have to use the full path, as shown below:/usr/local/bin/twitterbuddy -u macosxtips -p ******** -n 5 -t Tweets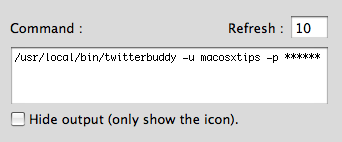
For help setting up GeekTool and formatting your output, check out the iCal on the Desktop tip, as everything is the same. Many thanks to Ali Rantakari, the deveoper of iCalBuddy and Benjamin Goering, the developer of twitterbuddy for all their hard work.
Also, if you want to, follow me on Twitter.
Display iCal Events and a To Do list on your desktop
If you are looking for more Geektool scripts then check out the Mac OS X Tips Geeklets site. It has loads of user-contributed Geeklets all in one place for you to download.
1. Get GeekTool and iCalBuddy
To set this up you need to download two (free) applications. The first is GeekTool, a preference pane that allows you to display files, images and shell scripts on the Desktop. The second is iCalBuddy, a command line utility that lets you access events and to do items without having to open iCal.
Download GeekTool from here and install it by double-clicking on the preference pane. You can now access it by going to System Preferences and looking in the bottom row.
Download iCalBuddy from here and double-click it to unzip the folder. Then double-click the install.command file, and enter your administrator password when the window appears. You can then close the window.
2. Set up GeekTool
Once you click on the GeekTool section in System Preferences, you will see a window with three different icons. Drag the one called “Shell” to a position on the desktop behind the window. A black “Properties” inspector window will appear, where you can enter the settings for this geeklet. The bits you need to change are the Command and Style sections. In the command box, paste
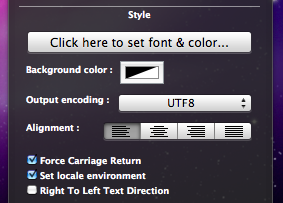
date and click the button below to set the font and colour to something that complements your background and make it a bit bigger. If you look on your desktop now, the date should be written in the top left. You can click and drag this around to where you want it, or you can type in the position in the bottom right of the GeekTool window. As you can see, the time only updates every 10 seconds. You can change this in the Refresh box above the Command box.3. Change the appearance
If you have a dark Desktop background, you may find that you can't see the date. By default the date appears in an ugly plain fixed width font with a black text colour. To make this more visually appealing, click on the "Colors and Font" tab and adjust the settings. You can see my settings in the screenshot below. Obviously lighter text colours work better with darker desktop backgrounds and vice versa.
The Shell option on GeekTool works just like the Terminal. If you type
date into the Terminal and press enter, you should get exactly the same thing back as shown by GeekTool. Conveniently, the date Terminal command has a number of options to change the style of the date. As you can see, the default setting includes the time, time zone and year that I don't really want. The command for my preferred date format is date '+%a %e %B' which gives something like Wed 18 February. Apple has a list of formatting options here you can use to change it to whatever you want. You need to put a + at the start, followed by the symbols for the bits you want. You can but punctuation like commas between the symbols, and the whole thing has to be enclosed in single quotes.

This is where the iCalBuddy application comes in. Create a new geeklet by dragging the “shell” icon onto the desktop as before. In the Command box type
/usr/local/bin/icalBuddy eventsToday. This should bring up a list of today's events on the desktop. There are loads of customisation options for iCalBuddy, so I won't go through them all, but I'll show you mine. The command I use is:/usr/local/bin/icalBuddy -nc eventsToday | sed -e "s/*/--/" | sed -e "s/!/!!/"-nc part removes the calendar name in brackets because all my events are in the same calendar. The sed -e "s/*/--/" part changes the * at the start of each event to a -- because I think it looks better. The "sed" and "awk" commands are really useful for customising the output, but I won't go into much detail here. Just do a Google search for a tutorial if you want more information. For the different iCalBuddy customisation options, check out the man page.One customization to note is the "eventsToday+NUM" option. Replacing
eventsToday with eventsToday+3, for example, will display the events for the next three days in separate sections titled by the date.6. Add to do items
To do items work in pretty much the same way as the iCal events. The command to use is
/usr/local/bin/icalBuddy uncompletedTasks. Similar to before, the command I use is:/usr/local/bin/icalBuddy -nc uncompletedTasks | sed -e "s/*/--/" | sed -e "s/!/!!/"7. Add some titles
If you just want GeekTool to display some text, the easiest way to do it is to use the
echo command. Just create a new entry and use the command echo To Do List to make it display "To Do List" on the Desktop.8. Set the Refresh rate
The next thing to do is to set a suitable refresh rate for each item. It is worth noting that these command take very little system resources, and having them all update every 10 seconds produces absolutely no decrease in performance whatsoever that I've noticed. However, in principle you should only really make them refresh as much as you need them too. I've set all mine to update once an hour (3600). This means that the worst case scenario is that the information is wrong for up to an hour between midnight and 1am each night. If you like having the time displayed in the date command, you probably want that to update every second.
8. Make it pretty
Finally, you just have to change the font and colour of each entry and position them somewhere you want on the Desktop. I went for the far left as it's a place guaranteed not to get covered up by icons.
9. Go crazy
There are hundreds of things you can do with GeekTool, and it's definitely worth trying them out and seeing what you like. In the end, I only kept the iCal events and to do list, but you may like having constant updates of your uptime, running processes, CPU use, local weather maps, IP address, current iTunes track etc. Check out the Mac OS X Tips Geeklets site for more.
Text to Speech in Mac OS X
Since Mac OS X 10.4 Tiger, the amazing operating system has included many built in things. One of the many great things included with Mac OS X is called TTS (text to speech). I'll be covering an easy way to dive into text to speech. All you have to do is fire up Terminal.app (/Applications/Utilities/Terminal.app) and type in:
say 'text to say with no quotes'So if you type in:
say Hello WorldAnd hit return, then (as long as your speakers are turned on) your computer will 'say' hello world to you! A more advanced way to do this is to type in:
osascript -e 'say "some text" using "some voice"'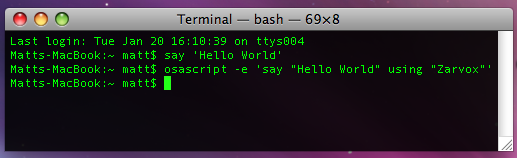
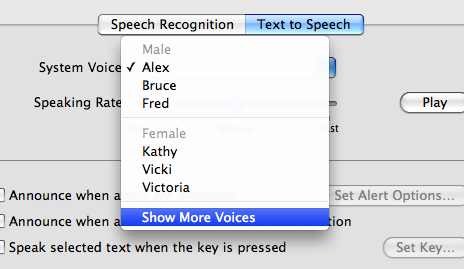
You can check the voices your system has in System Preferences in the Speech pane under the Text to Speech tab. You might have to select “Show more voices” at the bottom to get the full list.
[Matt adds: For any Cocoa application (Safari, TextEdit, etc.) there is a "Start Speaking Text" option under the Services menu (in the Application menu) that will speak your selection in the currently selected system voice. Great if you want a web page or long piece of text read to you. You can even assign a keyboard shortcut to it in the "Keyboard and Mouse" section of System Preferences. Also, since Leopard, Apple has added a new voice, Alex, which is much more realistic than the usual "robot" sounding voices that are available.]
Get the most out of your laptop battery
Over time, your battery holds less and less charge, meaning your laptop doesn't last as long between charges. Apple claims that their batteries are designed to retain 80% of their original capacity after 300 cycles.
You can check how many cycles your battery has done by looking in System Profiler. You can find this by clicking on the Apple menu in the top left and choosing About This Mac. In the window that appears, click the "More Info..." button. In the sidebar of System Profiler, click on Power to bring up all the details about your battery. The interesting part is the Health Information. (Note that the stats shown below are for a fairly new battery).
Charge remaining (mAh): 4940
Fully charged: Yes
Charging: No
Full charge capacity (mAh): 4940
Health Information:
Cycle count: 21
Condition: Good
If it says "Check Battery" under Condition, there is likely a problem with your battery. The good news is that if the cycle count is under 300, Apple are likely to replace the battery for free. If your laptop is under one year old, they will almost definitely do so. However, before seeking out a new battery, make sure to completely charge and discharge the battery at least one to check it is not a temporary problem.
If your battery is in good condition or is starting to show signs of aging, you will want to make sure you get the most out of it before you have to replace it. Here are a few tips to prolong the lifespan and battery life of your battery.
The best way to use your laptop on a day to day basis is to keep it fully charged as much as possible (i.e. plugged in), but run down the battery fully at least once per month. This is because it is important to keep the electrons inside moving occasionally. Doing this will make sure that your battery will continue to recharge to the maximum capacity for as long as possible.
To get the longest possible battery life, you should use your laptop between 10° and 35°C (50° to 95°F). More importantly, when storing your laptop you should keep it between -25° to 45°C (-13° to 113°F) even if you are not using it.
If you are going to store your laptop for a long time, Apple recommends you remove the battery from the laptop and store it at 50% charge. If you leave it fully charged or fully discharged you may find the battery loses a lot of capacity.
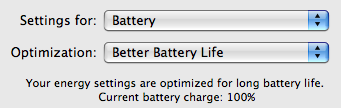
A simple method that can make your battery last a lot longer between charges is to tweak your System Preferences. Firstly, go to the Energy Saver Pane. Here, make sure the optimization menu is set to Better Energy Savings for when the laptop is powered by the battery. This will put the hard disk to sleep whenever possible, and reduce the laptop's CPU performance.
One trick that I often use if I am trying to squeeze an extra half an hour out of my battery is to reduce the brightness of the display. The simplest way to do this is to use the F1 key (F2 will increase the brightness again). Dim the screen to the lowest comfortable level, which should be pretty low especially if you are indoors.
You might also want to eject any CDs or DVDs you aren't using, quit as many applications as possible, disconnect any unused peripherals and turn off Bluetooth and Airport.
Change the default text for pretty much anything in OS X
Change the default new folder name
First, navigate to Macintosh HD/System/Library/CoreServices. In here, locate the Finder application. Right-click (Control-click) on it, and choose "Show Package Contents" from the contextual menu. In the window that appears, navigate through to Contents/Resources/English.lproj. A quick way of navigating here (you might end up doing it a few times) is to use the "Go to Folder" option in the Go menu. In the box that appears, paste the following line:
/System/Library/CoreServices/Finder.app/Contents/Resources/English.lproj/Find the file named "Localizable.strings" and drag it to the Desktop to make a copy. We are going to edit this copy on the desktop, and then copy it back into the English.lproj folder to replace the original version. You might want to make an additional copy of the file as a backup, just in case anything goes wrong.
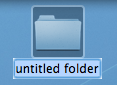
Open up the desktop version of the localizable.strings file using TextEdit. Scroll down to the line that starts with N2. it should say the following:
"N2" = "untitled folder";Now you can change the words "untitled folder" to anything you want. For something at the start of the alphabet, you could simply put "*untitled folder*".
Once you are done, save the file on the desktop and quit TextEdit. Finally, drag the file back to the English.lproj folder that you copied it from. Click Authenticate and type in your administrator password.
For changes to take place, you will have to relaunch the Finder, which can be done by holding down Control and Option, clicking the Finder icon in the Dock, and choosing Relaunch from the menu.
Suffixes for duplicates and aliases
These are done in exactly the same way as the new folder tip above. Only this time, change line N3 for aliases, or N4 for duplicates.In these cases, "^0" takes the place of the original file name. So, for a duplicate, the default is "^0 copy", meaning the duplicate of "file.doc" is "file copy.doc". As above, you can change this to anything you want. "copy of ^0" would mean the duplicate would work better with file extensions, giving "copy of file.doc". However, it wouldn't be next to the original file alphabetically.
Remember to relaunch the Finder when you are done.
Shorten the Finder's 'Show Item Info' text
One of the features I like about Mac OS X is the "Show item info" check box located in the View Options of the Finder. This works for all windows in icon view, and is therefore especially useful on the desktop. However, one problem with it is the text for Hard Drives is too long, unless you make the text size really small.You can solve this problem by editing the same localizable.strings file as above. Carry out the steps exactly the same, but search for the line "IV9" = "^0 free";. The best way to change this is to get rid of the word free, just leaving "IV9" = "^0";. You can see the result below.
Remove default Genres in iTunes
iTunes comes with a long list of genres, some of which many people will never use. Occasionally this may become annoying, for example when using the autofill feature.To remove some of the genres, you have to edit the localizable.strings file within iTunes, rather than within the Finder. You can find this by going to iTunes in the applications folder, right-clicking and choosing "Show Package Contents". In here, navigate to Contents/Resources/Englihs.lproj where you will find the localizable.strings file. As before, you will have to copy it to your desktop before editing.
Open up the file in TextEdit. You'll find the list of genres under the line
/* ===== Genres ===== */. To remove a genre, don't bother deleting it, just in case you ever want it back. Simply "comment" out the line, by putting a /* at the start, and a */ at the end. For example, to remove Techno, you will simply replace the line with /* "9200.019" = "Techno"; */.As always, quit and reopen iTunes for changes to take effect.
Change the iTunes sidebar labels
The most obvious reason for wanting to do this is if you would prefer the labels to be lowercase. Using the same localizable.strings file as in the genre tip above, find the following lines:"135.011" = "LIBRARY";
"135.012" = "DEVICES";
"135.013" = "STORE";
"135.014" = "PLAYLISTS";
You can change these to anything you want, or simply remove the capitalization.
Change the Finder's sidebar labels
You can do exactly the same thing in the Finder's sidebar. The file you need to edit is localizableCore.strings, located in exactly the same place as the localizable.strings file inside the Finder application. The lines you want to change are the following:"SD5" = "DEVICES";
"SD6" = "SHARED";
"SD7" = "SEARCH FOR";
"SD8" = "PLACES";
Customize System Preferences
All the System Preferences panes are grouped into five categories - Personal, Hardware, Internet and Network, System and Other. It is quite easy to change these category names by going inside the System Preferences package, which is in the Applications folder. Inside it, navigate to the English.lproj folder inside the Resources folder. In here, find a file named NSPrefPaneGroups.strings and drag it to your desktop. Now open this file up in TextEdit and you'll see the following lines:"personal" = "Personal";
"digitalHub" = "Digital Hub";
"hardware" = "Hardware";
"net" = "Internet & Network";
"system" = "System";
"addons" = "Other";
Don't change the words on the left, these are the ones used by System Preferences. You can change the words on the right. These are the ones displayed in the System Preferences window. Just make sure you don't delete any quotes or semicolons. Also, ignore the "Digital Hub" entry. This isn't used anymore and is probably just left over from a previous version of the operating system.
Now save the file and drag it back to the English.lproj folder from the Desktop. You will have to Authenticate this action with your administrator password.
Dock Menu items
For a bit of fun (I can't see why else) you can change the items in the menus you get when right-clicking on icons in the Dock. The Dock application is located in /System/Library/CoreServices. Right-click on it and choose "Show Package Contents". In the window that appears, navigate to Contents/Resources/English.lproj where you will find DockMenus.strings. Copy this file to the desktop to edit it.Some of the lines you might want to edit are the "Application Not Responding" and "Force Quit" lines to something more reflective of the feeling you get when you see them.
Change Unexpectedly Quit message
With some tinkering it is possible to customize Mac OS X alert messages and dialog box text. For a bit of fun, you can change the message that appears when an application crashes to something more humorous.Open up your hard drive and navigate to /System/Library/CoreServices. Find the Crash Reporter package and open it by right-clicking and choosing Show Package Contents.
In the window that appears, navigate to Contents/Resources/English.lproj and find Localizable.strings. Copy it to your Desktop and open it up in TextEdit. Near the bottom of the file you will see the line -
/* Unexpectedly quit dialog */
In the lines that follow this it is fairly obvious how to change the message. The symbol "%@" will make the message display the crashed Application's name, and "\n" will make a line break. Save the file and then copy it back to the package to replace the old version. You will have to enter your administrator password.

5 Commonly Overlooked System Preferences
Number 5 on the list, smooth scrolling, is something I have never noticed before. You can find it in the Appearance section of System Preferences. When enabled, it means that pushing page up/down or hitting space bar makes the page glide instead of jumping straight to the next position. This small feature is fantastic when reading long web pages or news feeds, as you can just tap space to scroll down a page while keeping a good idea of where you are on the page.

The other 4 overlooked preferences are a bit more well known, but are probably still pretty useful for newer users. Head over to mactips.org for the full article.
Install hidden screen savers in Leopard
While those ones are automatically included as screen savers, there is actually a whole folder full of other compositions hidden in the system files. These files simply need to be dragged onto the Screen Saver section of System Preferences to install them.
To find these hidden screen savers, go to Macintosh HD, and navigate to /System/Library/Compositions. In here there are almost 90 Quartz Composition files. They aren't specifically made to be screen savers (it's actually a collection of iChat effects, slideshow transitions, image effects and iTunes visualizers) but some of them work just fine. When you find one you like, open up System Preferences and go to the Screen Saver section. Now just drag the file you have chosen onto the screen saver preview on the right. I have found that the following files work best:
Defocus.qtz
Fall.qtz
Floor.qtz
Grid.qtz
Image Hose.qtz
Kaleidescope.qtz
Moving Shapes.qtz
Stix.qtz
Travelator.qtz
Wall.qtz
Admittedly, Floor is pretty boring, and Stix is actually an iTunes visualizer, but they work none the less. Many of them allow you to change the options in from in System Preferences. For example, you have to choose an image for Kaleidoscope, or it will just display a blank screen.
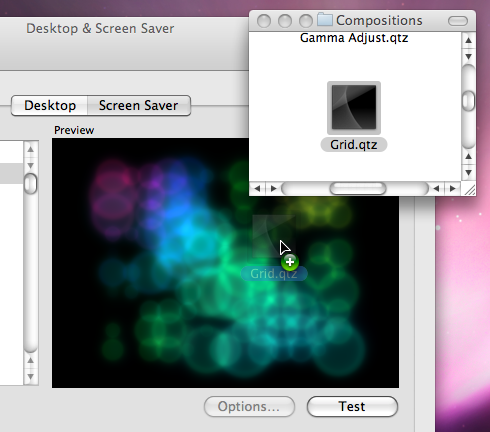
There are even more compositions available in the Developer Tools. You can install the Developer Tools from the Mac OS X install disk. If you don't have the Developer Tools installed, it means you probably don't need them. It's overkill to install 2.5 GB of tools you will never use, just for a few screen savers. Instead, you can just install the examples. On the install disk, go to /Optional Installs/Xcode Tools/Packages and install DevExamples.pkg.
Take a look in /Developer/Examples/Quartz Composer/Compositions/Graphic Animations. Some of my personal favourites, "Scanner" and "Static" are in here. There are also two purpose built screen savers included with the Developer Tools, located in /Developer/Examples/Quartz Composer/Compositions/Screen Savers. "Retro" takes a picture of your current screen, gives it a sepia tone and bounces it up and down. "Security" takes pictures using your iSight and displays them in a grid. As with the other files, simply drag them to the screen saver preview in System Preferences to install them.
Move all Windows to the Main Display
Luckily, this blog post has the solution - a simple AppleScript. When run, it automatically finds all the windows that are off the edge of the screen and clusters them in the top left of the main monitor. To run it, start by opening up Script Editor (located in Applications/AppleScript) then paste in the following:
property processesToIgnore : {}
tell application "Finder"
set _b to bounds of window of desktop
set screen_width to item 3 of _b
set screen_height to item 4 of _b
end tell
tell application "System Events"
set allProcesses to application processes
set _results to ""
repeat with i from 1 to count allProcesses
set doIt to 1
repeat with z from 1 to count processesToIgnore
if process i = process (item z of processesToIgnore) then
set doIt to 0
end if
end repeat
if doIt = 1 then
tell process i
repeat with x from 1 to (count windows)
set winPos to position of window x
set _x to item 1 of winPos
set _y to item 2 of winPos
if (_x < 0 or _y < 0 or _x > screen_width or _y > screen_height) then
set position of window x to {0, 22}
end if
end repeat
end tell
end if
end repeat
end tell
Click the Compile button at the top to make sure the script is OK. If you receive an error message, check for any problems that may have occurred in the copy/paste process.
For the script to work, you will need to enable access for assistive devices. You can do this by going to the Universal Access section of System Preferences. Check the box at the bottom that says “Enable access for assistive devices”.
Now, when you click the Run button above the script, any off-screen windows will be placed in the top left of the main monitor.
One problem with this is that you may have some applications that keep windows off-screen on purpose. One example of this is Firefox, which gives you a blank square in the top left when you run the script. The first line of the script allows you to get around this by excluding specific applications from the script. For example you could change it to
property processesToIgnore : {"Firefox"}
or
property processesToIgnore : {"Firefox", "otherApp", "anotherOne"}
Now, opening up the script and clicking the "Run" button every time you disconnect your second monitor is quite time consuming. There are a couple of ways to run it much more quickly. The first is to add it to your scripts menu. If you haven't already enabled this, you can do so by navigating to Macintosh HD/Applications/AppleScript and opening up AppleScript Utility. Near the bottom of the window that appears, check the box that says "Show Script Menu in Menu Bar". To add your script to the menu, you have to save it in a specific location. Go to the Library folder inside your user folder and look for a folder called "Scripts". If it isn't there, create it. Save the script here.
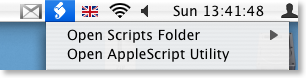
An alternative way to run the script is to save it as an application. With the script open in Script Editor, go to the File menu and choose Save As. Change the File Format drop-down menu to Application and then save it. Now when you double-click the script, it will instantly run. Save it somewhere you can easily access it, like on the desktop.
Reset a Lost OS X Account Password
If you still know the Administrator Password
If you still know the password to an administrator account, it is very simple to reset any standard or managed user's password. While logged in as the administrator, open up System Preferences and click on the Accounts section. All the accounts on the computer should be listed down the left hand side. Under each account name it should say Admin, Standard or Managed. If the lock at the bottom of the window appears locked, click on it to allow changes to the preferences.
Resetting an Administrator Password
Obviously, if you don't have access to an administrator account, you can't carry out any of the above steps. If you have forgotten the Administrator password or you can't log into your Mac at all, you will need to use the Mac OS X Install Disc.
Enter the Mac OS X Install Disc that is the closest version to that running on the Mac. For example, if you are running Mac OS X 10.6 Snow Leopard, you should enter the Snow Leopard install disk, not any earlier ones. Restart the computer, and hold the C key as it starts up. This might take longer than usual, and you can release the C key as soon as the Apple logo appears on the screen. When the window appears, choose your language and click the right arrow.
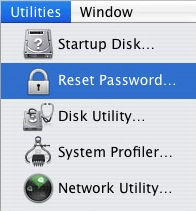
The next step depends on what version of Mac OS X you are using. Generally you need to choose Reset Password from the Utilities menu. For earlier versions of Mac OS X, choose Reset Password from the Installer menu.
Choose your Hard Drive from the top and then choose the Account from the drop down menu. Be careful not to select System Administrator, as this is actually the root user, not the administrator account on your Mac. Now enter the new password, click Save, quit the Installer and restart the computer.
Note that there are a few issues with this method. Firstly, it does not reset your keychain password. You will have to do this separately. Secondly, do not attempt this if you have FileVault enabled. To reset an FileVault protected account, you need the master password.
Resetting a FIleVault Protected User's Password
If you have enabled FileVault to encrypt your Account, you need to know the master password that you set when you enabled it. This is the password that the administrator should know that allows you to reset any password on the computer. If you have forgotten the master password, unfortunately your data is lost forever.
If you know the master password, start by attempting to log into your account. When you get the password wrong three times, you will be able to click “Forgot Password”. Now you will have to enter the master password and then a new login password for your account.
If you have lost the Mac OS X install Disc
If you have lost the install disc, don't try and use one from an earlier version as this might permanently block you out of your account. You really have two options: Firstly, you could buy a new copy of Mac OS X (try Amazon). Secondly, there is a way of resetting an administrator password without the disc if you are running Mac OS X 10.4 Tiger. Note: Do NOT do this with a FileVault protected account, or your data will be lost forever.
First, note the short name of the account. This is the same as the name of its home folder, but not necessarily the name that appears in the login window. Restart your computer, and while it is starting up, hold Command-S. This will start up your Mac in Single User Mode. Once it has started up, you will need to enter three lines of code. Enter
sh /etc/rc and press return. Then enter passwd yourusername and hit return. Now you will have to enter a new password twice. What you type won't appear on screen, but it is working. Once you have done this, type reboot and hit return.Similarly to the Install Disc method,this will not reset your Keychain password. You will have to do this separately.
Recovering Lost Users
In general, there seems to be two reasons why a user account and their home folder can disappear. The first is simply that you have (accidentally) deleted the user. Any administrator account has the ability to do this from the System Preferences.
The second way occurs when upgrading or installing Mac OS X from the install disks. If you inadvertently chose an "Archive and Install" installation, all users are deleted unless you choose to preserve them.
Luckily, in both of the above cases, Mac OS X keeps a copy of the user folder in case you want to get it back.
Recovering Deleted User Folders
In the Accounts section of System Preferences you can delete a user by selecting them and clicking the minus button. You are presented with two options - to keep a copy of the user folder (the normal way) or to delete immediately. Unfortunately, if you chose to delete an account immediately, it is almost impossible to retrieve it.

However, it is more likely that you kept a copy (the option with the big blue "OK" button). This copy is kept in the Users folder under "Deleted Users". You must be logged into an administrator account to have access to this folder. Look in here for the name of the deleted user you want to recover, and double click it. This will mount a disk image on the desktop that essentially the deleted user folder. Hold option and drag this disk image from the desktop to the Users folder in your Hard Drive. Now you have restored the user folder, but you still need to create an account for it. Skip down to "Recreating the Account" to do this.
Users lost during an Archive and Install
When you perform an archive and install without preserving users, your user folders are archived away along with the rest of the existing system files for your Mac. A new folder called "Previous Systems" is created in Macintosh HD that contains all the users from before the archive and install. If you have done an archive and install multiple times, you will have a number of previous systems. Choose the one that contains all the users you wish to restore. In here is a users folder containing each of the deleted user folders. Drag the ones you wish to restore to the users folder in Macintosh HD. Now you have restored the user folders, but you still need to create accounts to be associated with them.
Recreating the Account
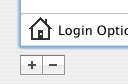
If you just want to retrieve certain files from the deleted user, you don't need to go through the hassle of creating a new user. From any administrator account you can open up the deleted user's disk image or Previous Systems folder and copy specific files from it.
Disable Volume Change Feedback
You can turn this sound off from the Sound section of System Preferences, but this is a bit time consuming to do every time you want to quietly change the volume.
![]()
Luckily there is a keyboard shortcut to silence the volume changing beep on a case by case basis. If you hold the Shift key while changing the volume, you will get no audio feedback, meaning you won't bother anyone with the clicking sound.
You can also get this to work the other way round. If you turn off the feedback in the Sound section of System Preferences, the clicking sound will only play if you hold down shift before changing the volume.
(This is vaguely related to a previous tip - holding option before pressing the volume change keys will open up the Sound System Preferences.)
Get Custom Audio or Visual Alerts
Whenever Mac OS X wants to get your attention, it plays an alert sound. For example it does this when a dialog box appears, when you receive an email and as an iCal alarm. Your Mac comes with a nice set of alert sounds, but after a while they may get a bit boring.
You can add your own alert sounds by placing audio files in a certain folder. Before you do that however, you will need to convert your sound file to the AIFF format using iTunes. Open up iTunes and choose Preferences from the iTunes menu. In the Advanced section, click on the Importing tab and choose AIFF encoder from the pop-up menu. Click OK.
![]()
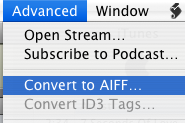
If the audio file you want to use is in iTunes, select it and then click on the Advanced menu. In here choose Convert selection to AIFF. If you audio file is somewhere else, hold Option while clicking on the Advanced menu and choose Convert to AIFF. This will bring up a dialog that will allow you to navigate to your audio file. Once the file is done converting, go back to the preferences and change the "Import Using" pop-up menu back to AAC.
Now we have to get this file to show up in the Alerts list in System Preferences, Mail and iCal. Open up your user folder, look in the Library for a folder called Sounds and drag the sound here from iTunes. Your new alert should now be in the list in the Sounds section of System Preferences.
Make your alerts visual
An alternative to the audio alert is a visual alert, which is basically a screen flash. You can turn this on in the Universal Access section of System Preferences, under the Hearing tab. This will flash the screen as well as playing an alert sound. If you want to get rid of the sound and just have the flash, go to the Sounds section of System Preferences and move the Alert Volume Slider all the way to the left.
![]()
Annoyingly, this will also mute the feedback you get when the volume is changed and the interface sound effects (like when you move something to the trash). If you're fine with this then use the method above. However if you still want these other sound effects, there is a better (but more complicated) solution.
Mac OS X will also flash the screen if for some reason it is unable to play the selected audio alert. To make this happen, open up TextEdit and press Command-Shift-T to convert the document to plain text. Save this empty file as Flash.aiff in the sounds folder inside your Library. If a dialog asks you which extension to use, choose .aiff.
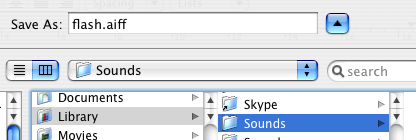
Now if you look in your alerts list in System Preferences there will be an alert called Flash that does exactly that - flash the screen. This is because Flash.aiff isn't really a sound file. When your Mac tries to play it and can't, it flashes the screen instead to make sure you still see an alert.
Ask a Question
The Ask a Question page that I recently added to the site has been surprisingly popular. Here's a few of the latest questions. If you have a question or tip about Mac OS X use the corresponding link in the sidebar to send it to me.
Dan writes:
My one year old daughter attacked my wife's iBook, and has somehow changed the settings so that the computer has gone 'negative' — everything looks like a photographic negative — desktop background, icons, the dock, everything. Does anyone know how to get this back to normal?
The "negative" effect is a feature of the Universal Access preferences. To quickly reverse it, press Control-Option-Command-8. You can change all the settings for this in the System Preferences, under the Universal Access pane. For more information on this, check out this previous tip on Universal Access.
Ignacio writes:
Hello, I accidentally erased the Ical application, I would like to know how to install it again.
The iCal application is included on the Mac OS X install disks that came with your Mac. However, technically you would have to reinstall the entire operating system to get it back.
A shareware application called Pacifist ( http://www.charlessoft.com/ ) allows you to open up the installer files and just install a single application. This should work for iCal or any other application included with Mac OS X.
Sean writes:
I have a delightful neighbour who's 90 years old who uses the net daily. She is sight impaired. I need to find a method of increasing the width of the scrollbars and their arrows to a size she can use. She recently switched from a PC to the Mac. She loves the Mac. It was easy to set the scrollbar size on XP. How can this be done on the Mac? Her Mac is a beige desktop G3 with lots of memory and OS X 10.2.8.
The only tools for the sight impaired that come with Mac OS X are the settings in the Universal Access pane of the System Preferences (in the Apple menu). There is an option here for zooming that zooms in on the cursor when you press a keyboard shortcut. However, this isn't exactly what you want and it involves learning a load of keyboard shortcuts.
Another option is to change the screen resolution. Go to the Displays pane in the System Preferences and choose a lower number from the list of resolutions. The drawback of this method is that everything gets bigger, and there is less room for viewing things like large photos.
I understand that neither of these are perfect solutions, but they may be worth a try.
Peek inside Mac OS X Packages
Packages are great because they allow the developer to store all the important related files inside the application. They are also great because they make it very easy to tinker with the way applications work.
To view or edit a package's contents, Control-click (or Right-click) on the application and select Show Package Contents from the context menu. This will bring up a finder window containing a folder named Contents. Inside here is the actual package contents.
The following are a few examples of what you can do inside Mac OS X packages.
Warning: It is a good idea to keep a backup of any file you modify. To do this, just Option-drag the file to copy it to a safe place before making any changes to the original.
1. Change Unexpectedly Quit message
With some tinkering it is possible to customize Mac OS X alert messages and dialog box text. For a bit of fun, you can change the message that appears when an application crashes to something more humorous.
Open up your hard drive and navigate to /System/Library/CoreServices. Find the Crash Reporter package and open it by Control-clicking (or right clicking) and choosing Show Package Contents.
In the window that appears, navigate to Contents/Resources/English.lproj and find Localizable.strings. Copy it to your Desktop and open it up in TextEdit. Near the bottom of the file you will see the line -
/* Unexpectedly quit dialog */
In the lines that follow this it is fairly obvious how to change the message. The symbol "%@" will make the message display the crashed Application's name, and "\n" will make a line break. Save the file and then copy it back to the package to replace the old version. You will have to enter your administrator password.
2. Change an application's default icon
You probably know how to change an application's icon by opening up its Get Info window (Command-I), clicking on the icon and pasting a new one over it. You can use the Cut tool (Command-X) to remove this icon and return to the default. To change this default icon, you have to delve into the package. The icon file is stored in the Resources folder within the package contents, and normally has the same name as the application with the .icns extension. You can replace this file with any other icon file, whether it is downloaded from the Internet or taken from another application.
If you dislike the way the iCal icon always displays the date as July 17 when it isn't open, there is an alternative icon inside the iCal package. If you look inside the Resources folder you will find two icons - App.icns and App-empty.icns. To change which one iCal uses, simply rename App.icns something like AppJul17.icns and make a duplicate of App-empty.icns named App.icns.
Some people also dislike the iTunes 7 icon. This Mac OS X Hints article describes how to change it back to the one used in iTunes 6.
3. Open help files in a Web browser
Anyone who has ever used the Mac OS X help browser will admit that it is a little on the slow side. Annoyingly, it also lacks a Save command, meaning you have to go through the slow process of loading it up and finding what you want every time. Luckily, the help pages are just HTML files stored away inside the application's package. This means you can open them up in Safari, which is much quicker for browsing and allows you to save bookmarks and Save pages.
For example, to open up the iPhoto help, open up the iPhoto package in your Applications folder. Then navigate to the English.lproj folder inside the Resources folder. Here you'll find a folder called iPhoto Help with a file named iPhoto Help.htm inside. Double-click on this file to open it up in Safari.

Annoyingly, every now and again a link will open up in Help Viewer, but generally you can browse the help files from within Safari.
Things like Airport, Applescript, Bluetooth, iPod and Mac OS X itself don't have an Application package to store the help files in, so these are located in the Library folder. To find them, go to your Hard drive and look inside Library/Documentation/Help. Each of the .help files in here is a package.
4. Change Text Clipping Behaviour
5. Customize System Preferences
All the System Preferences panes are grouped into five categories - Personal, Hardware, Internet and Network, System and Other. It is quite easy to change these category names by going inside the System Preferences package, which is in the Applications folder. Inside it, navigate to the English.lproj folder inside the Resources folder. In here, find a file named NSPrefPaneGroups.strings and drag it to your desktop. Now open this file up in TextEdit and you'll see the following lines:
"personal" = "Personal";
"digitalHub" = "Digital Hub";
"hardware" = "Hardware";
"net" = "Internet & Network";
"system" = "System";
"addons" = "Other";
Don't change the words on the left, these are the ones used by System Preferences. You can change the words on the right. These are the ones displayed in the System Preferences window. Just make sure you don't delete any quotes or semicolons. Also, ignore the "Digital Hub" entry. This isn't used anymore and is probably just left over from a previous version of the operating system.
Now save the file and drag it back to the English.lproj folder from the Desktop. You will have to Authenticate this action with your administrator password.
6. Modify iCal alarm message
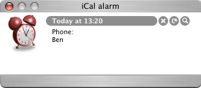
Create your own keyboard shortcuts
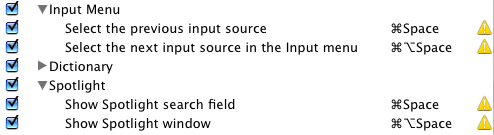
To do this, open up System Preferences and go to the Keyboard and Mouse pane. From the "Keyboard Shortcuts" tab you can view and edit all existing keyboard shortcuts for the system. To change any of them, double click on the current key combination then type your own. If the one you set clashes with any others, a warning icon will appear next to it. To disable a shortcut, uncheck the box next to it on the left.
Note that this list does not contain any application specific shortcuts. At the bottom there is a section for "Application Keyboard Shortcuts" but this is probably empty. The only ones that appear here are the shortcuts that you create. Click the small plus (+) button below the list to bring up a dialog box that allows you to choose an application and menu command and assign a keyboard shortcut to it.
The drop down menu contains all the applications in the applications folder, but if you want another one, choose other from the bottom of the list. Next enter the exact name of the menu item you want to create the shortcut for. This can be anything that appears in an application's menus, but don't forget to include the "..." at the end if the item has it (e.g. Customize Toolbar...").
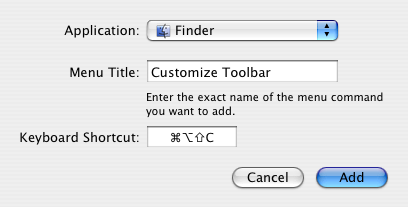
The keyboard shortcut can use a combination of the Command, Control, Option and Shift keys, as well as any of the function keys (F1, F2 etc.). For some of the nested menu items it isn't obvious what to type. For example, to choose the menu item "Arrange by --> Kind" you have to type "By Kind".
After entering all the details, click add and your shortcut will be added to the bottom of the list under "Application shortcuts". You will have to quit and reopen the application for everything to start working. To do this for the Finder, Control-Option click on its Dock icon and choose Relaunch.
Automate your Mac
The first thing to do is to make your Mac turn on by itself. You can set it to do this in the Energy Saver preference pane in System Preferences. Just load it up and click "schedule" and choose a time to start up (and/or shutdown) and on which days you want this. This will also wake up your Mac if it is asleep, but this might not work if you have a password enabled screensaver.
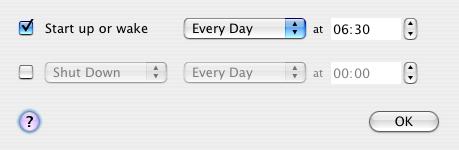
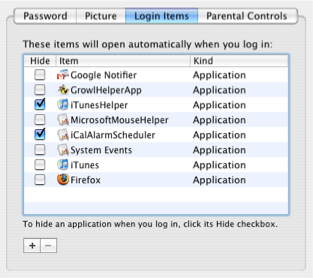
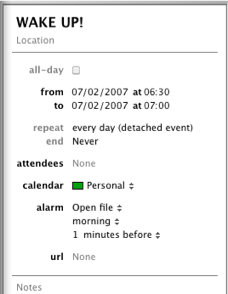
As far a scheduling specific applications goes, you have to use applescripts or automator actions for most of them. If you aren't completely super lazy, it is pretty straightforward to create a workflow in automator that opens up a list of websites, or starts an iTunes playlist going. To get this worklow to be carried out at a certain time, create an event in iCal and set an alarm. As the alarm action, set it to open up the automator file.
However, in some applications you can get the same results without making workflows or scripts. For example, in Firefox you can set multiple websites as your homepage, and all of these will open up when you start Firefox. There are two ways to do this. The first is to create a folder of bookmarks with all the sites you want to load on startup. After creating this folder, go to the Firefox preferences and click "use bookmark" to select the folder. The alternative way is to type in each address into the homepage field with a | (pipe) in between. Be sure to set Firefox to load your homepage on startup using the dropdown menu.

Finally, some applications have built in scheduling capabilities. Microsoft Entourage has tools to set Send and receive schedules that check for email at certain times and Apple's Backup has its own scheduling feature to carry out automatic backups however frequently you want.
You can use all of these features to automate your Mac and make sure that you never have to carry out a tedious task again.
Full Keyboard Access
Under the "Full Keyboard Access" section at the bottom, choosing "All controls" will allow you to focus on things like pop-up menus and buttons too.
Now, when a dialog box opens up, there will be a faint halo around one of the buttons, which you can move by pressing the tab key. Pressing the space bar will select whatever has the focus. The up and down arrow keys now navigate menus, and right and left arrows for folders and subfolders.
Universal Access
While the preference pane is useful for browsing through the features, all parts of it are accessible through keyboard shortcuts, which are a much quicker way of turning the features on and off.
Firstly, you can invert the display by pressing Control-Option-Command-8. This changes most windows from black writing on a white background, making your display look much more funky. Pressing the keyboard shortcut again will change your screen back to the way it was.
Secondly the zoom function can be enabled and disabled by pressing Command-Option-8. Once enabled, this allows you to press Command-Option-Dash(-) and Command Option-Equals(=, also has the + on it) to zoom in and out. These are the two keys next to the delete key, not the ones on the keypad to the right. I could see this being especially useful when giving a presentation or tutorial if you want to highlight a particular area of the screen.
Scheduled Startup and Shutdown
This is just about the only way to schedule things without buying other software or using iCal. Basically you can set your computer to come on in the morning on weekdays and go off in the evening for example.
I combine this with a locked screen saver. In the evening I start my "Big Clock" screensaver, then put my mac to sleep. In the morning it wakes up at a specified time, and loads the password dialog box. Then, when no password is typed in, it goes to the screen saver after 30 seconds. This means when I wake up in the morning I can look over and see the time in big bright letter next to me, without them on all night to wake me up.
You can also combine this with an applescript or automator actions to play music or load web pages every morning. After writing the script to do this, set a daily alarm in iCal that loads it every morning, but make sure to make it a minute later than the time your mac wakes up from sleep.
Keyboard Shortcuts
On a laptop the use is printed on the keys - keyboard brightness, sound volume and display brightness. On a desktop however, the only keys that show you what they do are the volume settings. F14 and F15 control the display contrast, so pressing Option-F14 (or F15) will take you to the display preferences. Of course desktops don't have backlit keyboards, so you can't do that one.
Sleep, Restart and Shut Down also have their own keyboard shortcuts. To put your computer to sleep, press Option-Command-Eject. To Restart, press Control-Command-Eject. To Shut Down, press Control-Option-Command-Eject. These are obviously very complicated to make sure you don't accidently press them whilst doing something else.
Multiple Desktop Images
In the System Preferences it is easy to make your desktop cycle through a series of images. Just open up System Preferences and click the desktop and screen saver section.
At the bottom of the desktop tab there is an option to change the picture for a given amount of time. With this selected, your desktop will cycle through the images in the iPhoto album or folder you have selected.
But what if you want a selection of photos that aren't in an album together, or want to use multiple albums? Open up iPhoto and click on any image. Clicking on the "desktop" button at the bottom will set this image as your desktop background. Select multiple images using shift-click (if they are in a row) or command-click (if they are separated by other photos), and click the desktop button. If you open up system preferences now, you can see that your desktop is set to cycle through these images.
An added quirk is that your screen saver is also set to make a slideshow of these pictures.