Bulk edit Address Book contacts
Unfortunately Address Book doesn’t support bulk editing a large number of contacts at once, but there are a couple of clever workarounds to achieve the same effect. Here are two different methods, the first using TextEdit and the second using AppleScript.
Manually editing a vCard file
This method is great if you have a group of people who share the same information. For example, if you have a whole load of people at the same address, and they have all moved to a new address, or if a group of people share a phone number and they recently changed it to something new.
The first thing to do is to make a backup of your Address Book. Open up Address Book and choose Export - Address Book Archive from the File menu. If anything goes wrong in the following process, you can always just find this file and double-click it to restore your original Address Book.
Next, create a contact group by clicking on the plus (+) icon in the bottom left. Add all of the contacts you want to bulk edit into this group by dragging their names across from the contact list. Once this is done, drag the group from Address Book onto the Desktop to create a single .vcf file that contains contact information for everyone in the group.
The next step is to open this .vcf file with TextEdit. Either open TextEdit and choose “Open...” from the File menu, or just drag the .vcf file onto the TextEdit icon in the Dock. Now we are going to use TextEdit’s Find and Replace feature to find the existing information and replace it with the new information.
Choose “Find...” from the Edit menu or press Command-F. In the “Find” text field, enter the old information, such as the old address or phone number. You might have to look in the file to see how this is formatted. For example, addresses have semicolons to separate lines like
item2.ADR;type=HOME;type=pref:;;8 High Street;Earls Court;London;SW5 9EK;UK
Press the Next button a few times to check that it is entered correctly, then enter the new information in the “Replace with” field. Now just click the “Replace All” button and every instance of the old information should be replaced with the new information. Check the file to make sure it looks correct, and then save it.

Finally, go to the Desktop and double-click on the .vcf file to import the contacts back into Address Book. You will be warned that the contacts are duplicates and will be updated. If you want, you can click “Review Duplicates...” to check that the changes are correct, or you can just click Import.
Using AppleScript
This second method is actually more flexible, but it does require that you get familiar enough with AppleScript to create your own script or modify one of my examples to suit your needs.
Start by opening up AppleScript Editor (located in Applications/Utilities). This is called Script Editor and is located in Applications/AppleScript if you are using Leopard or earlier.
Copy and paste the following lines into the AppleScript Editor window, and click the Compile button. If the AppleScript has been entered correctly, you should receive no errors.
tell application "Address Book"
    set peopleToChange to people whose (street of first address) contains "321 Old Street"
    repeat with thePerson in peopleToChange
        set (street of first address) of thePerson to "123 New Street"
    end repeat
    save
end tell
One of the great things about AppleScript is that it is designed to be readable by someone who knows nothing about AppleScript. Here’s a walk through what the above script does.
The first line says that we are about to tell Address Book to do something. The second line finds all the people in your address book whose street of their first address (people can have more than one address) contains “321 Old Street.” It then stores a list of all these people under the name peopleToChange. The third line says that we are going to go through the list peopleToChange one item at a time, and we will refer to each item in the list as thePerson. The next line sets the street of the first address of thePerson to “123 New Street.” Then the fifth line says we are finished going through the list peopleToChange, the sixth line saves the changes, and the last line says we are finished telling Address Book to do something.
You will have to create your own AppleScript to fit your exact needs, but the general structure of it will be similar to the above example. When you have created the script you want to use, just press the Run button to run the script and make the changes. Included below are a few more example scripts.
Find and replace phone numbers
tell application "Address Book"
    repeat with i from 1 to (count every person)
        set phoneProperties to properties of phones of person i
        repeat with j from 1 to (count of phoneProperties)
            if value of item j of phoneProperties contains "020 6704 3205" then
                set value of item j of phones of person i to "020 1523 6843"
            end if
        end repeat
    end repeat
    save
end tell
Clear the Notes field for every contact
tell application "Address Book"
    repeat with i from 1 to (count every person)
        set note of person i to ""
    end repeat
    save
end tell
A more advanced address replacement script
tell application "Address Book"
    repeat with i from 1 to (count every person)
        set theAddresses to properties of addresses of person i
        repeat with j from 1 to (count of theAddresses)
            if street of item j of theAddresses contains "321 Old Street" then
                set street of item j of addresses of person i to "123 New Street"
                set city of item j of addresses of person i to "NewCity"
                set zip of item j of addresses of person i to "12345"
                set country of item j of addresses of person i to "USA"
            end if
        end repeat
    end repeat
    save
end tell
Replace googlemail.com emails with gmail.com
tell application "Address Book"
    repeat with i from 1 to (count every person)
        set theEmailAddresses to properties of emails of person i
        repeat with j from 1 to (count of theEmailAddresses)
            if value of item j of theEmailAddresses contains "@googlemail.com" then
                set oldAddress to value of item j of theEmailAddresses
                set AppleScript's text item delimiters to {"@"}
                set firstBit to first text item of oldAddress
                set newAddress to firstBit & "@gmail.com"
                set value of item j of emails of person i to newAddress
            end if
        end repeat
    end repeat
    save
end tell
You can find more information about AppleScript in Address Book by going to “Open Dictionary...” in the File menu in AppleScript Editor and choosing Address Book from the list.
Top 15 Terminal Commands for Hidden Settings in Snow Leopard
Every time Apple brings out a new version of OS X, we compile a list of our favourite Terminal commands for enabling hidden features and changing hidden settings (here are the lists for Tiger and Leopard).
For those who are new to Terminal Commands, here's a quick run down of how to use them. Don't worry, it's really easy. Start by opening up Terminal, located in the Utilities folder in the Applications folder. In the window that appears, paste in one of the lines provided below, and then hit Return. For the changes to take effect, you need to restart the application concerned. For applications like the Dock or Finder, it is easiest to just type killall Dock or killall Finder into the Terminal to restart them. To reverse the changes, you just need to change the last word of the command and run it again. If the last word is YES, change it to NO, change 1 to 0, and change TRUE to FALSE and vice versa for all.
1. Folder previews in Quick Look
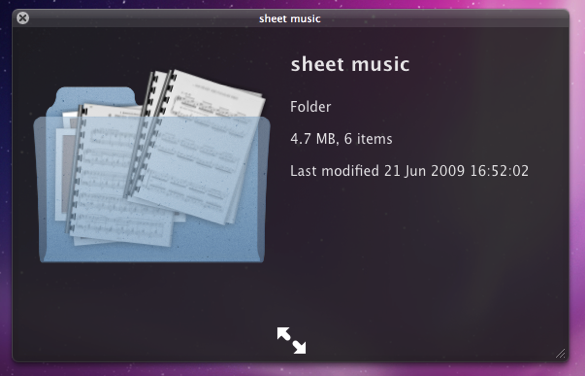
This is my favourite hidden feature in Snow Leopard. When enabled, using Quick Look (hit the space bar) on a folder will show you a preview of the folder's contents inside a translucent folder icon. The previews of the files inside the folder also cycle through so you can see all of them. Just use the following command:
<code>defaults write com.apple.finder QLEnableXRayFolders 1</code>
You will need to restart the Finder, either by typing killall Finder into the Terminal or by Control-Option-clicking on the Finder in the Dock and choosing Relaunch.
2. Globally enable Text Substitutions
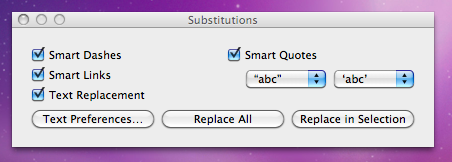
You may have realised that the new text substitutions feature in Snow Leopard isn't enabled in all applications by default, most noticeably in Safari. To enable it , you need to right-click on a text box and choose Substitutions then Show Substitutions. To globally enable text substitutions, use the following three commands one at a time. The first one will enable substitutions, while the second will enable dash replacement and the third will enable spell checking.
defaults write -g WebAutomaticTextReplacementEnabled -bool true
defaults write -g WebAutomaticDashSubstitutionEnabled -bool true
defaults write -g WebContinuousSpellCheckingEnabled -bool true
If you decide there are some specific applications where you want to disable these again, you can do it in the normal way. As always you will need to restart each application for the changes to take effect.
3. Bring back AppleScript Studio palette
As of Snow Leopard, AppleScript Studio has be deprecated in favour of AppleScriptObjC. You can still work on AppleScript Studio projects, but you can't create new ones, and the AppleScript Studio palette in Interface Builder is gone. To bring it back, use the following command:
defaults write com.apple.InterfaceBuilder3 IBEnableAppleScriptStudioSupport -bool YES
4. Disable "focus follows mouse" in Terminal
In Leopard there was a Terminal command to make the Terminal's window focus change with mouse movement. If you had previously enabled this, you will find things don't work quite right in Snow Leopard when you use Command-Tab to switch between applications in different spaces. To fix this, you will need to disable the focus follows mouse behaviour using the following command:
defaults write com.apple.Terminal FocusFollowsMouse -string NO
5. Force Dictionary to only use one window
If you aren't a fan of using Command-Control-D to quickly look up definitions, you might use the "Look up in Dictionary" contextual menu item or Services menu item. In Snow Leopard, each word you look up using these methods opens in a new Dictionary window, which gets a bit annoying. To make each word you look up open in the same window, just use the following command:
defaults write com.apple.Dictionary ProhibitNewWindowForRequest -bool TRUE
6. Change the behaviour of the green zoom button in iTunes
With the release of iTunes 9, Apple messed around a bit with the behaviour of the green zoom button in iTunes. Things are back to normal as of iTunes 9.01, but briefly the green button maximised the window instead of switching to the mini-player. If you liked the temporary change, you can bring it back using the following command:
defaults write com.apple.iTunes zoom-to-window -bool YES
Of course, you can always get the alternative behaviour by holding the Option key and clicking in the green button.

7. Debug menu in Address Book
The debug menu has been available in Address Book for some time, but there are some new additions in Snow Leopard. If you don't already have it enabled, the command is:
defaults write com.apple.AddressBook ABShowDebugMenu -bool true
Restart Address Book, and then click Debug in the menu bar to see the new options. You can enable reflections under contacts pictures, get to the "People Picker Panel" and enable a debug panel called "Ye Olde Debug Settings”.
8. Autoplay movies in QuickTime X
One of the weird things about the new version of QuickTime is that it has no Preferences. Luckily you can still change things using the Terminal. To make a movie automatically start playing when you open it, use the following command:
defaults write com.apple.QuickTimePlayerX MGPlayMovieOnOpen 1
9. Keep QuickTime in full screen when switching applications
If you are watching a movie in full screen in QuickTime and you use Command-Tab to switch to another application then the movie will automatically exit full screen. To make it stay full screen in the background, use the following command:
defaults write com.apple.QuickTimePlayerX MGFullScreenExitOnAppSwitch 0
10. Disable Rounded corners in QuickTime
If the slightly rounded corners of movies in QuickTime bug you, use the following command to disable them:
defaults write com.apple.QuickTimePlayerX MGCinematicWindowDebugForceNoRoundedCorners 1
11. Always or Never show titlebar and Controller in QuickTime
The following two commands either permanently enable or disable the titlebar and controller that pop up when you mouse over a movie in QuickTime:
defaults write com.apple.QuickTimePlayerX MGUIVisibilityNeverAutoshow 1
defaults write com.apple.QuickTimePlayerX MGUIVisibilityNeverAutohide 1
12. Automatically show closed captioning and subtitles on opening
This turns on subtitles and closed captioning automatically when you open a movie that supports them.
defaults write com.apple.QuickTimePlayerX MGEnableCCAndSubtitlesOnOpen 1
13. Make list view stacks work like grid view Stacks
This command slightly changes the behaviour in Stacks in list view. Once enabled, they act more like grid view Stacks, but with a single list of files and icons on the left. The main difference is when "drilling-down" through folders within the Stack.
defaults write com.apple.dock use-new-list-stack -bool YES
You will need to restart the Dock for changes to take effect. The easiest way is to use killall Dock in the Terminal.
14. Enable mouseover highlight in stacks
If you want items in grid view stacks to highlight when you move the mouse over them, use the following command. It's slightly different from the equivalent in Leopard. Also, note that you can get the highlight behaviour in Snow Leopard without using this command by using the arrow keys to select items in a stack, or by clicking and holding on a stack before dragging the mouse up onto the grid.
defaults write com.apple.dock mouse-over-hilite-stack -boolean YES
You will need to restart the Dock for changes to take effect. The easiest way is to use killall Dock in the Terminal.
15. Set a precise screensaver password delay
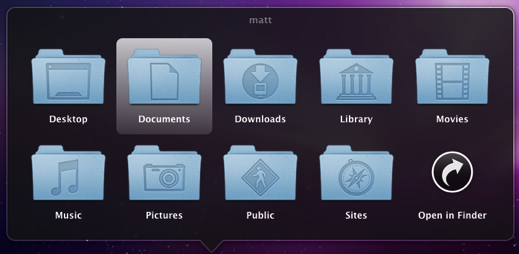
A useful new feature of Snow Leopard is the ability to set how long your Mac is asleep or how long the screen saver is on before it requires a password to wake up again. You can access this from the Security section of System Preferences. However, you have to choose a time period from a drop-down menu, and you can't enter your own custom time period. To do this, use the following command. The number at the end is the time in seconds. For example 1800 is 30 minutes, which bizarrely isn't an option in the drop-down menu.
defaults -currentHost write com.apple.screensaver askForPasswordDelay -int 1800
Address Book Tips
Add Contacts to your Safari Bookmarks
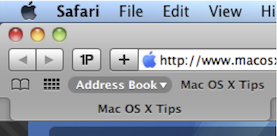
If lots of your contacts have their own web sites, you might be interested to know that you can automatically add these to your Safari bookmarks bar. Open up Safari go to the Preferences (in the Safari Menu). In here click the Bookmarks tab and check the box that says “Include Address Book” in the Bookmarks Bar. Now a new folder will appear at the far left of your Bookmarks bar. In here will be the web sites of all you contacts who have a home page set in their Address Book entry.
Address Book integrates quite well into iChat, the Mac OS X instant messenger. If a person in your Address Book is online and using iChat, a little green dot will appear next to their picture. Clicking on the dot will open up iChat, where you can start a new conversation with the person.
Put your Contacts in the Spotlight
In Address Book, select which contact you want to search, right-click on their name and choose “Spotlight [name]”. The spotlight window will pop up, and show documents, photos, iCal events, mail messages and iChats related to this person. This is one of my favourite features of Spotlight — it allows you to use it as a personal organiser and links together Address Book, iCal, Mail and iChat.
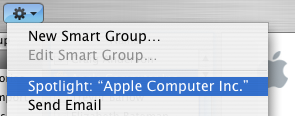
If you don't have Address Book open, you don't need to bother opening it up to Spotlight search someone. Simply type their name into Spotlight for the same results.
Moreover, Spotlight remembers files that people have sent you. When searching for one of your contacts, Spotlight will list any files they sent as attachments to you, providing you received them in Mail.
Highlight Groups
If you hold down the Option key while you are viewing a contact, all the groups that they are in are highlighted in a lovely yellow.
Merge two contacts
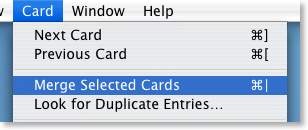
If somehow you end up with two entries in your address book for the same person, you can easily merge the two. Select the two entries by clicking on one in the list and then Command-clicking on the other. Now click on the Card menu and choose “Merge Selected Cards”. If you have a huge contact list and you suspect some duplicate entries, you can also choose “Look for Duplicate entries” from the Card menu.
Large Type
If you want to read a person's phone number off the screen while dialing it across the room, you can make it display in large numbers across the screen. To do this, click on the number and choose “Large Type” from the pop-up menu.
Address Book Sharing
If you want to share your address book (for example with your family or secretary) you can do so via MobileMe, Yahoo!, Google or an exchange account. In Address Book just go to the Preferences and click on the Accounts tab. Be careful with the Google and Yahoo synchronisation though, you might end up accidentally adding everyone you ever sent an email to into your address book.
Using vCards
In reality, most people don't have .Mac, so the standard way to share contacts is using vCards. A vCard is a file containing a contact's information that you can attach to an email and send to whoever you want. Luckily, vCards work really well with Address Book.
To create a vCard for a specific contact, select them from the list and right-click (Control-click) on their name. From the pop-up menu choose "Export vCard...".
To create a vCard that contains the information for all the people in a certain group, select the group you want from the list, right-click on it and choose "Export Group vCard...".
If you receive a vCard from someone else as an email attachment, you can add it to your address book in a couple of ways. If you received it in Mac OS X's Mail application, simply drag it from the email message across to Address Book. If not, save it to your Hard Drive and then choose Import vCards (Command-O) from the File Menu in Address Book.
Make Your Own Card

Restrict Private Information
If you don't want to share all of your contact information with everyone you send your vCard to, you can choose to keep certain parts private. Go to the Address Book Preferences and check "Enable Private Me Card". Now when you edit your own card, you can use the check boxes to choose which information is exported as your vCard.
Printing Envelopes
You can print an envelope addressed to a contact by choosing Print from the File menu with the chosen person selected. In the print dialog you might have to click the blue disclosure triangle to show all the settings, and choose Envelopes from the Style drop-down menu.
Move Outlook Contacts to Address Book
There are 7 methods mentioned:
1. If you have access to a PC, use a windows program called OutPort
2. Do it via Netscape Communicator
3. Use a program called ABFiller, which is very simple a straightforward
4. Converting to vCards if you have Outlook 2003
5. A more complex trick, using terminal to customise things
6. Importing CSV files to Address Book
7. Importing via Thunderbird
Altogether, these tips should allow you to import contacts into address book in just about every situation.