Automatically create Calendar events when receiving email
I’m always looking for ways to automate the most repetitive tasks I find myself doing on my Mac. The other day, I realised that I spend a lot of time manually creating Calendar events by copying information from booking confirmation emails. This is exactly the sort of task that can be easily automated to save you a little bit of time and effort every day.
Here’s how you can set up a custom rule in Mail app that runs a short AppleScript to create a new event in Calendar app.
To illustrate how to do this, I’m going to use an example that I’ve set up for myself. I regularly receive booking confirmation emails from my local cinema that look like this:
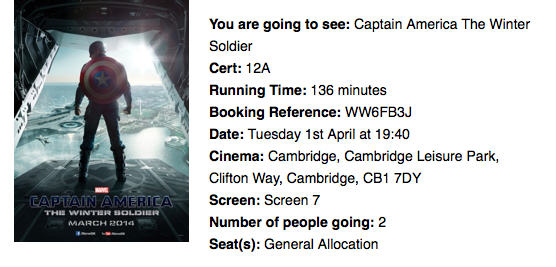
All the information to create a Calendar event is there in the text, but it is annoyingly time consuming to do this manually. Let’s set up a Rule to process these emails automatically.
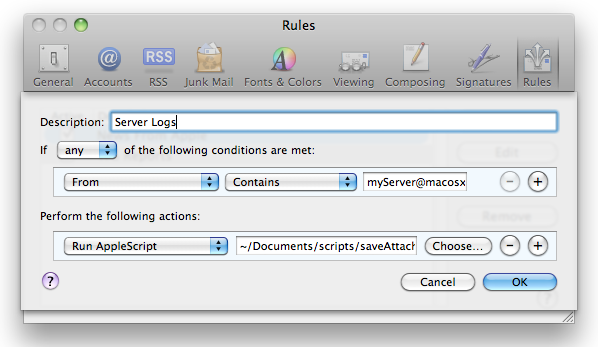
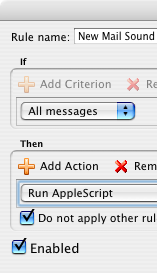
In Mail app, choose Preferences from the Mail menu, and click on the Rules tab. Create a new rule, and adjust the drop down menus to look like the screenshot below. The first section shows the conditions required to apply the rule to a message. In my case, I restrict the rule to only messages from “noreply@cineworldmail.com” in my “iCloud” account. When an email that meets these criteria is received, a series of actions are performed. First the message is moved out of my inbox into another mailbox, and it is marked as read.
The final action is the most complicated. It is a custom AppleScript that reads the email, figures out the name, date, time and location, then creates a Calendar event.
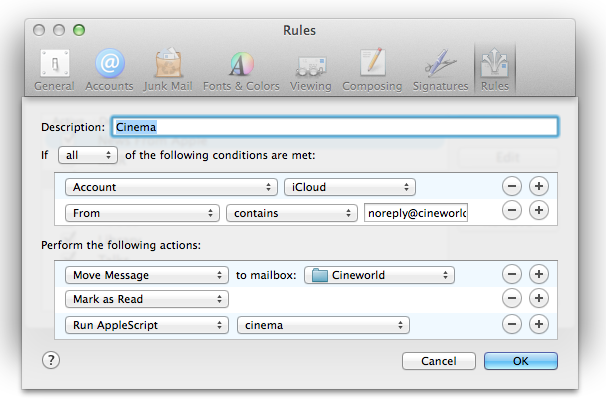
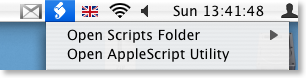
When you first choose Run AppleScript from the drop down menu, there will not be any AppleScripts available for you to run. First we have to create one.
To do this, open up AppleScript Editor. This is located in the Utilities folder in the Applications folder, or you can find it using Spotlight search or Launchpad. In the script window that appears, paste the following script:
-- Triggered by Mail rule.
using terms from application "Mail"
    on perform mail action with messages msgs for rule theRule
        tell application "Mail"
            repeat with msg in msgs
                try
                    set msgcontent to content of msg
                    set msgid to message id of msg
                    set {movie, runtime, cert, bref, starttime, addr, screen} to my parseMsg(msgcontent)
                    my createEvent(movie, runtime, cert, bref, starttime, addr, screen, msgid)
                end try
            end repeat
        end tell
    end perform mail action with messages
end using terms from
This is the general format of all Mail rule AppleScripts. One of the benefits of AppleScript is that it is very close to normal English language, and you can get some idea of what a script does even if you aren’t familiar with AppleScript. The above script takes each email message that the rule matched, and runs a function called parseMsg on it to extract the event details. Then it runs a function called createEvent using those details.
Next, below this paste the following functions:
-- Parse the email content to extract movie details.
on parseMsg(msgcontent)
    set movie to extractBetween(msgcontent, "You are going to see: ", "Cert: ")
    set cert to extractBetween(msgcontent, "Cert: ", "Running Time: ")
    set runtime to extractBetween(msgcontent, "Running Time: ", " minutes")
    set bref to extractBetween(msgcontent, "Booking Reference: ", "Date: ")
    set datestring to extractBetween(msgcontent, "Date: ", "Cinema: ")
    set addr to extractBetween(msgcontent, "Cinema: ", "Screen: ")
    set screen to extractBetween(msgcontent, "Screen: ", "Number of people going: ")
    set starttime to parseDateString(datestring)
    return {movie, runtime, cert, bref, starttime, addr, screen}
end parseMsg

-- Extract the substring from between two strings
to extractBetween(theString, startText, endText)
    set tid to AppleScript's text item delimiters
    set AppleScript's text item delimiters to startText
    set startComps to text items of theString
    set AppleScript's text item delimiters to endText
    set endComps to text items of second item of startComps
    set AppleScript's text item delimiters to tid
    return trim(first item of endComps)
end extractBetween

-- Trim all whitespace from start and end of a string
on trim(theString)
    set theChars to {" ", tab, character id 10, return, character id 0, character id 8232}
    repeat until first character of theString is not in theChars
        set theString to text 2 thru -1 of theString
    end repeat
    repeat until last character of theString is not in theChars
        set theString to text 1 thru -2 of theString
    end repeat
    return theString
end trim

-- Parse date and time from the string given in the email.
on parseDateString(datestring)
    set theDate to current date
    set dateWords to words of datestring
    set day of theDate to text 1 thru -3 of item 2 of dateWords
    set time of theDate to (item 5 of dateWords) * hours + (item 6 of dateWords) * minutes
    set monthList to {January, February, March, April, May, June, July, August, September, October, November, December}
    repeat with i from 1 to 12
        if item 3 of dateWords = ((item i of monthList) as string) then
            set monthNumber to (text -2 thru -1 of ("0" & i))
            exit repeat
        end if
    end repeat
    set month of theDate to monthNumber
    return theDate
end parseDateString
This is the core of the AppleScript, which parses the email to extract the event details. The way it works is to extract the text between two other pieces of text. For example, it extracts the text between You are going to see: and Cert: and sets it as the name of the movie. You will need to modify this to match the exact format of your email. A bit of trial and error may be necessary, so you may want to test the rule on emails you send to yourself.
Finally, paste the following function that creates the Calendar event:
-- Create a calendar event for the specified movie.
on createEvent(movie, runtime, cert, bref, starttime, addr, screen, msgid)
    set endtime to starttime + runtime * minutes
    tell application "Calendar" to tell calendar "Home"
        set theEvent to make new event with properties {start date:starttime, end date:endtime, summary:"Cinema: " & movie}
        set location of theEvent to screen & ", Cineword " & addr
        set description of theEvent to "Booking Reference: " & bref & return & "Run Time: " & runtime & " minutes" & return & "Certificate: " & cert
        set url of theEvent to "message://" & "%3c" & msgid & "%3e"
    end tell
end createEvent
You will also need to modify this to match the exact details in your email messages. Above, I set the name of the even to the title of the movie and I calculate the end time by adding the running time of the movie to the start time. I set the location of the event to the screen number and the cinema address, and I add a few details to the event notes like my booking reference number. Setting the url of the event to the email message id also provides a handy link back to the original email message from within Calendar.
You can find the full script here.
Now all we need to do is save the AppleScript somewhere Mail can see it. Choose Save from the File menu, and then press Command-Shift-G to bring up the Go to folder dialog. In the text field, type ~/Library/Application Scripts/com.apple.mail and press Return. Give the script a memorable name and save it. Now, when you return to Mail, your script should be available in the drop down menu next to “Run AppleScript”.
Using Finder labels for tagging files and automating actions
Labels are a handy way to organise your files in the Finder by colour-coding their icons. Until OS X Mavericks is released later this year, they are a pretty good substitute for having a proper way to tag files in the Finder.
Adding a label to a file or folder is simple. Just right-click the icon and choose one of the coloured squares from the menu. Alternatively, you can select the icon by clicking on it, and choose the label from the File menu in the menubar.
If you want to use labels a bit more like tags, it is possible to choose a custom name for each label colour in the Finder Preferences (under Finder in the menubar). Once you have done this, the only limitation compared to a real tagging system is that you are restricted to only having 7 different tags.
Using labels as tags can work really well in conjunction with Saved Searches (also known as Smart Folders).
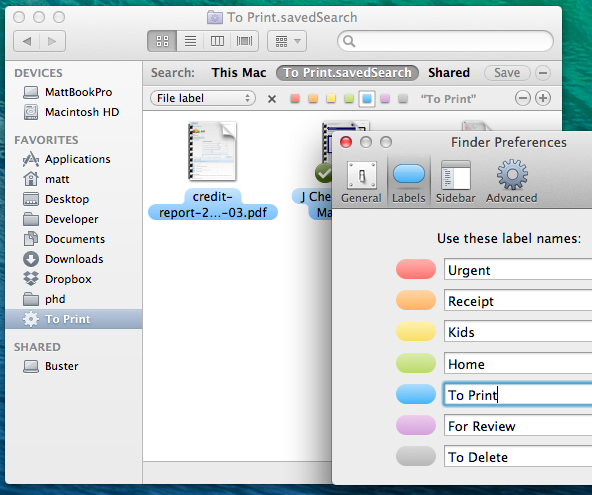
Most people will have their documents organised into separate folders for each project, and will have separate folders for work and home files. But sometimes, for example, you might want to see all your receipts from all your different projects together, or all the files that you need to print. Instead of duplicating all your receipts into a separate “receipts” folder, you can just use labels along with a Saved Search that displays all the files with that label.
To set up the saved search, start by switching over to the Finder and choosing Find from the File menu (or type Command-F). Choose Other from the left hand drop-down menu, and choose File label from the list. Then just choose the desired label, and click the Save button to add the Saved Search to your sidebar.
Power users can take this idea even further using a tool like Hazel. Firstly, Hazel can automatically add labels to your files based on your own criteria. For example, automatically adding a red label to files that have been in the Downloads folder for more than a week, or adding a purple label to files that were downloaded from your bank website.
Secondly, Hazel can automatically perform actions when you assign a specific label to a file. For example, it could import MP3 files into iTunes if they you label them purple, or resize images to 800x600px and upload them to a server if they are labelled green, or run any AppleScript or shell script you want.
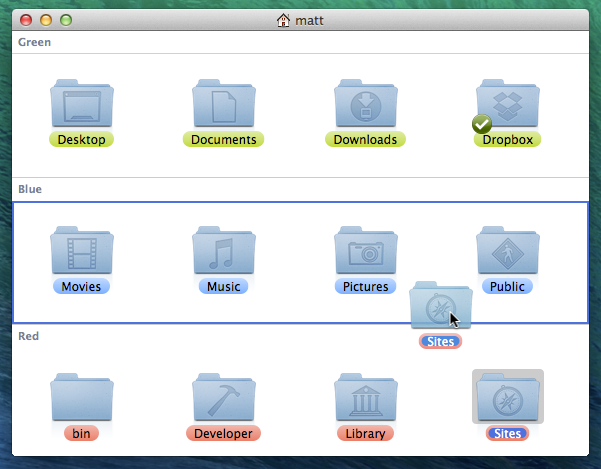
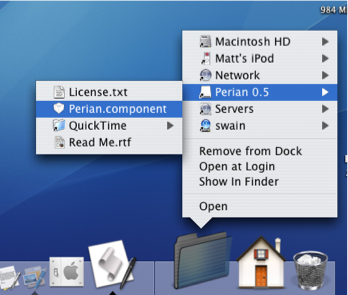
Bonus tip: You can quickly change the label of a file by dragging it into the section for a different label in the folder, as show in the screenshot below. For this to work, you must have your folder in Icon View, and have the folder Arranged by Label.
Disable restored windows when re-opening specific apps
There’s a great tip over on the Macs in Chemistry blog on how to stop Lion from restoring your previous windows when re-opening specific apps. In System Preferences there’s a checkbox for turning this on and off globally, but using a handy little AppleScript you can disable it on a per-app basis.
One of the new features in Lion is the ability of applications to resume activity at the point an application was quit. This means that when you reopen an application it will open and display all the documents you were editing in the state when you quit the application. This is obviously very useful but there are times when you may not want confidential documents automatically opened and displayed when you open an application.
Here’s an example of the script for Safari:
set statePath to POSIX path of (path to home folder) & "Library/Saved Application State/com.apple.Safari.savedState"

set quotedPath to quoted form of statePath
try
   do shell script "test -w " & quotedPath
    set current to "enabled"
on error
   set current to "disabled"
end try

if current is "enabled" then
   tell application "Finder" to delete every item of ((POSIX file statePath) as alias)
    do shell script "chmod u-w " & quotedPath
    display dialog "Disabled window restore for Safari" buttons "OK" default button 1
else
   do shell script "chmod u+w " & quotedPath
    display dialog "Enabled window restore for Safari" buttons "OK" default button 1
end if
Head over to macinchem.org for a quick explanation of how to add it to your scripts menu to give you an easy place to access it.
Replace DigitalColor Meter in Lion
I encountered my first major annoyance with Lion today: For no apparent reason, it seems Apple have decided to remove some of the most useful features from the DigitalColor Meter utility. For anyone who does any web development, DigitalColor Meter was great for quickly getting the hex value of any colour displayed on the screen, simply by hovering the cursor over it.
While it’s annoying that DigitalColor Meter is now pretty useless, it’s not too tricky to build our own replacement using a tiny bit of AppleScript with the built in OS X colour picker and a free downloadable plugin.
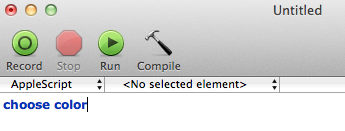
First we’ll start by creating our colour meter application. Open up AppleScript Editor (located in Applications/Utilities) and type choose color in the window that appears. This is actually all the AppleScript we need! To test if it works, click the Run button. Hopefully the familiar OS X colour picker should appear. Close it, choose Save As... from the File menu and give it a name like “Colour Meter.” Also, be sure to change the file format drop-down menu to Application. Now, whenever you double-click on this new application, the colour picker will open.
To get hex values in the colour picker, go to Color Palettes tab (the third one along), and change the Palette drop-down menu to Web Safe Colors. To “choose” a colour from somewhere on the screen, just click the magnifying glass, then click on the colour you want.
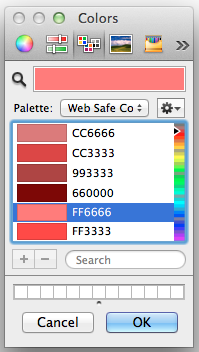
Straight away you might notice a small problem with the hex values that appear: They aren’t all there! This palette only contains “Web Safe Colors,” which basically means R, G and B values of 00, 33, 66, 99, CC and FF. To get the full range of colours, we will need to install a new colour picker plugin.
The two options are RCWebColorPicker from rubicode, and Hex Color Picker from waffle software. They each have their pros and cons, so it’s worth downloading them both and trying them out before deciding on one (or both).

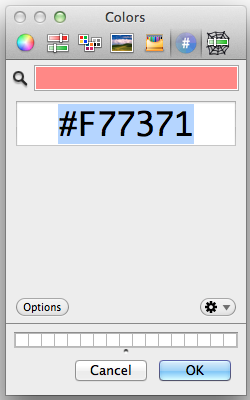
Installation is fairly straightforward, apart from one quirk you might not be aware of — the Library folder within your user folder is now hidden in Lion. The easiest way to get to it is to hold down the Option key while clicking on the Go menu in the Finder, and choose Library from the list. Inside the Library, find the ColorPickers folder and drag the plugin files there. You will need to log out and in again before the new colour pickers will appear.
One final touch for your colour meter application is to give it a proper icon — by stealing the one from DigitalColor Meter. Find both applications in the Finder and choose Get Info for each of them. Select the DigitalColor Meter icon in its Info window and press Command-C to copy it. Then select the icon for your colour picker application, and press Command-V to paste.
![]()
Automatically save Mail attachments using AppleScript
Here’s a simple AppleScript that’s great for if you regularly receive email attachments that you want to save in the same folder. This is really useful in situations where you receive regular reports via email, or even if you just want to be able to quickly delete emails without worrying about losing the attachments.
The script works in conjunction with “Rules” in Mail, which makes it really easy to filter out the attachments that you want to save. Once it has these attachments, the script simply adds a timestamp to the name and saves them in the specified folder. Here’s a step by step guide on how to set everything up.
First, start by opening up AppleScript Editor (located in Applications/Utilities). Copy and paste the following script into the empty window:
on perform_mail_action(ruleData)

    -- The folder to save the attachments in (must already exist)
    set attachmentsFolder to ((path to home folder as text) & "Documents:Attachments") as text

    -- Save in a sub-folder based on the name of the rule in Mail
    set subFolder to name of |Rule| of ruleData as text
    tell application "Finder"
       if not (exists folder subFolder of folder attachmentsFolder) then
           make new folder at attachmentsFolder with properties {name:subFolder}
       end if
   end tell

    -- Get incoming messages that match the rule
    tell application "Mail"
       set selectedMessages to |SelectedMessages| of ruleData
        repeat with theMessage in selectedMessages

            -- Get the date the message was sent
            set {year:y, month:m, day:d, hours:h, minutes:min} to theMessage's date sent
            set timeStamp to ("" & y & "-" & my pad(m as integer) & "-" & my pad(d) & "-" & my pad(h) & "-" & my pad(min))

            -- Save the attachment
            repeat with theAttachment in theMessage's mail attachments
               set originalName to name of theAttachment
                set savePath to attachmentsFolder & ":" & subFolder & ":" & timeStamp & " " & originalName
                try
                   save theAttachment in savePath
               end try
           end repeat
       end repeat
   end tell

end perform_mail_action

-- Adds leading zeros to date components
on pad(n)
   return text -2 thru -1 of ("00" & n)
end pad
Click the Compile button to check that you have copied everything correctly. If you receive an error, something isn’t right.
Take a look at the script and see if you can figure out what each part does. One of the great things about AppleScript is that even people who have never seen it before can get the gist of what a script does. The third line specifies the folder where the attachments will be saved — you might want to change this. It is currently set to a folder called “Attachments” located in the Documents folder. Whatever folder you choose, you need to go into the Finder and create it if it doesn’t already exist.
Save the script and remember the location. I recommend creating a “scripts” folder in your Documents folder that you can use to store all your scripts.
The final step is to open up Mail and create a new rule. To do this, go to Mail’s Preferences, and click the Rules tab. Click the “Add Rule” button, and give the new rule a name. This name will be used to create a sub-folder within the Attachments folder, meaning you can create multiple rules to filter different types of attachment.
Next, you will need to set the conditions that need to be satisfied for the attachment to be saved. Using the “Any Attachment Name” you can filter attachments of a specific kind using their file extension, for example saving only PowerPoint presentations or only images. Alternatively you can save only attachments from a specific person, or simply save all the attachments sent to your email address.
Once you have set up your conditions, choose “Run AppleScript” from the perform actions drop-down menu, and click the “Choose” button to select the script you saved earlier. You can also add additional actions as well as the script, such as deleting the message or moving it into another mailbox.
One interesting way to use this script would be to put the attachments folder in your Dropbox or iDisk. Then your attachments are automatically synced to the cloud, making them accessible from anywhere.
Bulk edit Address Book contacts
Unfortunately Address Book doesn’t support bulk editing a large number of contacts at once, but there are a couple of clever workarounds to achieve the same effect. Here are two different methods, the first using TextEdit and the second using AppleScript.
Manually editing a vCard file
This method is great if you have a group of people who share the same information. For example, if you have a whole load of people at the same address, and they have all moved to a new address, or if a group of people share a phone number and they recently changed it to something new.
The first thing to do is to make a backup of your Address Book. Open up Address Book and choose Export - Address Book Archive from the File menu. If anything goes wrong in the following process, you can always just find this file and double-click it to restore your original Address Book.
Next, create a contact group by clicking on the plus (+) icon in the bottom left. Add all of the contacts you want to bulk edit into this group by dragging their names across from the contact list. Once this is done, drag the group from Address Book onto the Desktop to create a single .vcf file that contains contact information for everyone in the group.
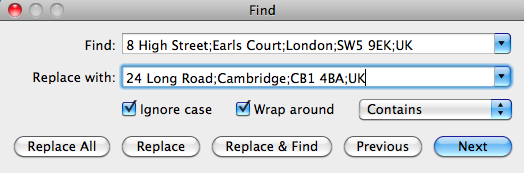
The next step is to open this .vcf file with TextEdit. Either open TextEdit and choose “Open...” from the File menu, or just drag the .vcf file onto the TextEdit icon in the Dock. Now we are going to use TextEdit’s Find and Replace feature to find the existing information and replace it with the new information.
Choose “Find...” from the Edit menu or press Command-F. In the “Find” text field, enter the old information, such as the old address or phone number. You might have to look in the file to see how this is formatted. For example, addresses have semicolons to separate lines like
item2.ADR;type=HOME;type=pref:;;8 High Street;Earls Court;London;SW5 9EK;UK
Press the Next button a few times to check that it is entered correctly, then enter the new information in the “Replace with” field. Now just click the “Replace All” button and every instance of the old information should be replaced with the new information. Check the file to make sure it looks correct, and then save it.
Finally, go to the Desktop and double-click on the .vcf file to import the contacts back into Address Book. You will be warned that the contacts are duplicates and will be updated. If you want, you can click “Review Duplicates...” to check that the changes are correct, or you can just click Import.
Using AppleScript
This second method is actually more flexible, but it does require that you get familiar enough with AppleScript to create your own script or modify one of my examples to suit your needs.
Start by opening up AppleScript Editor (located in Applications/Utilities). This is called Script Editor and is located in Applications/AppleScript if you are using Leopard or earlier.
Copy and paste the following lines into the AppleScript Editor window, and click the Compile button. If the AppleScript has been entered correctly, you should receive no errors.
tell application "Address Book"
    set peopleToChange to people whose (street of first address) contains "321 Old Street"
    repeat with thePerson in peopleToChange
        set (street of first address) of thePerson to "123 New Street"
    end repeat
    save
end tell
One of the great things about AppleScript is that it is designed to be readable by someone who knows nothing about AppleScript. Here’s a walk through what the above script does.
The first line says that we are about to tell Address Book to do something. The second line finds all the people in your address book whose street of their first address (people can have more than one address) contains “321 Old Street.” It then stores a list of all these people under the name peopleToChange. The third line says that we are going to go through the list peopleToChange one item at a time, and we will refer to each item in the list as thePerson. The next line sets the street of the first address of thePerson to “123 New Street.” Then the fifth line says we are finished going through the list peopleToChange, the sixth line saves the changes, and the last line says we are finished telling Address Book to do something.
You will have to create your own AppleScript to fit your exact needs, but the general structure of it will be similar to the above example. When you have created the script you want to use, just press the Run button to run the script and make the changes. Included below are a few more example scripts.
Find and replace phone numbers
tell application "Address Book"
    repeat with i from 1 to (count every person)
        set phoneProperties to properties of phones of person i
        repeat with j from 1 to (count of phoneProperties)
            if value of item j of phoneProperties contains "020 6704 3205" then
                set value of item j of phones of person i to "020 1523 6843"
            end if
        end repeat
    end repeat
    save
end tell
Clear the Notes field for every contact
tell application "Address Book"
    repeat with i from 1 to (count every person)
        set note of person i to ""
    end repeat
    save
end tell
A more advanced address replacement script
tell application "Address Book"
    repeat with i from 1 to (count every person)
        set theAddresses to properties of addresses of person i
        repeat with j from 1 to (count of theAddresses)
            if street of item j of theAddresses contains "321 Old Street" then
                set street of item j of addresses of person i to "123 New Street"
                set city of item j of addresses of person i to "NewCity"
                set zip of item j of addresses of person i to "12345"
                set country of item j of addresses of person i to "USA"
            end if
        end repeat
    end repeat
    save
end tell
Replace googlemail.com emails with gmail.com
tell application "Address Book"
    repeat with i from 1 to (count every person)
        set theEmailAddresses to properties of emails of person i
        repeat with j from 1 to (count of theEmailAddresses)
            if value of item j of theEmailAddresses contains "@googlemail.com" then
                set oldAddress to value of item j of theEmailAddresses
                set AppleScript's text item delimiters to {"@"}
                set firstBit to first text item of oldAddress
                set newAddress to firstBit & "@gmail.com"
                set value of item j of emails of person i to newAddress
            end if
        end repeat
    end repeat
    save
end tell
You can find more information about AppleScript in Address Book by going to “Open Dictionary...” in the File menu in AppleScript Editor and choosing Address Book from the list.
Automatically remove clutter from the desktop
John writes:
I was wondering if there was a way for the Mac to automatically clear the desktop and put all the items into the documents folder when shutting down. I'm setting up a computer which has a lot of users and clutter on the desktop is an issue. Thanks.
This is a great example of when AppleScript is really useful for automating simple tasks like moving files around. In fact, you can do it with a script that is only three lines long.
Start by opening up AppleScript Editor, located in the Utilities folder inside the Applications folder. If you don't have Snow Leopard, the latest version of Mac OS X, this might be called Script Editor and instead is located in the AppleScript folder in the Applications folder. In the window that appears, paste the following three lines:
tell application "Finder"
   move items of (path to desktop folder) to folder (path to documents folder)
end tell
If you click Run, you should see all the items on your desktop move into your Documents folder. Choose Save As from the File menu, give the script a name like cleardesktop and change the File Format to Application. Save it somewhere safe where someone won't accidentally delete it. I have a folder inside my Documents folder called Scripts where I keep all my AppleScripts. Other people choose to store their scripts in the Scripts folder in the Library folder, because Apple has already put some ready made ones in there.
The next step is to make it run every time you shut down your Mac. This is pretty tricky to do, and involves using a lot of Terminal commands. Instead, a much easier way is to make the script run when you log in, which will essentially do the same thing. Just go to System Preferences, and click on the Accounts section. Choose your account from the list on the left, and then click on the Login Items tab. You can now either click the plus (+) button and locate your script, or just drag the script from a Finder window into the list.
Now, whenever you turn on your computer, all the clutter left over from the previous user will be automatically moved into the Documents folder.
The above script is just about as basic as you can get. Here’s an idea for a more complicated version. Instead of just dumping everything in your documents folder, it instead creates a folder in there with a name that includes todays date ( e.g. “Desktop 13/01/2010” ) and puts the items in this folder instead.
set foldername to ("Desktop " & short date string of (current date))
set docsfolder to (path to documents folder) as string

tell application "Finder"
   if not (exists folder (docsfolder & foldername)) then
       make new folder at docsfolder with properties {name:foldername}
   end if
    move items of (path to desktop folder) to folder (docsfolder & foldername)
end tell
Alternatively, the following script checks the file extension of all the files on the desktop, and sorts them into the Movies, Pictures, Applications and Documents folders depending on what they are. If you are feeling adventurous, you can modify the script to include your own folders and file extensions.
tell application "Finder"
   set desktopFolder to (path to desktop folder)
    set musicFolder to (path to music folder)
    set appsFolder to (path to applications folder)
    set picsFolder to (path to pictures folder)
    set moviesFolder to (path to movies folder)
    set docsfolder to (path to documents folder)

    set musicExt to {".mp3", ".aac"}
    set appsExt to {".dmg", ".sit", ".app"}
    set picsExt to {".jpg", ".gif", ".tif", ".png", ".psd"}
    set moviesExt to {".avi", ".mpg", ".mov", ".m4v"}
    set docsExt to {".pdf", ".txt", ".doc", ".xls", ".key", ".pages"}

    set allFiles to files of desktopFolder
    repeat with theFile in allFiles
       copy name of theFile as string to FileName

        repeat with ext in musicExt
           if FileName ends with ext then
               move theFile to musicFolder
           end if
       end repeat

        repeat with ext in appsExt
           if FileName ends with ext then
               move theFile to appsFolder
           end if
       end repeat

        repeat with ext in picsExt
           if FileName ends with ext then
               move theFile to picsFolder
           end if
       end repeat

        repeat with ext in docsExt
           if FileName ends with ext then
               move theFile to docsfolder
           end if
       end repeat

        repeat with ext in moviesExt
           if FileName ends with ext then
               move theFile to moviesFolder
           end if
       end repeat
   end repeat
end tell
10 tips for using Mac OS X like a pro
Here is a collection of 10 tips that are slightly more advanced than usual. They are aimed at those who want to become more expert Mac users - and of course those who think they already are experts... In general these tips will help you save time and effort when carrying out day to day tasks and hopefully introduce some concepts and applications you may not have come across before.
1. Download Quicksilver

This is really the most important pro app for Mac OS X. The principle of Quicksilver is simple, but it is amazingly powerful: Hit a hotkey, then start typing what you want to do. You can open an application. Send an email to a certain contact. Pause iTunes. Anything (more or less). But what makes this so incredible is that Quicksilver learns over time so you can get what you want faster and more efficiently with less and less effort. Head here for a more detailed explanation, or if you've got some time to spare, watch this demo video. Download it from the Blacktree site.
2. Get to grips with keyboard shortcuts
This may seem like a really simple tip, but far too often I watch supposedly experienced computer users take forever performing simple tasks like copying and pasting. The fact of the matter is keyboard shortcuts make everything easier, but not only do you have to learn them, you have to get into the habit of using them. There is a hugely extensive list here, but to be honest nothing will save you more time than getting into the habit of using shortcuts for quitting, closing windows, copying and pasting and switching applications.
For the more adventurous, you can create your own keyboard shortcuts in the keyboard and mouse section of System Preferences. And if you want to go even further, here are 10 AppleScripts that you can assign keyboard shortcuts to using Quicksilver.
3. Drag and drop everywhere
This is often a problem that comes from working in Windows a lot, where drag-and-drop doesn't quite have the same power. However in Mac OS X, you can use it almost anywhere. Dragging folders onto open/save dialogs will make it display that folder. Dragging text selections onto icons in the Dock does all sorts of useful things. And you can just drag files onto "Choose File" buttons in web pages.
4. Change hidden settings with Terminal commands
Often developers choose not to include some settings in the preferences of an application in order keep things nice and simple for the user. Luckily, they often leave these hidden settings accessible via the Terminal. Although this will scare off a lot of people, being comfortable with the Terminal is really useful and it's the best way to get a higher level of customisation and enable hidden features on your Mac. Luckily, modifying preference files is one of the easiest things you can do in the Terminal - just paste in a line of code and hit return. Simple! Here is a list of Terminal commands that will work with every version of Mac OS X, and here are some ones just for Leopard.
5. Download VLC
VLC is a multipurpose media player that can play pretty much any movie file you throw at it. While Quicktime will serve you for most needs, VLC will handle anything that Quicktime struggles with, as well as stubborn DVDs and VIDEO_TS folders. Download it here.
6. Understand the concept of packages
In Mac OS X, packages are just folders disguised to look like single files. In fact, almost every application is a package. To look inside packages, just right-click on one and choose Show Package Contents. Why would you want to do this? Inside application packages are all the files it needs to run. Once inside, you can tinker about and change things. Here's a previous tip with a collection of things you can do, including changing the unexpectedly quit message, the iCal alarm message and the layout of System Preferences.
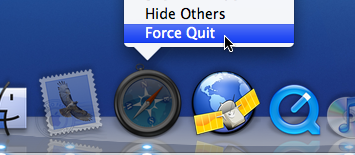
7. Quickly kill accidently opened applications
If you are clumsy like me, you will often accidently click the wrong icon in the Dock. Or maybe you occasionally want to stop iTunes opening up when you plug in your iPod. If you are quick enough, you can just right-click (Control-Click) on the icon in the Dock and choose Force Quit. If you are too late, pressing the Option key will change Quit to Force Quit so you can close the unwanted application even faster.
8. Make rectangular selections (Cocoa apps only)
This is one of the best tricks for saving time when you are moving round chunks of text. If you want to select a column in a table or remove the numbers from the start of each line in a list you would normally have to go through every line individually. This can be hugely time consuming if you have a long list. To get around this, just hold the Option key while making the selection. Now you can draw a box around the stuff you want to copy or delete etc. and not worry about having to select entire lines.
9. Learn some AppleScript
Don't be put off by the idea of a programming language - AppleScript is about as close to normal english as you can get. AppleScript's real power is it's ability to automate repetitive tasks — in fact Automator is basically just a visual way to create AppleScripts. The best way to get familiar with AppleScript is to download some example scripts, try and figure out how they work, and then try and extend them or customise them for your own needs. If you are looking for scripts, I've written loads of tips that use a small bit of AppleScript to solve a problem.
10. Get comfortable using the command line
While you might be fine pasting a single line into the Terminal to change some hidden settings, you might not be comfortable actually working from the command line. I guess the whole point of Mac OS X is that it is a pretty graphical interface placed over the command line, but in reality some things are faster from the Terminal, and some things aren't possible without it. Learning about using the command line requires a whole tutorial in itself so I won't go into it here. O'Reilly have a great series of tutorials for beginners, and OSXDaily have a list of common commands.
Run Applescripts with Keyboard Shortcuts
In the Keyboard and Mouse section of System Preferences there is a Keyboard shortcuts tab that allows you to assign a keyboard shortcut to any menu item. This is great, but unfortunately it doesn’t work everywhere.
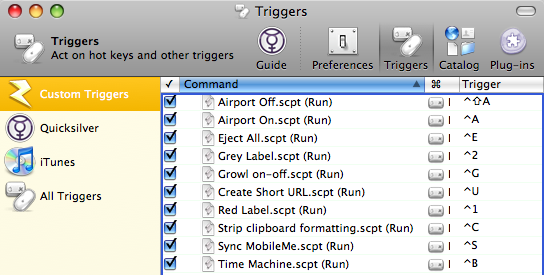
The main loss I notice is being unable to assign keyboard shortcuts to scripts in the scripts menu, which would actually solve the entire problem because you could just create scripts to replicate the functionality of any menu item that doesn't want to have a keyboard shortcut. Luckily you can use Quicksilver to assign keyboard shortcuts to AppleScripts. (or anything else). Listed below are 10 AppleScripts to perform lots of tasks that are much more convenient to do quickly with a keyboard shortcut.
Quicksilver is probably one of the most versatile applications for Mac OS X so I won't try and explain everything it does. For our purposes, we only need to use the "Triggers" part, which is accessible from the Quicksilver preferences. If you want to know more about Quicksilver check out the official "What is Quicksilver", or read through Dan Dickinson's "QuickSilver - A Better OS X In Just 10 Minutes".
For each of the AppleScripts below, this is the process you need to go through to assign a keyboard shortcut.
- Open up AppleScript Editor (located in Applications/Utilities) and paste in the script. You can test it works by clicking Run.
- Save the script in the Scripts folder, located in the Library in your user folder.
- Open up the Triggers panel in Quicksilver (Command-' when quicksilver is visible). If you don't already have Quicksilver, you can download it for free from here.
- Click the plus (+) at the bottom, and choose HotKey from the menu to create a new trigger.
- Start typing the name of the script and it should appear in the box. Alternatively you can just drag it into the box from the Scripts folder. Click Save.
- Assign a keyboard shortcut by double-clicking on the trigger column, and typing the shortcut.
These are just the scripts that I could think of off the top of my head. If you have any others that work well with a keyboard shortcut please share them in the comments.
1. Turn AirPort on and off
The two separate scripts that you need to use are below. It's pretty obvious which is which. As explained above, paste each one into a script editor and save as "Airport Off" and "AirPort On" in the Scripts folder.
do shell script "networksetup -setairportpower off"
do shell script "networksetup -setairportpower on"
2. Run Time Machine backup now
do shell script "/System/Library/CoreServices/backupd.bundle/Contents/Resources/backupd-helper & “
3. Eject All Disks
To eject all disk images, flash drives, external hard drives, CDs and DVDs (i.e. everything):
tell application "Finder" to eject (every disk whose ejectable is true)
To ignore CDs and DVDs:
tell application "Finder" to eject (disks where free space is not 0)
To ignore large drives (like a Time Machine backup). This is good to get rid of all the mounted disk images:
tell application "Finder" to eject (every disk whose ejectable is true and local volume is true and physical size & lt; 1.0E+9)
4. Set colour labels in the Finder
You will need to create one script for each colour, and assign a different keyboard shortcut to each (or just the colours you use regularly). Command-Option-1, Command-Option-2 etc. might work well. The script works with multiple files selected too.
tell application "Finder"
   activate
    set selected to selection
    set colour to 2
    repeat with n_file in every item in selected
       set label index of n_file to colour
   end repeat
end tell
Replace the number in the fourth line with one of the following: 0 = No colour 1 = Orange 2 = Red 3 = Yellow 4 = Blue 5 = Purple 6 = Green 7 = Grey
5. Enable/Disable Growl Notifications
This page over at Mac OS X Hints has a great script for toggling Growl notifications on and off. Really useful for turning them off just before a presentation.
6. Go to Login Window
Quickly switch over to the login window without actually logging out. Works similarly to a "lock screen" shortcut.
do shell script "'/System/Library/CoreServices/Menu Extras/User.menu/Contents/Resources/CGSession' -suspend"
7. Sync with MobileMe
do shell script "/System/Library/PrivateFrameworks/DotMacSyncManager.framework/Versions/A/Resources/dotmacsyncclient sync"
8. Paste as plain text
This script just strips the formatting out of text in the clipboard. So you use Command-C to copy a load of formatted text, then Control-C (or whatever) to strip formatting, then Command-V to finally paste it.
do shell script "pbpaste | pbcopy"
9. Create a short URL
This script creates a short URL of the current page in Safari and copies it to the clipboard. Then all you need to do is paste into where you want it.
tell application "Safari"
   set bigURL to the URL in document 1
end tell
set tinyURL to (do shell script "curl --url \"http://metamark.net/api/rest/simple?long_url=" &  bigURL &  "\" ")
set the clipboard to tinyURL
10. The built in scripts
Most of the scripts that come with Mac OS X are pretty useless, but some are quite fun. They are all located in Macintosh HD/Library/Scripts. Here are the ones to look out for:
- “Show/hide all” in Finder Scripts
- “Create New Message” in Mail Scripts
- “New Applications Window” in Navigation Scripts
- “Convert to PDF” in the Printing Scripts
- “Download Weather Map” in the URLs folder
Move all Windows to the Main Display
Luckily, this blog post has the solution - a simple AppleScript. When run, it automatically finds all the windows that are off the edge of the screen and clusters them in the top left of the main monitor. To run it, start by opening up Script Editor (located in Applications/AppleScript) then paste in the following:
property processesToIgnore : {}
tell application "Finder"
set _b to bounds of window of desktop
set screen_width to item 3 of _b
set screen_height to item 4 of _b
end tell
tell application "System Events"
set allProcesses to application processes
set _results to ""
repeat with i from 1 to count allProcesses
set doIt to 1
repeat with z from 1 to count processesToIgnore
if process i = process (item z of processesToIgnore) then
set doIt to 0
end if
end repeat
if doIt = 1 then
tell process i
repeat with x from 1 to (count windows)
set winPos to position of window x
set _x to item 1 of winPos
set _y to item 2 of winPos
if (_x < 0 or _y < 0 or _x > screen_width or _y > screen_height) then
set position of window x to {0, 22}
end if
end repeat
end tell
end if
end repeat
end tell
Click the Compile button at the top to make sure the script is OK. If you receive an error message, check for any problems that may have occurred in the copy/paste process.
For the script to work, you will need to enable access for assistive devices. You can do this by going to the Universal Access section of System Preferences. Check the box at the bottom that says “Enable access for assistive devices”.
Now, when you click the Run button above the script, any off-screen windows will be placed in the top left of the main monitor.
One problem with this is that you may have some applications that keep windows off-screen on purpose. One example of this is Firefox, which gives you a blank square in the top left when you run the script. The first line of the script allows you to get around this by excluding specific applications from the script. For example you could change it to
property processesToIgnore : {"Firefox"}
or
property processesToIgnore : {"Firefox", "otherApp", "anotherOne"}
Now, opening up the script and clicking the "Run" button every time you disconnect your second monitor is quite time consuming. There are a couple of ways to run it much more quickly. The first is to add it to your scripts menu. If you haven't already enabled this, you can do so by navigating to Macintosh HD/Applications/AppleScript and opening up AppleScript Utility. Near the bottom of the window that appears, check the box that says "Show Script Menu in Menu Bar". To add your script to the menu, you have to save it in a specific location. Go to the Library folder inside your user folder and look for a folder called "Scripts". If it isn't there, create it. Save the script here.
An alternative way to run the script is to save it as an application. With the script open in Script Editor, go to the File menu and choose Save As. Change the File Format drop-down menu to Application and then save it. Now when you double-click the script, it will instantly run. Save it somewhere you can easily access it, like on the desktop.
Automate Trash Emptying
It involves an AppleScript that you attach to the trash as a Folder Action. This script checks the size of the trash every time you add a file to it. If the size goes over a limit, it will deleted the item that has been in the trash the longest.
There are various versions of the script on the Mac OS X Hints page as many users added suggestions in the comments. If you are interested, take some time to read through the page to see how the script works. Adding all the suggestions and improvements, here is the final version of the script:
on adding folder items to this_folder after receiving added_items
	try
		-- Size limit of the Trash folder in MB
		set trash_limit to 2048

		--  Check size & Touch all incoming items to update the modified date to now
		repeat with i from 1 to the count of added_items
			set a_file to item i of added_items

			-- Get incoming item size and check if it exceeds the max trash size
			set a_file_size to ((do shell script "du -sk " & quoted form of (POSIX path of a_file) & "| awk '{print $1}' ") / 1024)
			if a_file_size is greater than trash_limit then
				display dialog quote & (name of (info for a_file)) & quote & " is too big for the Trash. Would you like to delete it permanently?" buttons {"Yes", "No"} default button "No"
				set response to the button returned of the result
				if the response is "Yes" then
					-- Permanently delete
					set sh_script to "rm -Rf " & quoted form of (POSIX path of a_file)
					do shell script sh_script
				end if
				if the response is "No" then
					-- Rename and move to Desktop
					set sh_script to "cd ~/Desktop;mv " & quoted form of (POSIX path of a_file) & " " & quoted form of (POSIX path of a_file)
					do shell script sh_script
					display dialog quote & (name of (info for a_file)) & quote & " has been moved to the Desktop."
				end if
			end if
			if a_file_size is not greater than trash_limit then
				set sh_script to "touch " & quoted form of (POSIX path of a_file)
				do shell script sh_script
			end if
		end repeat

		-- Get the current Trash size in 1k clusters, then divide by 1024 to get megabytes
		set trash_size to do shell script "du -sk ~/.Trash/ | awk '{print $1}'"
		set trash_size to trash_size / 1024

		-- Delete old items until we're under the limit
		repeat while trash_size is greater than trash_limit
			set trash_files to (list folder this_folder without invisibles)
			set oldest_file to {}

			-- Get the least recently deleted file in the Trash folder
			repeat with i from 1 to the count of trash_files
				set a_file to alias ((this_folder as text) & (item i of trash_files))
				if i is equal to 1 then set oldest_file to a_file
				if the (modification date of (info for a_file)) comes before (modification date of (info for oldest_file)) then set oldest_file to a_file
			end repeat

			-- Delete the file and update the Trash icon
			set sh_script to "rm -Rf " & quoted form of (POSIX path of oldest_file)
			try
				do shell script sh_script
			on error
				display dialog "Permission denied on file " & quoted form of (POSIX path of oldest_file) & " would you like to try with administrator priviledges?"
				do shell script sh_script with administrator privileges
			end try

			-- And rinse!
			set trash_size to do shell script "du -sk ~/.Trash/ | awk '{print $1}'"
			set trash_size to trash_size / 1024
		end repeat
		tell application "Finder" to update trash
	end try
end adding folder items to
Select all the text and paste it into AppleScript Editor (in Applications/Utilities). Now you need to decide what size limit your trash will have. This is specified in megabytes on the 4th line of the script. It is currently set to 2048 (2GB). If you would like a different size, change this number. 512 for example, would mean that older items would be deleted to keep the total size under 512 MB.
![]()
Once you are done choose Save As from the File menu and go to the Library in your User folder. In here go to Scripts, then Folder Action Scripts. You will probably have to create these folders unless you have added folder actions in the past. Save the script here.
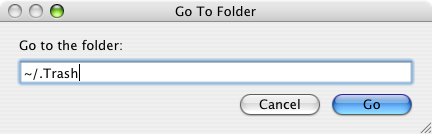
Now open up Folder Actions Setup (in Applications/AppleScript). If you click the plus button, you will be presented with a normal "Open" dialog. However there is the problem that the Trash is a hidden folder. It's actually located in your user folder with Documents, Music, Movies etc. To get to it, press Command-Shift-G. In the box that appears, type "~/.Trash" (without the quotes) and click Go then Open.
In the list that appears, choose the script that you just saved. Now you can start trashing things without ever having to worry about emptying the Trash again!
Be warned that this script permanently deletes files from your computer, without you specifically telling it to do so. If you change your mind and want to retrieve a file you put in the trash, you may find that it is already gone.
Customize Sound Sets in Microsoft Entourage
Is there a way to customize your own sounds for incoming emails in Entourage? In OS9, all you had to do was drop .snd files into the system folder and they were accesible from within Entourage. In OSX, it seems like all you can do is assign the standard sound sets. (like the 'new mail' sound etc..)
Microsoft Entourage's Sound Sets are stored in the Microsoft User Data folder located inside your Documents folder. To get there, navigate to: ~/Documents/Microsoft User Data/Entourage Sounds sets. In here should be one file, the default sound set that comes with Microsoft Office.
Once you have downloaded a sound set you will need to double-click it to decompress it. You may need Stuffit Expander for this. You then need to drag the sounds file to the Entourage Sounds sets folder.
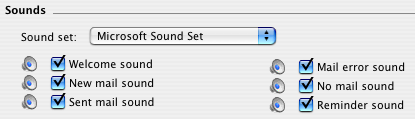
Now open up entourage and go to the Preferences (in the Entourage menu). In the Notification section you can choose your new sound set from the pop-up menu. To test each sound, click the little speaker icon next to each check box.
It is also possible to use own audio files or the Mac OS X alert sounds as Entourage alerts. It's just not quite as easy and you can only make it play when you receive new mail. Essentially you have to create a mail rule that will run an Applescript that will tell another application to play the sound file.

The first step is to download Play Sound, a really simple sound player for Mac OS X. After downloading this, install it by double-clicking on the disk image and dragging Play Sound to your Applications folder.
Next, open up Script Editor (in Applications/AppleScript) and paste the following script:
set soundAlias to "Macintosh HD:Applications:Microsoft Office 2004:Office:Sounds:Take Off" as alias
tell application "Play Sound"
play (soundAlias as alias)
end tell
Running this script will play a sound file. To choose your own sound file, you will need to change the first line of the script.
Macintosh HD:Applications:Microsoft Office 2004:Office:Sounds:Take Off tells it to play the "Take Off" file in the "Sounds" folder in the "Office" folder etc. If you wanted it to play a file in your Music folder you would put something like Macintosh HD:Users:matt:Music:sound.mp3. If you wanted it to play one of the Mac OS X alert sounds, you would put something like Macintosh HD:System:Library:Sounds:Sosumi.aiff.Once you have chosen your sound file, select Save As from the File menu, and save the script in the "Entourage Script Menu Items" folder in the "Microsoft User Data" folder in your Documents.
Even though you can't use mail rules to play a nice "Welcome" sound like the sound sets do, you can make one play manually. Any sound script you add to the "Entourage Script Menu Items" folder can be accessed from the script menu next to the help menu at the top of the screen. Just click up there or assign a keyboard shortcut to play it whenever you open up Entourage!
Print the Clipboard without Pasting into an Application
After selecting all text with Command-A, is there away to print it from memory to the printer without pasting it to an application? If I'm on a website I don't want to have to paste it into TextEdit to print it.
The best way to achieve this is using an AppleScript written by Chris from Macs in Chemistry.
You can download the script by clicking here. Double-click the downloaded file to un-zip it. You will now have a file called "Print Clipboard.scpt". Now go to the Library folder inside your user folder. Look in here for a folder called "Scripts". If it isn't there, create it by choosing New Folder from the file menu. Copy the "Print Clipboard.scpt" file to this folder by dragging it across.
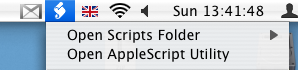
Now Navigate to Macintosh HD/Applications/AppleScript and open up AppleScript Utility. Near the bottom of the window that appears, check the box that says "Show Script Menu in Menu Bar" (if it isn't already checked). A menu will appear near the right hand side of the menu at the top with an icon that looks like a script. If you open this menu you will notice the Print Clipboard Option at the bottom.
To see if it works, go to Safari (or your normal web browser) and select some text. Press Command-C to copy it. Now instead of pasting it into TextEdit, just go to the Script menu and choose the Print Clipboard script. If all is well, a dialog will appear confirming you want to print.
You must have a default printer set for the script to work. If you are having trouble, go to the Print and Fax section of System Preferences. If the "Selected Printer in Print Dialog" is set to "Last Printer Used", change it to the specific name of the printer you want to print with.
If you are feeling really adventurous you can even try editing the script. If you go to the Scripts menu and Option-click on "Print Clipboard" it will open up the script in Script Editor. Now you can make changes.
For example, if you want to remove the dialog that confirms what you are printing, put "--" (without the quotes) before the start of the 4th line. It would look like this:--display dialog the_clip buttons {"Cancel", "Print"} def...
Read new email on your iPod
Alternatively, click this link to automatically open up Script Editor with the script ready typed. Wherever it says <
If you are confident editing the script, you can set it to create the folder on your iPod instead of on the Desktop (This wasn't done in the original because everyone's iPod has a different name and you have to have the iPod connected to run the script). If you want to leave it as it is, all you have to do is plug in your iPod and copy across the folder from the desktop.
To make things even more automatic, you could set up an iCal alarm that runs the script every morning before you leave the house.
Applescript your Calendar Colours
A more interesting way to solve this problem is by using randomly generated colours. To do this, we'll need to write a quick, easy AppleScript.
If you are using Mac OS X 10.3 or later, simply click this link to automatically open up Script Editor with a window containing the script you need.
If you are using an older version of Mac OS X, load up Script Editor (from /Applications/Applescript) and paste the following script into the window that appears:
tell application "iCal"
set calnum to (count every calendar)
repeat with currentnum from 1 to calnum
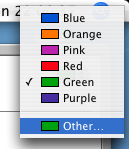
set calcolour to (the color of every calendar)
set red to random number 65535
set green to random number 65535
set blue to random number 65535
repeat until calcolour does not contain {{red, green, blue}}
end repeat
set red to random number 65535
set green to random number 65535
set blue to random number 65535
set the color of calendar currentnum to {red, green, blue}
end repeat
end tell
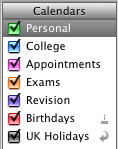
Now all you need to do is click Compile (the hammer icon) and then click Run. iCal will load up and each of your calendars will be assigned a new colour. It doesn't work perfectly - sometimes two colours will be very similar. However it is much more fun than going through each calendar individually and this is a great example of just how powerful AppleScript can be.
Create a Drives Menu in the Dock
In the Dock you can use the section to the right of the divider to store folders. Many people choose to put their user folder or Hard Drive here for easy access. One of the greatest benefits is that you can right click (Control click) on the icon to get a handy pop-up menu containing the contents of the folder. From here you can navigate through to any file contained within.
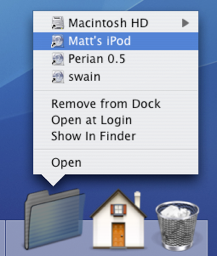
This works great, apart from with the Volumes folder. If you don't already know, the Volumes folder contains your Hard Drive, CDs, DVDs, Disk Images, iPods, iDisks and any other mounted media devices. To get to this folder, choose "Go To Folder" from the Go menu and enter /Volumes. You'll find that if you put this folder in the Dock you can still right-click to view the pop-up menu, however you can't navigate into any of the drives apart from your startup disk (Probably Macintosh HD).
The work around for this involves creating a folder action using AppleScript to make a self-updating Dock pop-up menu. Start by opening up Script Editor (located in Application/AppleScript). Paste the following script into the window that appears:
property scriptfolder : ((path to documents folder) as string) & "Drives"
on run
   tell application "Finder"
       if not (exists alias scriptfolder) then
           make folder at folder ((path to documents folder) as string) with properties {name:"Drives"}
       end if
   end tell
    Update()
end run
on adding folder items to thisfolder after receiving addeditems
   Update()
end adding folder items to
on removing folder items from thisfolder after losing theseitems
   Update()
end removing folder items from
on Update()
   tell application "Finder"
       set theFolder to folder script_folder
        delete every item of theFolder
        set theDisks to disks
        repeat with i in theDisks
           make new alias at theFolder to i
       end repeat
   end tell
end Update
Click Compile (the Hammer icon) and then click Run. The first time you run this script it will create a folder named "Drives" in your Documents folder and put an alias to every drive in it. You can drag this to your Dock and you will have a Drive pop-up menu that allows you to navigate through all of your mounted media. However, the list in the menu only updates when the script is run. This is where Folder Actions come in to make the script run every time a new drive is mounted or a drive is removed.
Save the script to your desktop and then go to your user folder and navigate to Library/Scripts/Folder Action Scripts/. You may need to create these folders if they don't already exist. Drag your script from your desktop over to here. Now we have to attach it to the Volumes folder.

As described earlier, to get to the Volumes folder choose "Go To Folder" from the Go menu and enter /Volumes. Right click (Control Click) on the icon and choose "Enable Folder Actions" (If folder actions are already enabled this will say disable - don't click it!). Then right click again and choose "Attach a Folder Action". Choose the script you saved earlier.
If you haven't already dragged the "Drives" folder from your Documents folder to the Dock, do so, and then you're done. Note that every time the list updates it moves the old list to the Trash, so if you insert and remove CDs, external Hard Drives, iPods etc. often, the Trash will get quite full. You might also want to change the icon of the Drives folder to something a bit nicer than the standard folder icon.
Set half star ratings in iTunes
The way it works is that ratings are stored as a number between 1 and 100 as increments of 20. For example, 1 star is 20, 2 stars is 40 and so on. Using a little bit of trickery you can set the rating at 10, 30, 50, 70 or 90 giving a half star rating between two of the normal ones. Note that setting the rating to something like 31 just breaks the whole thing and your rating will just show up as one star.
![]()
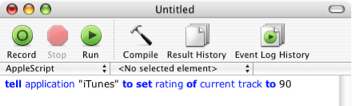
To set a half star rating, just open up script editor (search spotlight or go to Applications/Applescript) and paste the following line:tell application "itunes" to set rating of current track to 30
The number at the end can be changed to one of the following:
10 gives ½
30 gives *½
50 gives **½
70 gives ***½
90 gives ****½
To make the change, click "Run" at the top of the window. To get rid of the half star rating just click on a normal rating in iTunes, or run the script again with 20, 40, 60 or 80 instead.
This method is slightly inconvenient if you have to load up script editor every time you want to rate a song, so luckily iTunes has built-in script support. Doug Adams has even made a whole site dedicated to providing scripts for it - Doug's AppleScripts for iTunes. From there you can download Add-Substract A Half Star which is a script like the one above, but compiled into an application. Save this file in
Users-->[username]-->Library-->iTunes-->Scripts

If the scripts folder doesn't exist, you will need to create it.
Quit and re-open iTunes if it is already open, then in the menubar next to the Window menu there will be a little script icon. From there you can choose to add or subtract a half star from the rating of the current song.

On his site, Doug also explains how you can assign a keyboard shortcut to the script.
Google Notifier's Hidden Features
![]()
One of the greatest benefits of this piece of software is its simplicity - just put in your Google ID and password and everything works. At times this makes the notifier look somewhat limited, however this couldn't be further from the truth.
The first hidden feature is to customise the number of messages shown in the notifier menu. By default, the menu shows the last four unread messages received (or the last three received and an additional "View More" submenu). To change this, pull down the notifier menu and hold Command and Option while clicking on preferences. This brings up a hidden settings editor where you can easily edit the notifier preferences file.
In the "Key" field, enter "MaxMessagesOnMainMenu" and in the "Value" field enter the number of messages you want on the main menu. Click Set, and then quit and reload Google Notifier. Now when you click on the notifier menu bar item, you will see the number of messages that you set. To return to the default setting, repeat the prcoess, putting 4 in the value field instead of the number you entered last time.

The second trick can be done in much the same way. If you only want the notifier to fetch mail with a certain label, you can create a filter. As before, click on the notifier menu and Command-Option-Click on preferences. This time, in the key field enter "Label" and in the value field enter the name of the label you want to receive. To receive all mail, leave this field blank. And again as before, quit and reload the notifier for changes to take effect.
When you set these preferences, you are actually editing Google Notifier's preference file (Library/Preferences/com.google.GmailNotifier). If you want, you can load up this file with Property List Editor or TextEdit and changes things yourself (be careful!) or you can achieve the same effect using the Terminal (Applications/Utilities). For example the previous trick could be done by typing the following into the Terminal:
defaults write com.google.GmailNotifier Label -string “YOURLABELHERE”Finally you can extend Google notifier using plugins. I found the following on the Official Google Blog:
The Gmail Notifier supports plugins written in AppleScript, or full-blown Cocoa Bundles in Objective-C. Details about the Objective-C plugin API can be found inside the Gmail Notifier application bundle in the required header file, GGPluginProtocol.h (control+click Gmail Notifier.app -> Show Package Contents -> Contents -> Headers).
AppleScript plugins are written by simply implementing a handler like:
on NewMessagesReceived(messages, fullCount)
-- Your code goes here...
end NewMessagesReceived
To install, simply copy the script (plugin) to Library/Application Support/Gmail Notifier (create the directory if it doesn't exist), and restart the Gmail Notifier. An example of a great plugin for the Gmail Notifier for MacOS X is the Gmail+Growl plugin, which sends Growl notifications when new mail arrives.
Folder Actions
This is a feature of the Finder that very few people use, yet it is so powerful. Folder actions allow you to perform an action to any file that is dropped into the folder. What you can do is only limited by what you can script, or what scripts you can find.
Start by creating a new folder and checking that folder actions are enabled by right-clicking (control-clicking) and selecting “Folder Actions Setup”.
Next, choose a script from the list to attach, or press the plus (+) button to navigate to one of your own scripts. Also, make sure the “Enable Folder Actions” checkbox is checked.
Most of the example scripts involve image manipulation and converting from one file format to another. Selecting one of these format converting scripts will mean, for example, that all jpeg images dropped into the folder will be turned into tiff images.
However, as I mentioned at the start of this tip, this is only a taste of what you can do. Any applescript, automator workflow or shell script can be attached, and therefore the possibilities are endless!