Hidden settings to adjust Dock animations
Here are a couple of tips for customising the delay and animation speed of your Dock if you have it set to automatically show and hide (in System Preferences).
Custom delay time
You may have noticed that there is a short delay before the Dock appears when your mouse hits the edge of the screen. There is a hidden setting that allows you to adjust the delay time using the Terminal.
Start by opening up the Terminal app (in Applications/Utilities). To remove the delay entirely, paste in the following line and press Return.
defaults write com.apple.Dock autohide-delay -float 0
The changes won’t take effect until you restart the Dock, which you can do by typing killall Dock and pressing Return.
The number at the end of the command is the delay time in seconds, which you can customise to your liking. My preferred delay is 0.1, which is a bit quicker than the default. To return to the default, just use the following command:
defaults delete com.apple.Dock autohide-delay

Custom animation speed
There is a related hidden setting that allows you to customise the speed of the animation when the Dock slides onto the screen. As before, paste the following line into the Terminal and press Return.
defaults write com.apple.dock autohide-time-modifier -float 0.5
Remember to restart the Dock with killall Dock for the changes to take effect. Just like the delay, the number at the end is the length of the animation in seconds. 0 will make the Dock instantly appear with no animation. My preferred time is about 0.5, which makes things just a little snappier than the default.
To return to the default, just use the following command:
defaults delete com.apple.Dock autohide-time-modifier
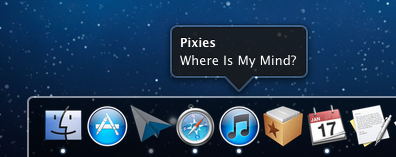
Get iTunes track notifications in your Dock
In Lion there is a cool hidden setting to enable “Now playing” notifications that appear from the iTunes icon in the Dock. Every time a new song starts, a small popup containing the artist and the song name appears and then slowly fades out after a few seconds.
To enable this, start by opening Terminal (located in Applications/Utilities), then paste in the following line and press Return.
defaults write com.apple.dock itunes-notifications -bool YES
For the changes to take effect, the Dock has to be restarted. The easiest way to do this is to type killall Dock into the Terminal and press Return. If you change your mind and want to disable the notifications, repeat the above commands, but replace YES with NO.
For those of you who have your Dock set to hide when not in use, you’ll notice that when the Dock is hidden the iTunes icon is added to the notification. If you want the icon to show even when the Dock is not hidden, just use the following command in the same way as above:
defaults write com.apple.dock notification-always-show-image -bool YES
As before, remember to restart the Dock with killall Dock for changes to take effect.
It’s not entirely clear why this setting isn’t present in the iTunes preferences. It might still be under development — there is still room for improvement. For example it would be better if it included the album artwork like Bowtie, Growl and DockArt already do. It could also be a sneak peak of future plans Apple has for a notifications framework for all apps in Mac OS X, much like Growl provides at the moment.
Top 15 Terminal Commands for Hidden Settings in Snow Leopard
Every time Apple brings out a new version of OS X, we compile a list of our favourite Terminal commands for enabling hidden features and changing hidden settings (here are the lists for Tiger and Leopard).
For those who are new to Terminal Commands, here's a quick run down of how to use them. Don't worry, it's really easy. Start by opening up Terminal, located in the Utilities folder in the Applications folder. In the window that appears, paste in one of the lines provided below, and then hit Return. For the changes to take effect, you need to restart the application concerned. For applications like the Dock or Finder, it is easiest to just type killall Dock or killall Finder into the Terminal to restart them. To reverse the changes, you just need to change the last word of the command and run it again. If the last word is YES, change it to NO, change 1 to 0, and change TRUE to FALSE and vice versa for all.
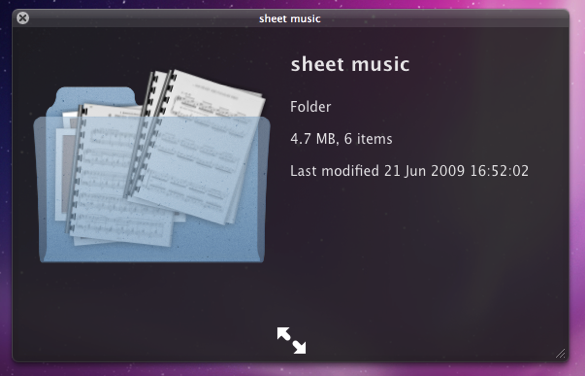
1. Folder previews in Quick Look
This is my favourite hidden feature in Snow Leopard. When enabled, using Quick Look (hit the space bar) on a folder will show you a preview of the folder's contents inside a translucent folder icon. The previews of the files inside the folder also cycle through so you can see all of them. Just use the following command:
<code>defaults write com.apple.finder QLEnableXRayFolders 1</code>
You will need to restart the Finder, either by typing killall Finder into the Terminal or by Control-Option-clicking on the Finder in the Dock and choosing Relaunch.
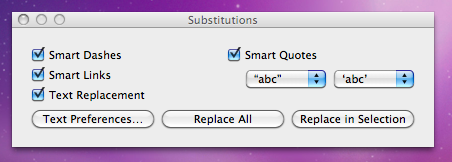
2. Globally enable Text Substitutions
You may have realised that the new text substitutions feature in Snow Leopard isn't enabled in all applications by default, most noticeably in Safari. To enable it , you need to right-click on a text box and choose Substitutions then Show Substitutions. To globally enable text substitutions, use the following three commands one at a time. The first one will enable substitutions, while the second will enable dash replacement and the third will enable spell checking.
defaults write -g WebAutomaticTextReplacementEnabled -bool true
defaults write -g WebAutomaticDashSubstitutionEnabled -bool true
defaults write -g WebContinuousSpellCheckingEnabled -bool true
If you decide there are some specific applications where you want to disable these again, you can do it in the normal way. As always you will need to restart each application for the changes to take effect.
3. Bring back AppleScript Studio palette
As of Snow Leopard, AppleScript Studio has be deprecated in favour of AppleScriptObjC. You can still work on AppleScript Studio projects, but you can't create new ones, and the AppleScript Studio palette in Interface Builder is gone. To bring it back, use the following command:
defaults write com.apple.InterfaceBuilder3 IBEnableAppleScriptStudioSupport -bool YES
4. Disable "focus follows mouse" in Terminal
In Leopard there was a Terminal command to make the Terminal's window focus change with mouse movement. If you had previously enabled this, you will find things don't work quite right in Snow Leopard when you use Command-Tab to switch between applications in different spaces. To fix this, you will need to disable the focus follows mouse behaviour using the following command:
defaults write com.apple.Terminal FocusFollowsMouse -string NO
5. Force Dictionary to only use one window
If you aren't a fan of using Command-Control-D to quickly look up definitions, you might use the "Look up in Dictionary" contextual menu item or Services menu item. In Snow Leopard, each word you look up using these methods opens in a new Dictionary window, which gets a bit annoying. To make each word you look up open in the same window, just use the following command:
defaults write com.apple.Dictionary ProhibitNewWindowForRequest -bool TRUE
6. Change the behaviour of the green zoom button in iTunes
With the release of iTunes 9, Apple messed around a bit with the behaviour of the green zoom button in iTunes. Things are back to normal as of iTunes 9.01, but briefly the green button maximised the window instead of switching to the mini-player. If you liked the temporary change, you can bring it back using the following command:
defaults write com.apple.iTunes zoom-to-window -bool YES
Of course, you can always get the alternative behaviour by holding the Option key and clicking in the green button.

7. Debug menu in Address Book
The debug menu has been available in Address Book for some time, but there are some new additions in Snow Leopard. If you don't already have it enabled, the command is:
defaults write com.apple.AddressBook ABShowDebugMenu -bool true
Restart Address Book, and then click Debug in the menu bar to see the new options. You can enable reflections under contacts pictures, get to the "People Picker Panel" and enable a debug panel called "Ye Olde Debug Settings”.
8. Autoplay movies in QuickTime X
One of the weird things about the new version of QuickTime is that it has no Preferences. Luckily you can still change things using the Terminal. To make a movie automatically start playing when you open it, use the following command:
defaults write com.apple.QuickTimePlayerX MGPlayMovieOnOpen 1
9. Keep QuickTime in full screen when switching applications
If you are watching a movie in full screen in QuickTime and you use Command-Tab to switch to another application then the movie will automatically exit full screen. To make it stay full screen in the background, use the following command:
defaults write com.apple.QuickTimePlayerX MGFullScreenExitOnAppSwitch 0
10. Disable Rounded corners in QuickTime
If the slightly rounded corners of movies in QuickTime bug you, use the following command to disable them:
defaults write com.apple.QuickTimePlayerX MGCinematicWindowDebugForceNoRoundedCorners 1
11. Always or Never show titlebar and Controller in QuickTime
The following two commands either permanently enable or disable the titlebar and controller that pop up when you mouse over a movie in QuickTime:
defaults write com.apple.QuickTimePlayerX MGUIVisibilityNeverAutoshow 1
defaults write com.apple.QuickTimePlayerX MGUIVisibilityNeverAutohide 1
12. Automatically show closed captioning and subtitles on opening
This turns on subtitles and closed captioning automatically when you open a movie that supports them.
defaults write com.apple.QuickTimePlayerX MGEnableCCAndSubtitlesOnOpen 1
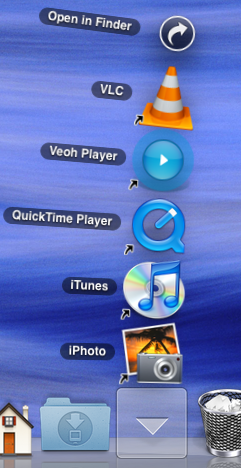
13. Make list view stacks work like grid view Stacks
This command slightly changes the behaviour in Stacks in list view. Once enabled, they act more like grid view Stacks, but with a single list of files and icons on the left. The main difference is when "drilling-down" through folders within the Stack.
defaults write com.apple.dock use-new-list-stack -bool YES
You will need to restart the Dock for changes to take effect. The easiest way is to use killall Dock in the Terminal.
14. Enable mouseover highlight in stacks
If you want items in grid view stacks to highlight when you move the mouse over them, use the following command. It's slightly different from the equivalent in Leopard. Also, note that you can get the highlight behaviour in Snow Leopard without using this command by using the arrow keys to select items in a stack, or by clicking and holding on a stack before dragging the mouse up onto the grid.
defaults write com.apple.dock mouse-over-hilite-stack -boolean YES
You will need to restart the Dock for changes to take effect. The easiest way is to use killall Dock in the Terminal.
15. Set a precise screensaver password delay
A useful new feature of Snow Leopard is the ability to set how long your Mac is asleep or how long the screen saver is on before it requires a password to wake up again. You can access this from the Security section of System Preferences. However, you have to choose a time period from a drop-down menu, and you can't enter your own custom time period. To do this, use the following command. The number at the end is the time in seconds. For example 1800 is 30 minutes, which bizarrely isn't an option in the drop-down menu.
defaults -currentHost write com.apple.screensaver askForPasswordDelay -int 1800
Diagnostics on the Dock
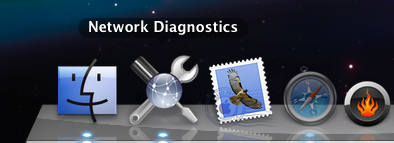
One of the great features of Safari on the Mac is the way it handles a network outage. If youre somewhere with an unreliable connection, say because youre using a distant wireless network (or if like me you live in Africa), then Safari will give you a message if it can’t connect to the internet with a button to click to open the network diagnostics window. What’s more, it automatically loads pages if the network becomes reconnected.
The diagnostics window is great because it gives you clear red/green indicator lights that show whats working and what isnt so you can quickly diagnose connection issues and find out whether its something wrong with your computer or with the network.
But what if your favourite browser is Firefox or if you have to deal with tricky or unreliable network issues without using Safari? Well, you dont need to go and use Safari, you can just open the Network Diagnostics application directly. The problem is, its not in the Applications or Utilities folder, its buried in
/System/Library/CoreServices. For a quick convenience diagnostics tool this is not so handy. To make the Network Diagnostics application more accessible, first navigate to
/System/Library/CoreServices. Look in this folder for Network Diagnostics, and drag it to the Dock. Now, whenever you have problems connecting to the internet via an application other than Safari, you can simply click on the icon in the Dock to find out what’s wrong.If you dont like a whole dock space being taken up with it, then you could make a shortcut to the application and add it to a folder of other applications stored in a neat stack at the documents end of the dock.
Add Spacers to the Dock
If you want to divide the applications in your Dock into groups, the best way is to add spacers. A common method is to create “fake” applications with an invisible icon to fill the space, but that is a bit inelegant. A much better way, available in Leopard, is to use a Terminal Command. Each time you run the command it inserts a blank "space" into your Dock, which you can then drag around to where you like.
Start by opening up Terminal, located in Applications/Utilities. Type the following line and then hit enter:
<code>defaults write com.apple.dock persistent-apps -array-add '{tile-data={}; tile-type="spacer-tile";}'</code>
For the changes to take effect you will have to restart the Dock, either by logging out and in again or by running the killall Dock command in the Terminal. The spacer appears at the end of the icons that are permanently in the Dock. You can then drag it along to where you want it.

The above command inserts the spacer on the applications side of the Dock. To insert a spacer on the right hand side, use the following command:
defaults write com.apple.dock persistent-others -array-add '{tile-data={}; tile-type="spacer-tile";}'
As always, you will have to run killall Dock for changes to take effect. To add multiple spacers just run the command again and again. Note that you can use the “up” arrow in terminal to automatically enter the last run command.
If you want to remove a spacer, treat it like any other icon in the Dock. Either drag it off and let go to get a nice puff of smoke, or right-click on it and choose Remove from Dock.
Make the Dock appear when it refuses to show

Simply use the keyboard shortcut Command-Option-D, which turns on/off Dock hiding. You don't even have to stop dragging your icon to do this, and it works whatever application you are in.
Next time the Dock fails to appear, while still dragging your icon, simply hit Command-Option-D and the Dock should spring up. Drop your icon onto the trash (or eject icon, or whatever you want), and then just hit Command-Option-D again to make the Dock disappear again.
Let Stacks keep your Dock tidy
Just as desktops get cluttered because they're handy, and an easy place to put and find things, the Mac OS X Dock gets easily cluttered with every application that you might want to launch at the click of a button. A cluttered dock means it may take so long to find the (tiny) icon you're looking for that you may as well have opened your application folder and searched through. But come to mention it, the Applications folder gets rather cluttered too. You can move things around, but so many programs assume that Safari and other standard applications will be sitting right there in the Applications folder. Is there a better way to group applications sensibly, without using any special software?
With Leopard's new Stacks feature, I believe there is.
2. Then create theme-based folders for every other application you want close at hand. A stack is just a folder dragged onto the Dock, so we'll create the folders first. Create folders somewhere, like your Applications folder or Documents folder. I have folders for 'Utilities', 'Internet', 'Media', and document creation.
3. Fill these folders with aliases of the appropriate applications. Do this by holding the Command and Option keys as you drag a file from the Applications folder to put an alias/shortcut of that file in the destination folder, instead of moving or copying it.
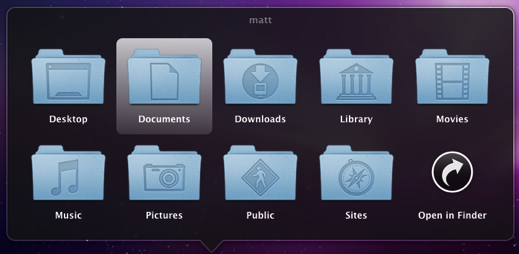
4. When you have filled your theme-based folders, drag them onto the end of the Dock near the Downloads Stack and Trash (but not IN the Trash!) In the past you would have had a bunch of identical folder icons there, but now the Stack takes on a conglomeration of icons from the contents of each folder.
5. Click once on a stack and it opens out quickly. Click once and you launch the application. Click the wrong stack by mistake? Just click the one you want without having to click the first one closed. It's one more click than having everything in the Dock separately, but since icons are grouped more logically and icons can be bigger, it's actually miles more efficient.
6. But what to do with the special Apple icons? Time Machine, Spaces, Dashboard and Expose all have Dock icons which are not normal applications. The good news is that you can get hold of them from the Applications folder and drop them in a Stack, then remove them from the Dock. After all, Time Machine is almost automatic, Spaces, Dashboard and Exposé can be triggered from the keyboard more conveniently anyway (with the F8-12 keys) so they're just extra clutter. But it might be nice to keep the icons around.
NB: You do lose a little functionality that the Dock icons provide in their contextual menus if you follow this method, but nothing really significant in my eyes. Control-click on the dock icons before you delete them and see if you'd really miss any of the functions there. Since 10.5.2 there's a Time Machine menu item now, which gives you back any functionality lost with the demise of the Dock icon. That seems to make more sense anyway.
Finally, you can control-click on the stacks to change the order the icons are sorted, which may be helpful, and affects the order of the conglomerate icon visible on the Dock.
Temporarily change Dock magnification settings
If you normally have Dock magnification turned off, holding Control and Shift while moving the mouse along it will temporarily turn on magnification. As soon as you let go of the keys, the magnification will turn back off again.

The Dock will magnify based on the settings in the Dock section of System Preferences, which you can only change when magnification is turned on. As a result you'll have to turn it on, choose your preferred magnification level and turn it back off again.
The keyboard shortcut works the other way round too. If you normally have magnification on, holding Control and Shift will temporarily turn it off.
I'm not sure how useful this feature is, but it's interesting none the less.
Disable the Dock icon for any Application
Luckily, if it is a cocoa application, you can hide the Dock icon yourself. To see if it is possible, right-click (Control-click) on the application icon. If "Show Package Contents" is in the menu that appears, you can hide the icon in the Dock.
If this is the case, select "Show Package Contents" and look for the "Info.plist" file inside the Contents folder. Open this file using TextEdit by right-clicking on it and choosing "Open With - Other" from the menu.
In the file, paste the following two lines just after <dict> on the 6th line:
<key>LSUIElement</key><string>1</string>Save the file and close it. For the changes to take effect, you need to move the application to the desktop and them back to its original location (OS X keeps a cache of the file, so you need to trick it into checking it again).
Now when you open the application, no icon will appear in the Dock. I wouldn't recommend doing this with your regular applications like iTunes and Safari as this also has the side-effect of disabling the menu bar. This means that you will have to quit the application using the keyboard shortcut Command-Q. If the application doesn't have any windows, you will have to quit it from Activity Monitor (in Applications/Utilities).
To bring back the Dock icon, simply open up the Info.plist file and remove the lines you added.
If you are too lazy to do this yourself, FoggyNoggin Software has created an application called Dock Dodger that automates the process.
Drag Chunks of Text onto Dock Icons
Doing this with different applications will produce different results. If the application will accept the text, it will darken when you hold the selection over it. Note that some applications will only accept the text if it is in a certain format (a web address for example). Here are the results with a few common applications. If you know of any more, add them in the comments.
1. Safari - If you drop a web address (i.e. something that starts with http://) on Safari, it will load up that address. If you drag any other bit of text, it will perform a Google Search on it. This is mainly useful if the text is from a non-cocoa app that doesn't have the "Search in Google" item in the right-click context menu.
2. Firefox - If dropped text is a web address, Firefox will load it. This is helpful if you want to view a site in a browser other than your default browser.
3. Mail - A new message will load up with the dropped text as the main message body. Annoyingly the text is placed in the body even if it is an email address.
4. TextEdit - As expected, this loads a new document containing the dropped text.
5. Skype - If the dropped text is a phone number, Skype will call it. This will also work with nicknames in your contact list.
6. Script Editor - A new script window will open up containing the dropped text. Script Editor will then attempt to compile it.
7. iTunes - If you drop a podcast address onto iTunes, it will subscribe to it. If the address isn't a podcast, iTunes will attempt to do it anyway (and fail).
8. Acquisition - Starts a new search with the dropped text.
9. Newsfire - Adds a new feed with the text as the address. (Why not try it out with http://feeds.feedburner.com/macosxtipsfeed )
10. Stickies - This will make a new Stickies note containing the text open up.
11. Dictionary - This will show you the definition of the dropped word. If you drop a selection of words, Dictionary will display the definition of the first. (In cocoa apps, it's probably quicker to use this keyboard shortcut).
Most of these also work if you drag the text to the desktop to create a text clipping first, and then drag it to the Dock icon.
Create a Drives Menu in the Dock
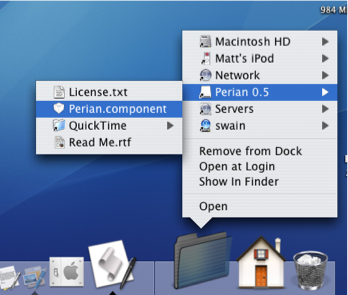
In the Dock you can use the section to the right of the divider to store folders. Many people choose to put their user folder or Hard Drive here for easy access. One of the greatest benefits is that you can right click (Control click) on the icon to get a handy pop-up menu containing the contents of the folder. From here you can navigate through to any file contained within.
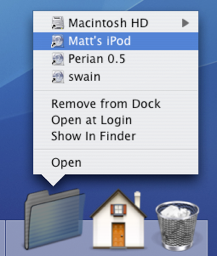
This works great, apart from with the Volumes folder. If you don't already know, the Volumes folder contains your Hard Drive, CDs, DVDs, Disk Images, iPods, iDisks and any other mounted media devices. To get to this folder, choose "Go To Folder" from the Go menu and enter /Volumes. You'll find that if you put this folder in the Dock you can still right-click to view the pop-up menu, however you can't navigate into any of the drives apart from your startup disk (Probably Macintosh HD).
The work around for this involves creating a folder action using AppleScript to make a self-updating Dock pop-up menu. Start by opening up Script Editor (located in Application/AppleScript). Paste the following script into the window that appears:
property scriptfolder : ((path to documents folder) as string) & "Drives"
on run
   tell application "Finder"
       if not (exists alias scriptfolder) then
           make folder at folder ((path to documents folder) as string) with properties {name:"Drives"}
       end if
   end tell
    Update()
end run
on adding folder items to thisfolder after receiving addeditems
   Update()
end adding folder items to
on removing folder items from thisfolder after losing theseitems
   Update()
end removing folder items from
on Update()
   tell application "Finder"
       set theFolder to folder script_folder
        delete every item of theFolder
        set theDisks to disks
        repeat with i in theDisks
           make new alias at theFolder to i
       end repeat
   end tell
end Update
Click Compile (the Hammer icon) and then click Run. The first time you run this script it will create a folder named "Drives" in your Documents folder and put an alias to every drive in it. You can drag this to your Dock and you will have a Drive pop-up menu that allows you to navigate through all of your mounted media. However, the list in the menu only updates when the script is run. This is where Folder Actions come in to make the script run every time a new drive is mounted or a drive is removed.
Save the script to your desktop and then go to your user folder and navigate to Library/Scripts/Folder Action Scripts/. You may need to create these folders if they don't already exist. Drag your script from your desktop over to here. Now we have to attach it to the Volumes folder.

As described earlier, to get to the Volumes folder choose "Go To Folder" from the Go menu and enter /Volumes. Right click (Control Click) on the icon and choose "Enable Folder Actions" (If folder actions are already enabled this will say disable - don't click it!). Then right click again and choose "Attach a Folder Action". Choose the script you saved earlier.
If you haven't already dragged the "Drives" folder from your Documents folder to the Dock, do so, and then you're done. Note that every time the list updates it moves the old list to the Trash, so if you insert and remove CDs, external Hard Drives, iPods etc. often, the Trash will get quite full. You might also want to change the icon of the Drives folder to something a bit nicer than the standard folder icon.
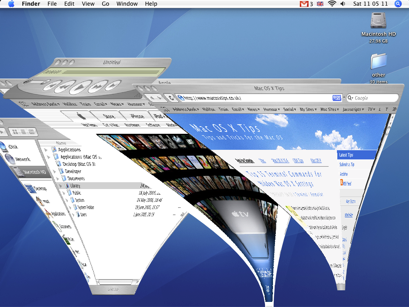
Playing with Half Minimized Windows
They mentioned the killall Dock thing... if you hold shift and collapse a window it goes slowly into the dock. if you do a killall Dock command in the terminal while it's collapsing, the window freezes in it's squished state, while still allowing you to scroll in it and click links (although the links will be in their original location).
SleepingInsomniac | Homepage | 03.21.07 - 4:42 am | #
This is great fun, and also a little weird. As mentioned, you will need to press Shift while clicking minimize to slow things down and give you enough time to run the command. Have Terminal open with "killall Dock" ready typed so you just have to press enter. When the Dock relaunches, your currently minimizing window gets stuck half way, but is still treated like a normal window. Drag it around, scroll up and down, browse web pages. It's not perfect however - as SleepingInsomniac notes, the links on web pages are still where they were before you minimized, making things a bit confusing.
Check out the image below to get an idea of what it looks like.
To get your windows back to normal you just need to close (Command-W) and reopen them.
Thanks to SleepingInsomniac for this!
Top 15 Terminal Commands for Hidden Mac OS X Settings
Update: This article is very old. Most of the Terminal Commands still work, but consider checking out our top Terminal commands for Leopard and Snow Leopard. Our Terminal Tips category also has loads of other ways help you get the most out of your Mac.
There are a huge amount of hidden settings for Mac OS X and its applications that aren't accessible from preferences dialog boxes or the System Preferences. Applications such as Tinkertool and Mac Pilot allow you to access some of these, but the real flexibility is from the Terminal. From here it is possible to edit any preferences file for any application on your Mac.You'll find the Terminal in the Utilities folder within the Applications folder. To carry out any of the following commands you will need to copy/paste or type in the line of text then hit enter. For the most part, applications will need restarting before changes take place. For most applications you can just quit and open them again, but for the Finder and the Dock it is easiest to just type “killall Finder” or “killall Dock” into Terminal after the command.
To reverse any of them, just repeat the command with NO at the end instead of YES, or vice versa.
Feel free to add any of your favourites in the comments.
1. Make hidden applications' dock icons translucent.
defaults write com.apple.Dock showhidden -bool YES![]()
defaults write com.apple.iTunes invertStoreLinks -bool YES3. This allows you to drag widgets out of Dashboard onto the desktop. Requires the dock to be relaunched to take effect, so type "killall Dock" and press enter. Now, if you click and hold onto a widget in the dashboard and press F12 to return to the desktop, the widget won't disappear with the rest.
defaults write com.apple.dashboard devmode YES
defaults write com.apple.mail PreferPlainText -bool YES5. Set expanded save dialogs as default (showing column/list view of folders rather than a drop down menu). Replace TRUE with FALSE to reverse.
defaults write -g NSNavPanelExpandedStateForSaveMode -bool YES6. Display the currently chosen screen saver to be shown as the desktop background. Press Control-C or Command-. to stop. More details here.
/System/Library/Frameworks/ScreenSaver.framework/Resources/ ScreenSaverEngine.app/Contents/MacOS/ScreenSaverEngine -background7. Display useful system stats in the login window. More details here.
defaults write /Library/Preferences/com.apple.loginwindow AdminHostInfo SystemVersion Replace "SystemVersion" with one of the following for different stats:
SystemBuildSerialNumberIPAddressDSStatusTimeHostName
8. To remove accounts from the login window type this command with the short name of each account you wish to remove. More details here.
sudo defaults write /Library/Preferences/com.apple.loginwindow HiddenUsersList -array-add shortname1 shortname2 shortname39. Skip disk image verification. Potentially risky, use with disk images from trusted sources.
defaults write com.apple.frameworks.diskimages skip-verify -bool YES10. Put double scroll arrows at both ends of scroll bar. Use Appearance pane in system preferences to reset.
defaults write "Apple Global Domain" AppleScrollBarVariant DoubleBoth![]()
defaults write com.apple.CrashReporter DialogType none12. Set the history limit in Safari to a certain number of items and and/or a certain age.
defaults write com.apple.Safari WebKitHistoryItemLimit 2000defaults write com.apple.Safari WebKitHistoryAgeInDaysLimit 3013. Show hidden files in the Finder.
defaults write com.apple.finder AppleShowAllFiles -bool YES14. Enable the debug menu in Safari.
defaults write com.apple.safari IncludeDebugMenu -bool YES15. Deactivate Dashboard. Requires the dock to be relaunched to take effect, so type "killall Dock" and press enter.
defaults write com.apple.dashboard mcx-disabled -bool YESOpen at Login Shortcut
Translucent Icons for Hidden Applications
I know a lot of people who use only use the minimize function to hide windows that they aren’t currently using. I really don’t like this, as it’s not really usable via the keyboard, and it doesn’t work well with the Command-Tab application switcher. Instead, I use the hide function by pressing Command-H to hide active application. That is, all the windows of the program will become invisible and allow you to see the application underneath, or the desktop. This can also be achieved by choosing hide from the menu with the name of the application. To show the windows again, just click the application icon in the Dock, or switch back to the application by using the Command-Tab switcher.
One drawback of this method is that there is no way to tell that an application is hidden by looking at the dock. Unlike when you minimize, the windows don’t appear on the right-hand side of the Dock. The application icon also remains fully visible, unchanged from when the application was in view. With lots of applications open, it gets quite hard to tell which applications are hidden and which aren't.
By modifying a hidden setting, you can make the Dock show which applications are hidden by displaying them as a semi-transparent icon. To do this, open up the Terminal (located in Applications/Utilities), paste in the the following line and press Return.
defaults write com.apple.Dock showhidden -bool YESFor this change to take place, you have to relaunch the Dock. There are a few ways of doing this, but seeing as we are already in the Terminal, the quickest way is to just type `killall Terminal` followed by Return.
To cancel this change, and return the icons to normal, repeat the above command in the terminal, but replace YES with NO.
Reveal in Finder
Less obviously, Command-Clicking on an icon in the Dock will do just the same. But it doesn't end there. Command clicking has a similar effect when clicking icons in other places.
For instance, in the title bar of any cocoa app, you will see the name and icon of the open file. Command-Clicking on the icon brings up a list of all the enclosing folders.
Another example that could save you hours of wasted time, is command clicking spotlight results. This one is especially useful, as the other option (clicking on show all, finding the result, right-clicking and selecting show in finder) takes a long while in comparison.
Kill Accidentally Opened Applications
Do you ever accidentally click the wrong icon when choosing an application from the dock? Normally this wastes valuable seconds waiting for the application to launch and then choose quit. However there is a nice shortcut.
As soon as you have clicked the wrong icon, right click on it, and select force quit. This will allow you to kill it before it slows down your system.
If you aren't quite as quick, and the application has started loading, sometimes the contextual menu will say quit instead of force quit. To get around this, hold the option key, and quit will change back to force quit.
Use your Mac in Slow Motion
If you want to see any application do something in slow motion, hold down the shift key and see if it works!
Remove the Dock
If you are are one of those people who hates the dock, you probably already know it is fairly easy to remove it for good. However when you do this you also lose other features such as Exposé, Command-Tab switcher and Dashboard. A much better solution is to move the dock to the top of the screen and then hide it - making it invisible, but still around.
The easy way to do this is to download a copy of Tinkertool (free) that allows you to modify lots of hidden preferences.
The more hardcore solution is to use the terminal. Before you start, make sure Dock hiding is off by going to the apple menu, choosing Dock then "Turn Hiding off" . Alternatively open up the dock section of system preferences and turn hiding off there, or control-click on the gap in the middle of the dock (or even press Command-Option-D).
Then launch the terminal (located in Applications/Utilities) and type
defaults write com.apple.Dock orientation -string top
and press enter. Nothing will happen at first, until you log out then in again or restart the dock process in Activity Monitor (also located in Applications/Utilities).
Once you do this you should see your Dock appear at the top of your screen, and all you need to do is turn hiding off again, and your Dock will be invisible, only activating if you hover over a very thin line below the menu bar.