The Ultimate Mac Screenshot Guide
Keyboard Shortcuts
The quickest way to take a screenshot is to use a keyboard shortcut. Annoyingly, these aren't particularly intuitive. There are two main ones:Command-Shift-3 - Take a screenshot of the entire screen.
Command-Shift-4 - Allows you to click and drag around the area you want a shot of.
Each of these will save a file to the desktop named Picture 1.png, or a higher number if that file already exists.
Now there are a few extra things you can do. If you press Space after pressing Command-Shift-4, you will notice that the cursor changes to a picture of a camera. You can now just click on a window, icon, widget or almost any other interface element to take a screenshot of it. You can also add Control into the keyboard shortcut to put the image in the clipboard instead of saving it to the desktop. For example, pressing Command-Control-Shift-3 would allow you to then paste the image into another document.
The Grab Application

You can create a timed screenshot by going to the Capture menu, or by pressing Command-Shift-Z. Using this, you can achieve screenshots that are supposedly “impossible”. One example is the login window.
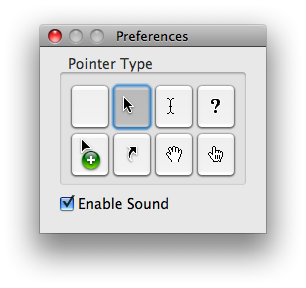
To change the pointer type, go to the Preferences. See the image below for the different options.

Disable Shadow
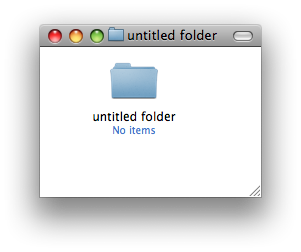
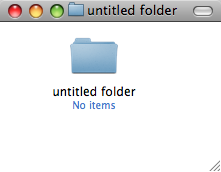
If you use the Command-Shift-4 Space method to take a screenshot of an entire window, you will find that the shadow is in the screenshot. This was added in Leopard because without the shadow, windows don't actually have a border if they have no scrollbars. However, if you prefer no shadows, you can disable them with a Terminal command. Simply open up Terminal (located in Applications/Utilities), paste in the following line and hit return.defaults write com.apple.screencapture disable-shadow -bool trueAfterwards you will need to log out and in again for changes to take effect. To enable shadows again, simply repeat the command but with false at the end. The two images below show a before and after shot.


Change Image Format
The default image format for screenshots is png, which gives a nice, high quality picture. However you can change this if you want. As before, use the following Terminal command:defaults write com.apple.screencapture type pngSimply replace png with your file format of choice. The available options are jpg, tiff and pdf. Changing to jpg gives a lower quality but smaller file. Some people prefer this for quick snaps, but others dislike the slightly blurry results it gives. As before, log out and in again for changes to take effect.
Advanced Screenshot Applications
If widgets are your thing, Screenshot Plus will probably be the method of choice for you. It's free, and allows you to do everything that you can achieve with keyboard shortcuts. It also allows you to view a preview image, before saving it to the desktop or importing it into Preview.If you really want to go all out on your screenshots, you might want to consider buying an application like Snapz Pro. It allows you to do all of the things above, as well as record movies of your screen.
Finally, if you want to get screenshots of long webpages that don't fit on the screen, Paparazzi! is your solution. It gives allows you to set the size of the image, set a delay, choose the file name and choose the file format. Of course, if you want a PDF of the web page, that functionality is already built into Mac OS X.

Also, the MacTipper Blog pointed out one more thing I forgot. Using another Terminal command, you can change the default save location to somewhere other than the Desktop. The command is as follows:
defaults write com.apple.screencapture location /Full/Path/To/FolderFor full instructions, check out the MacTipper Blog.
blog comments powered by Disqus